How to use Billy
Short steps, big screenshots. Pick a topic below, or start at the top.
1Getting started
Four steps to your first bill.
- Register your shopYour login comes by email.
- Sign inAt app.mybilly.store, on any browser.
- Add your itemsOne by one, or from Excel.
- Make your first billCustomer, items, payment, receipt.
Billing on a Windows counter PC? See Billy Desktop below. Tap any screenshot to see it larger.
2Sign in and register
Billy runs in the browser at app.mybilly.store.
-
1Sign in
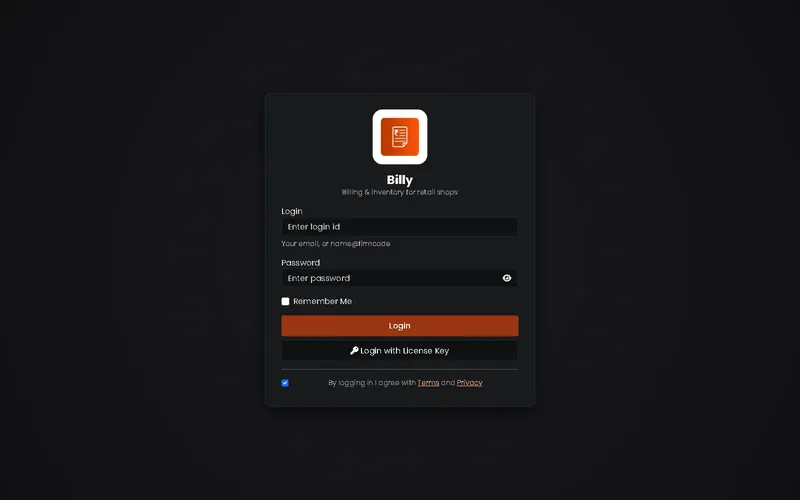
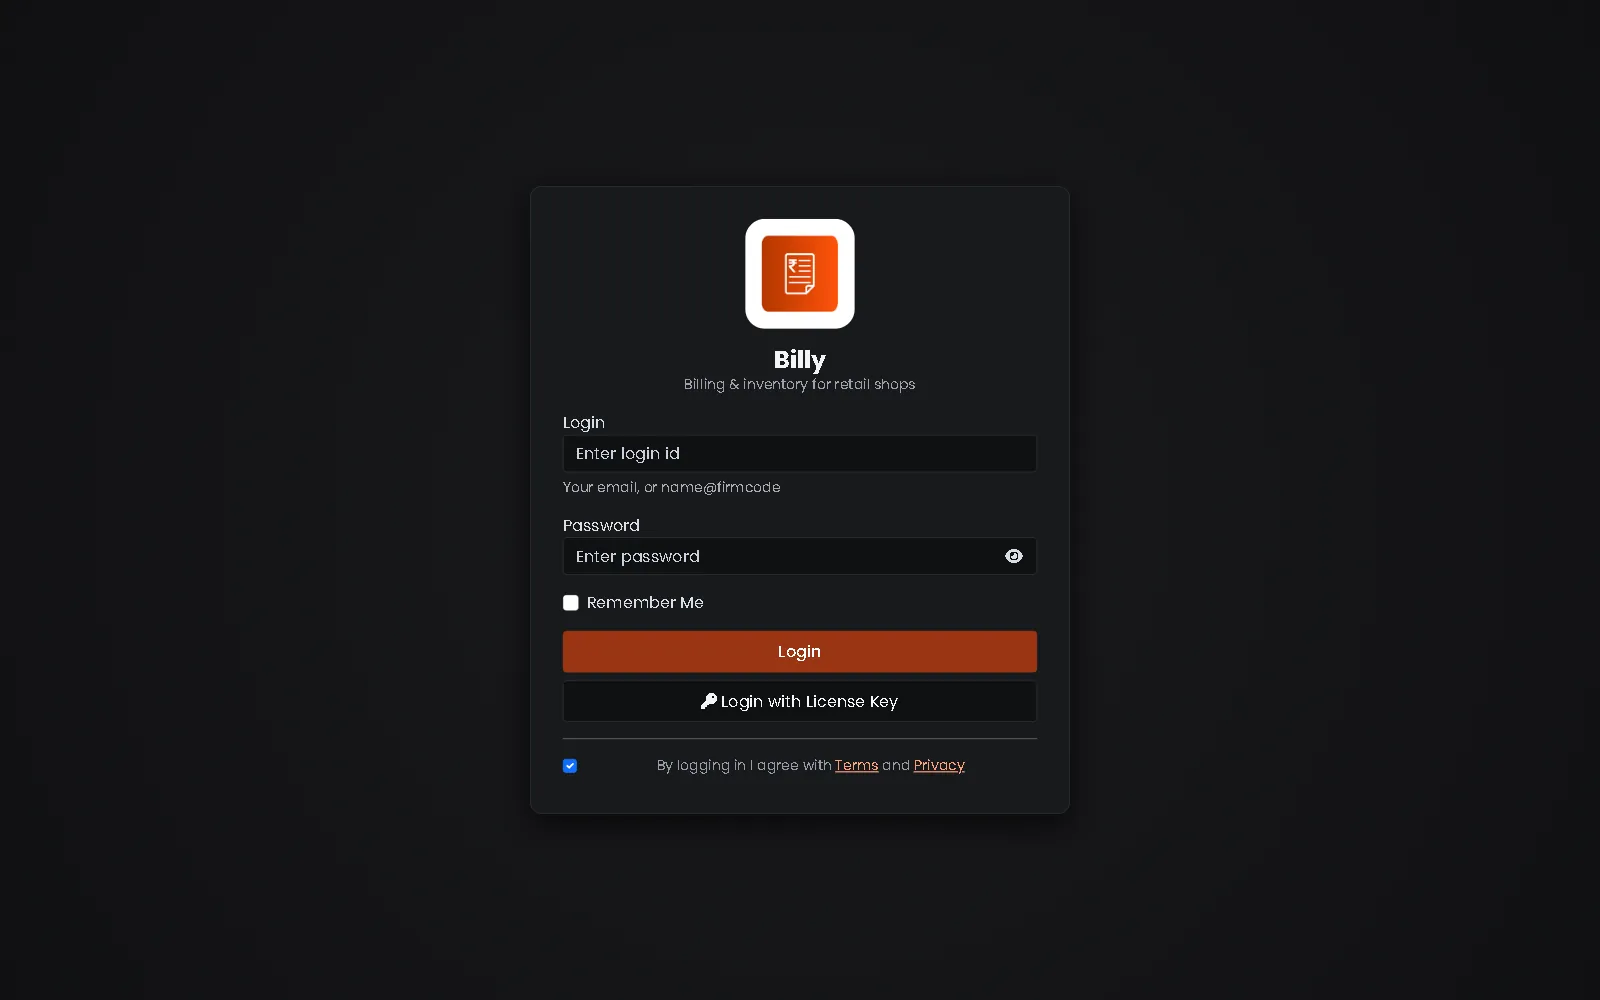
Open app.mybilly.store, type your login (your email, or name@firmcode) and password, and press Login. Tick Remember Me on your own computer.
-
2Sign in with a licence key
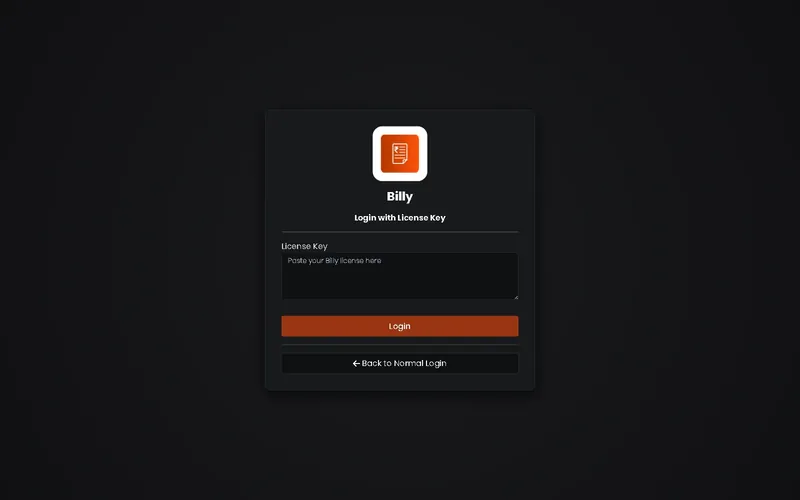
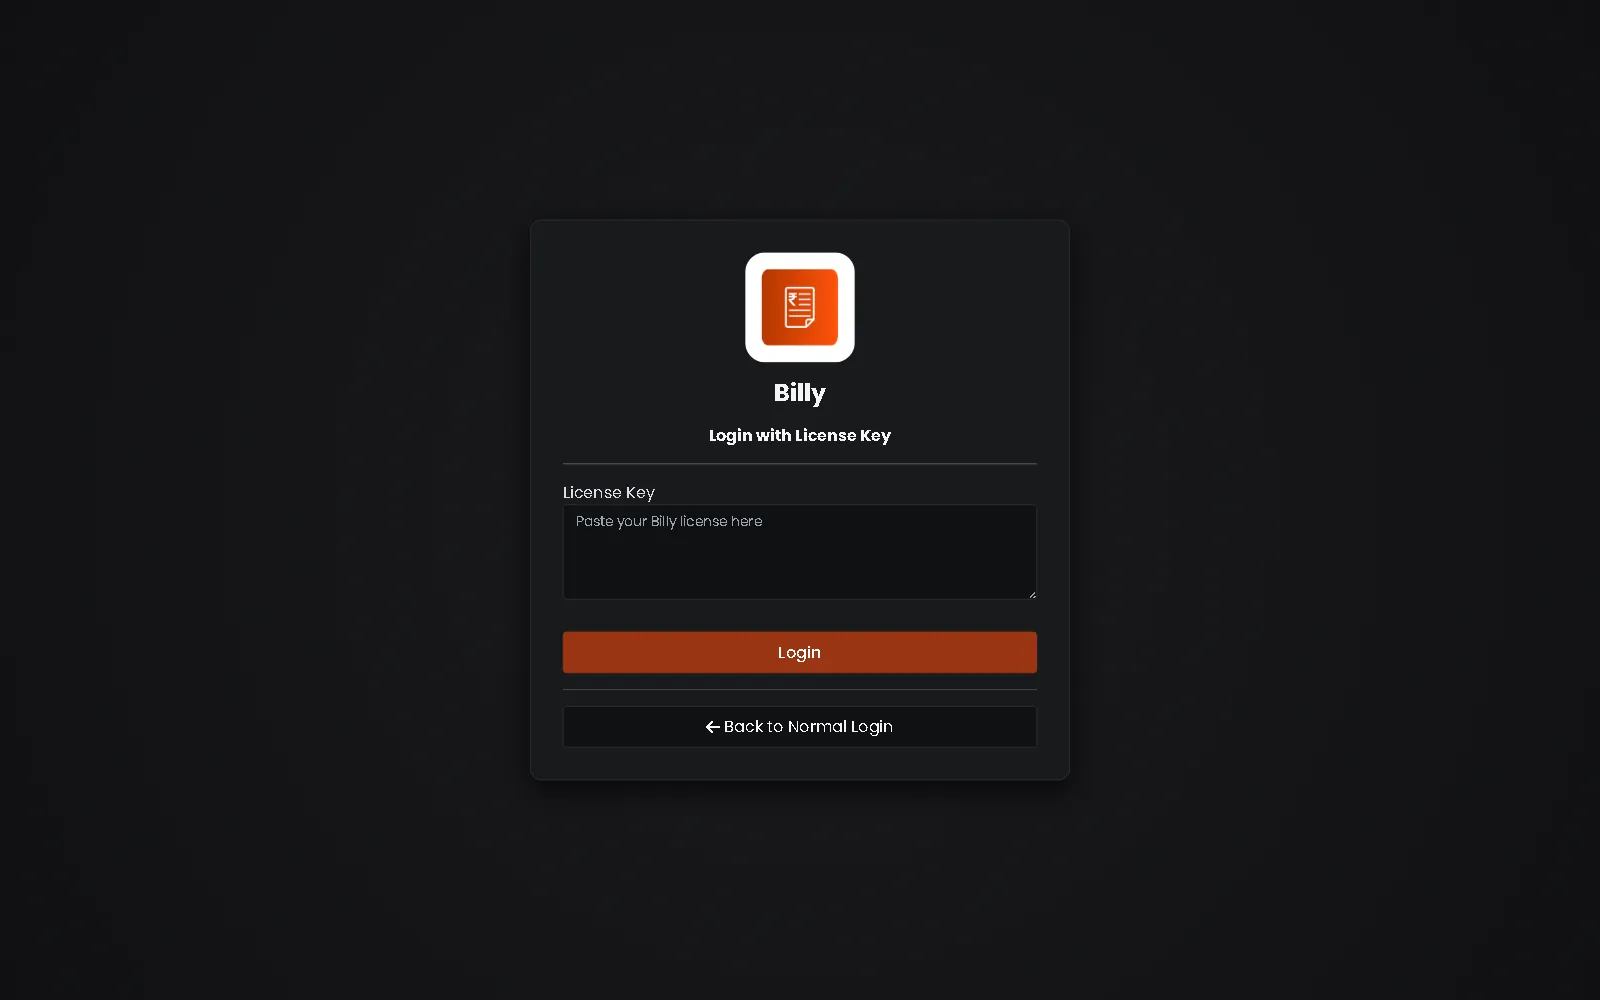
Got a licence key from your Billy partner? Press Login with License Key and paste it in. Keep the key private: anyone who has it can open your shop.
-
3Register a new shop
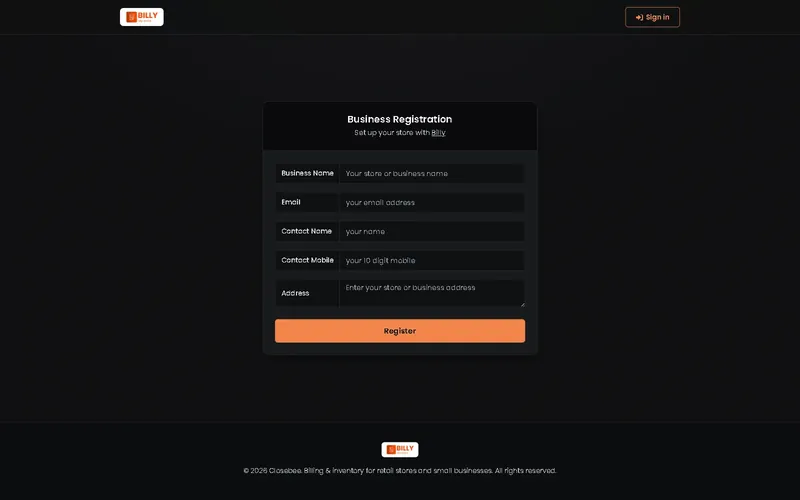
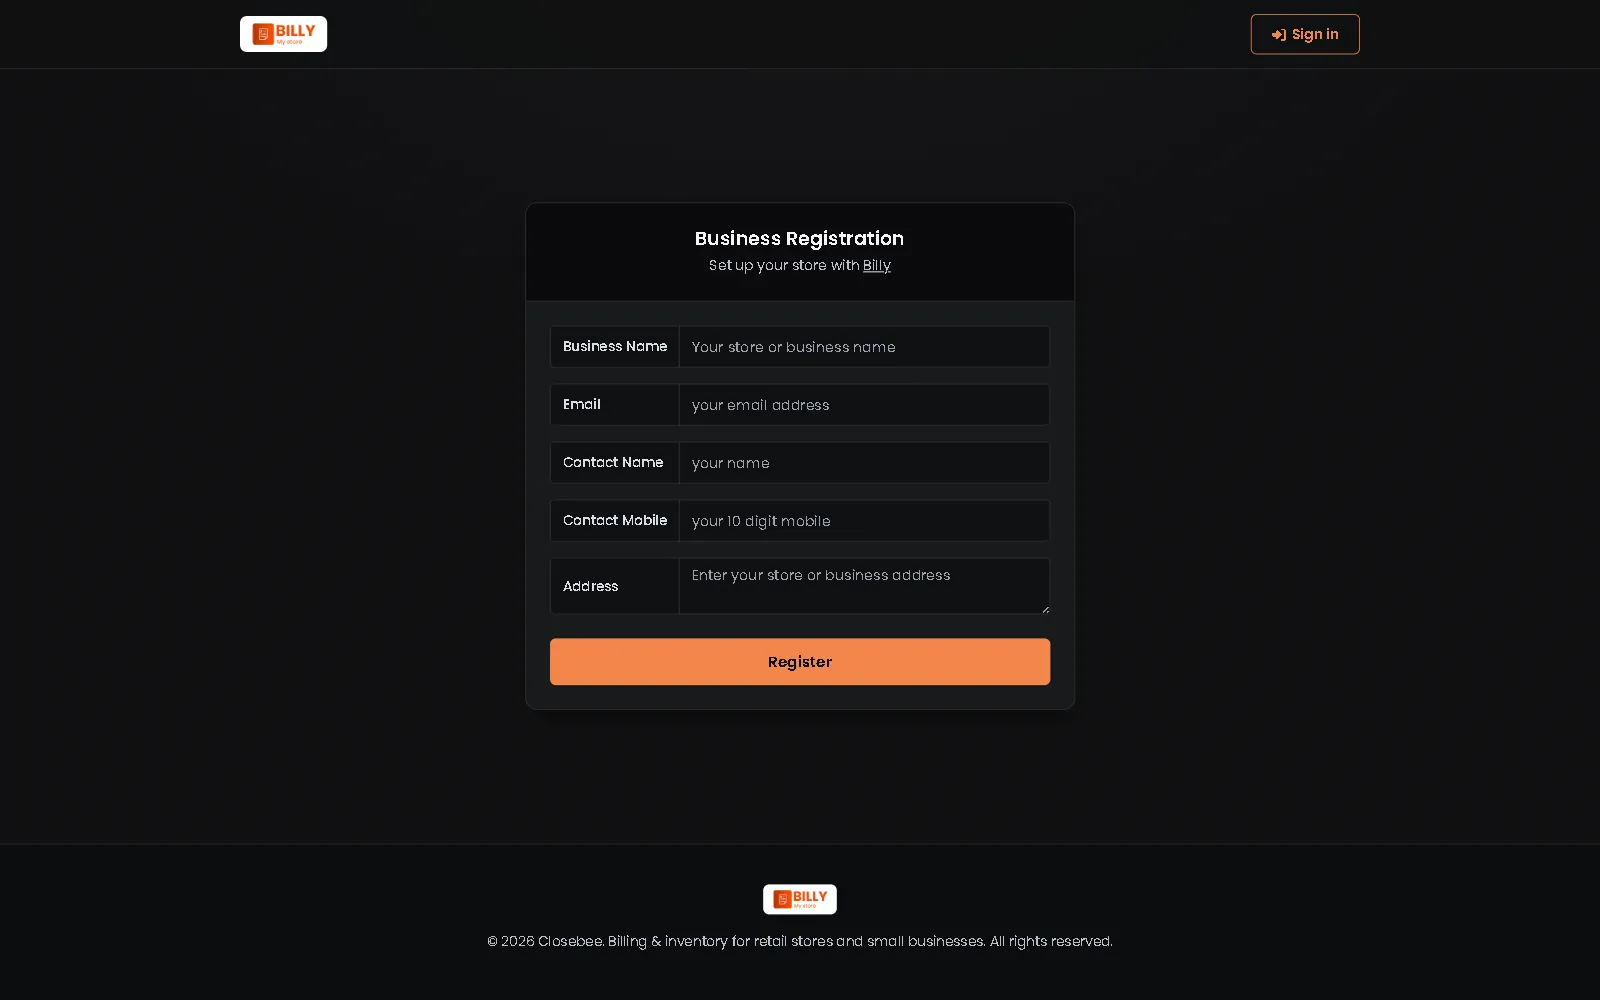
New to Billy? Open mybilly.store/register, fill in your shop name, email, name, mobile and address, and press Register. Your login comes by email.
3Switch business
For logins that run more than one shop.
-
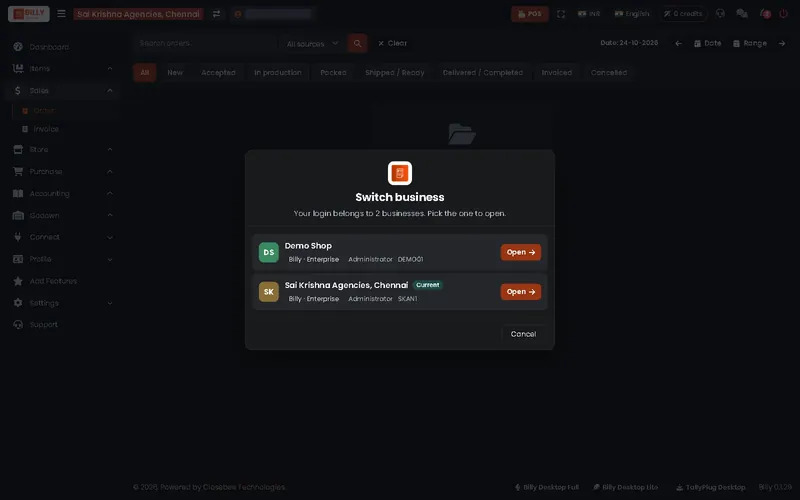
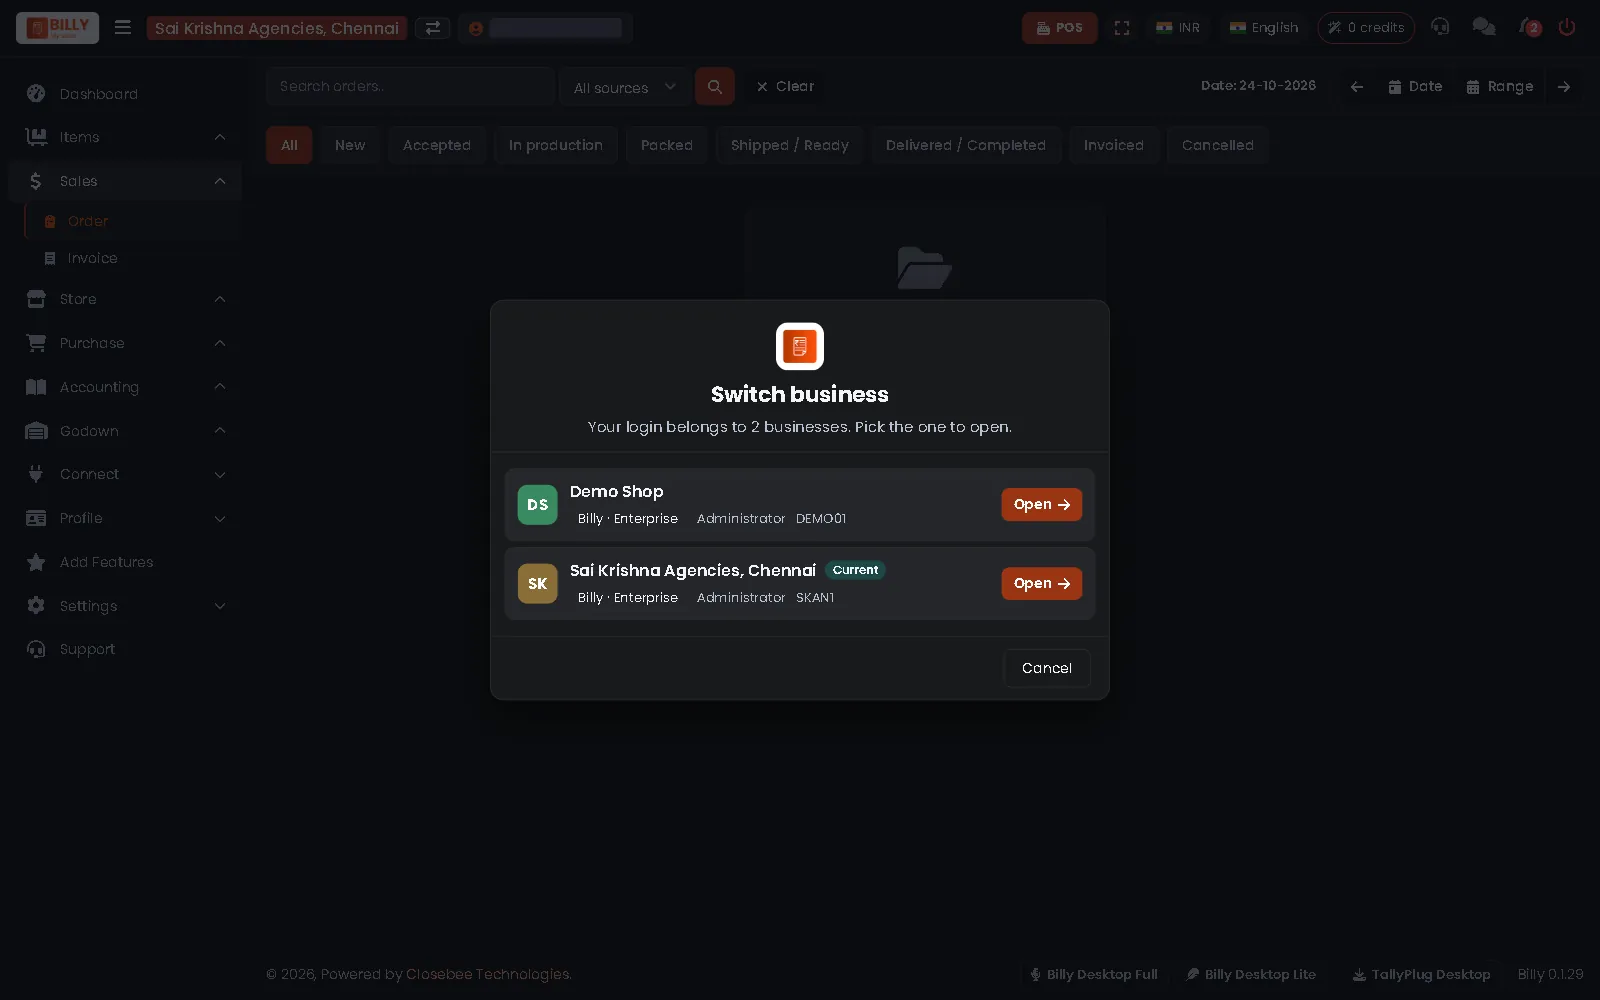
1Pick the shop to open
Press the switch button next to the shop name at the top and pick a shop. The one marked Current is the shop you are in now.
4Dashboard
Your shop at a glance.
-
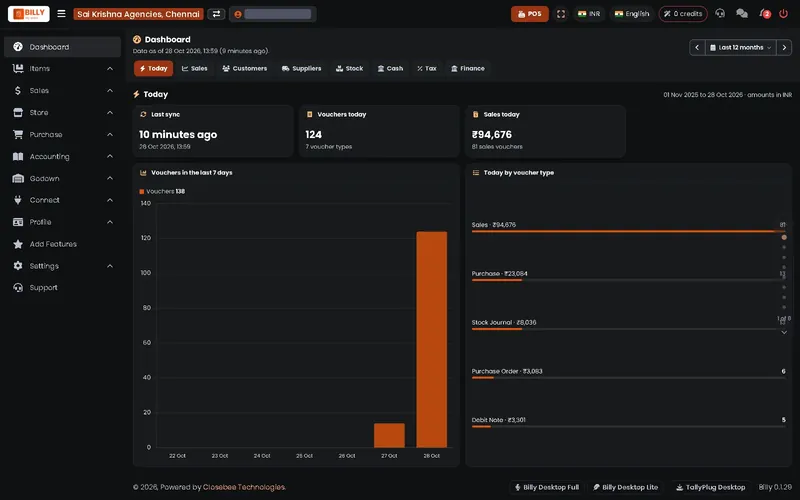
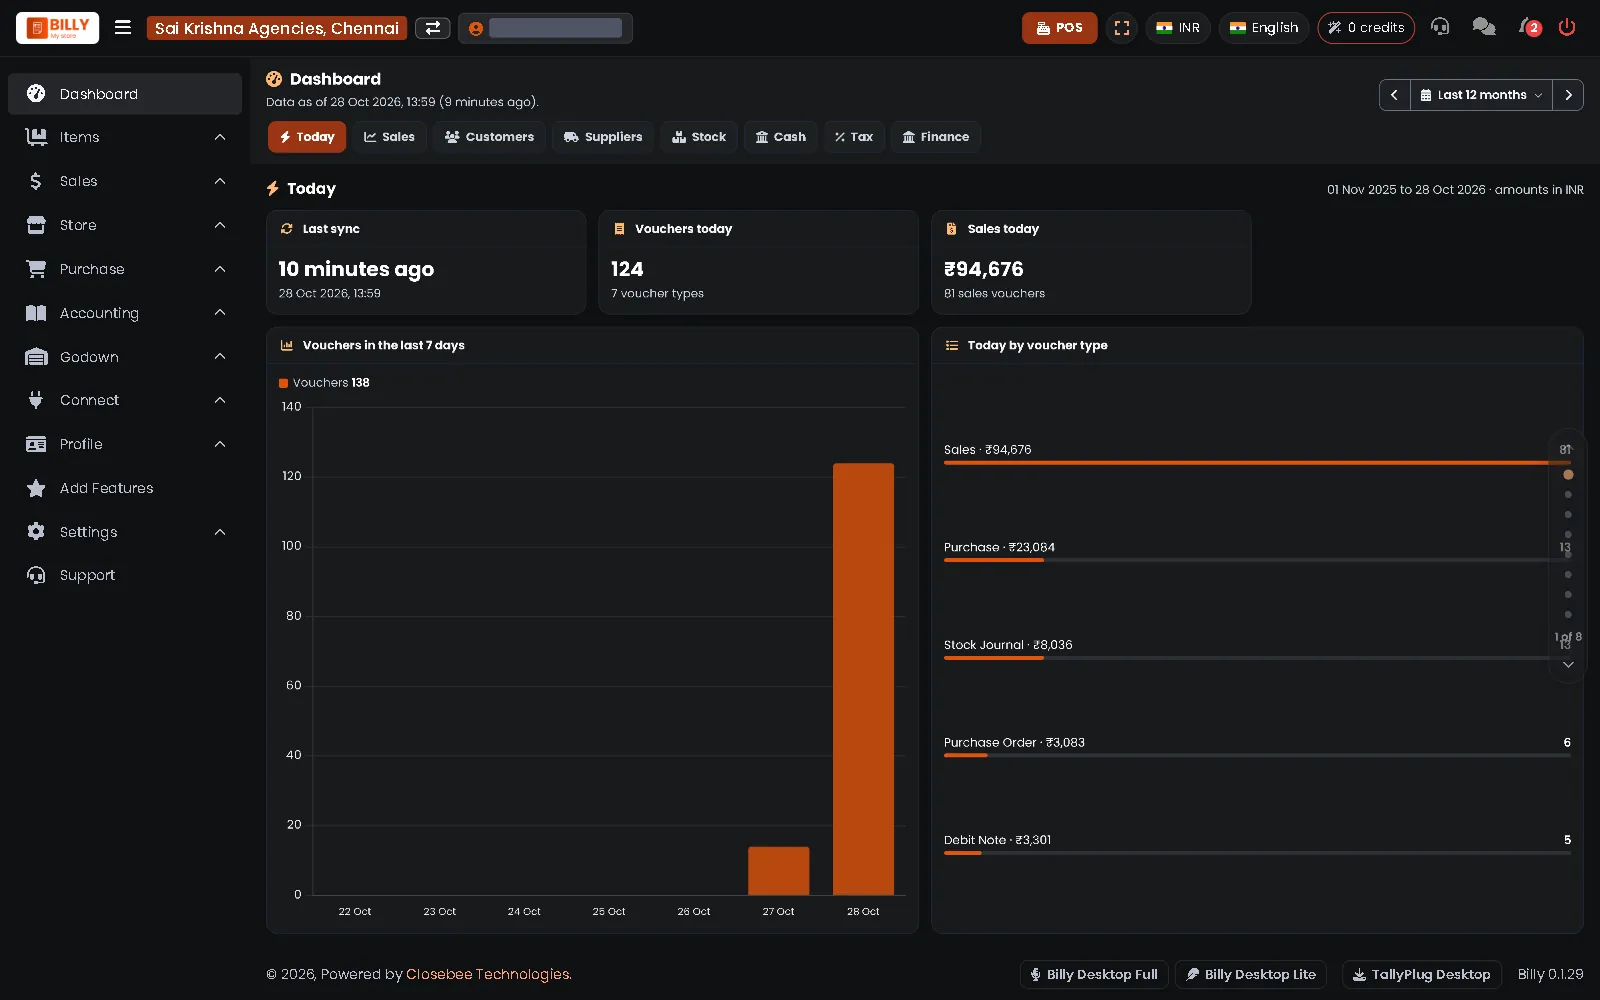
1Today at a glance
The dashboard opens on Today: last sync, vouchers made and what you sold. Use the arrows and the period box at the top right to see another day, month or year. The tabs show Sales, Customers, Suppliers, Stock, Cash, Tax and Finance.
5POS: make a bill
Customer, items, payment, receipt.
-
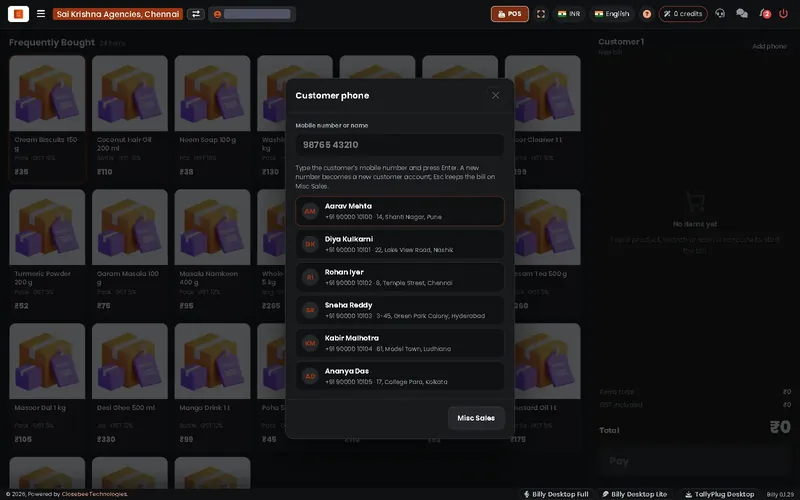
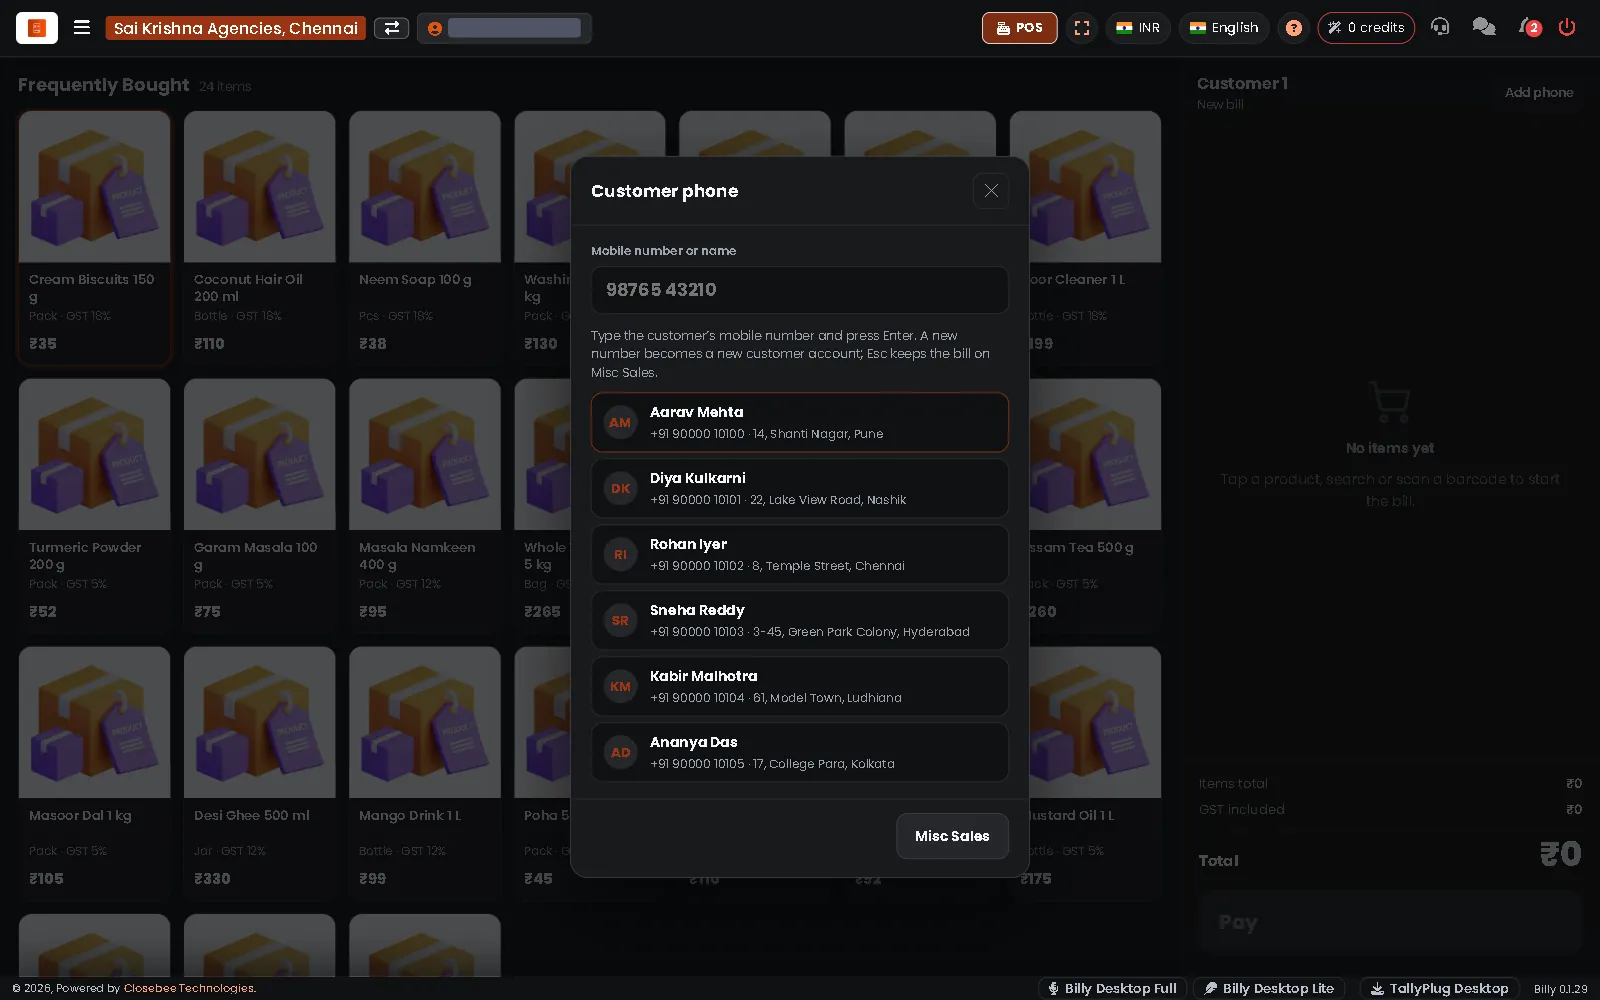
1Start with the customer
The POS asks for the customer first. Type the mobile number and press Enter, pick a regular customer from the list, or press Misc Sales for a walk-in.
-
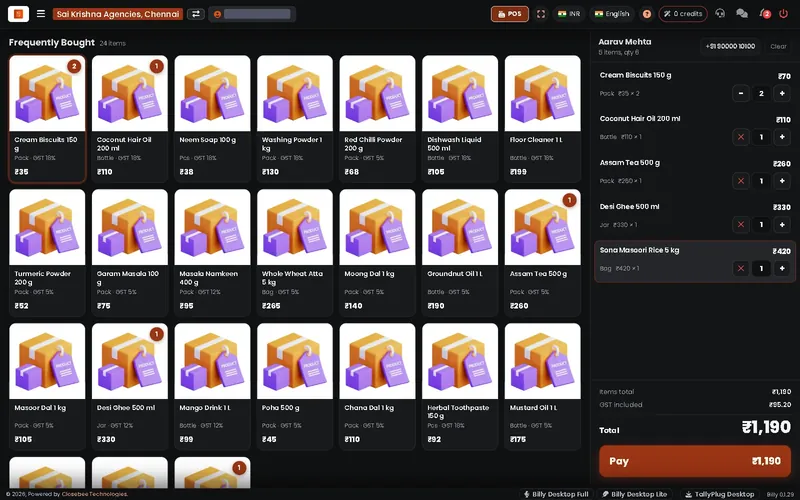
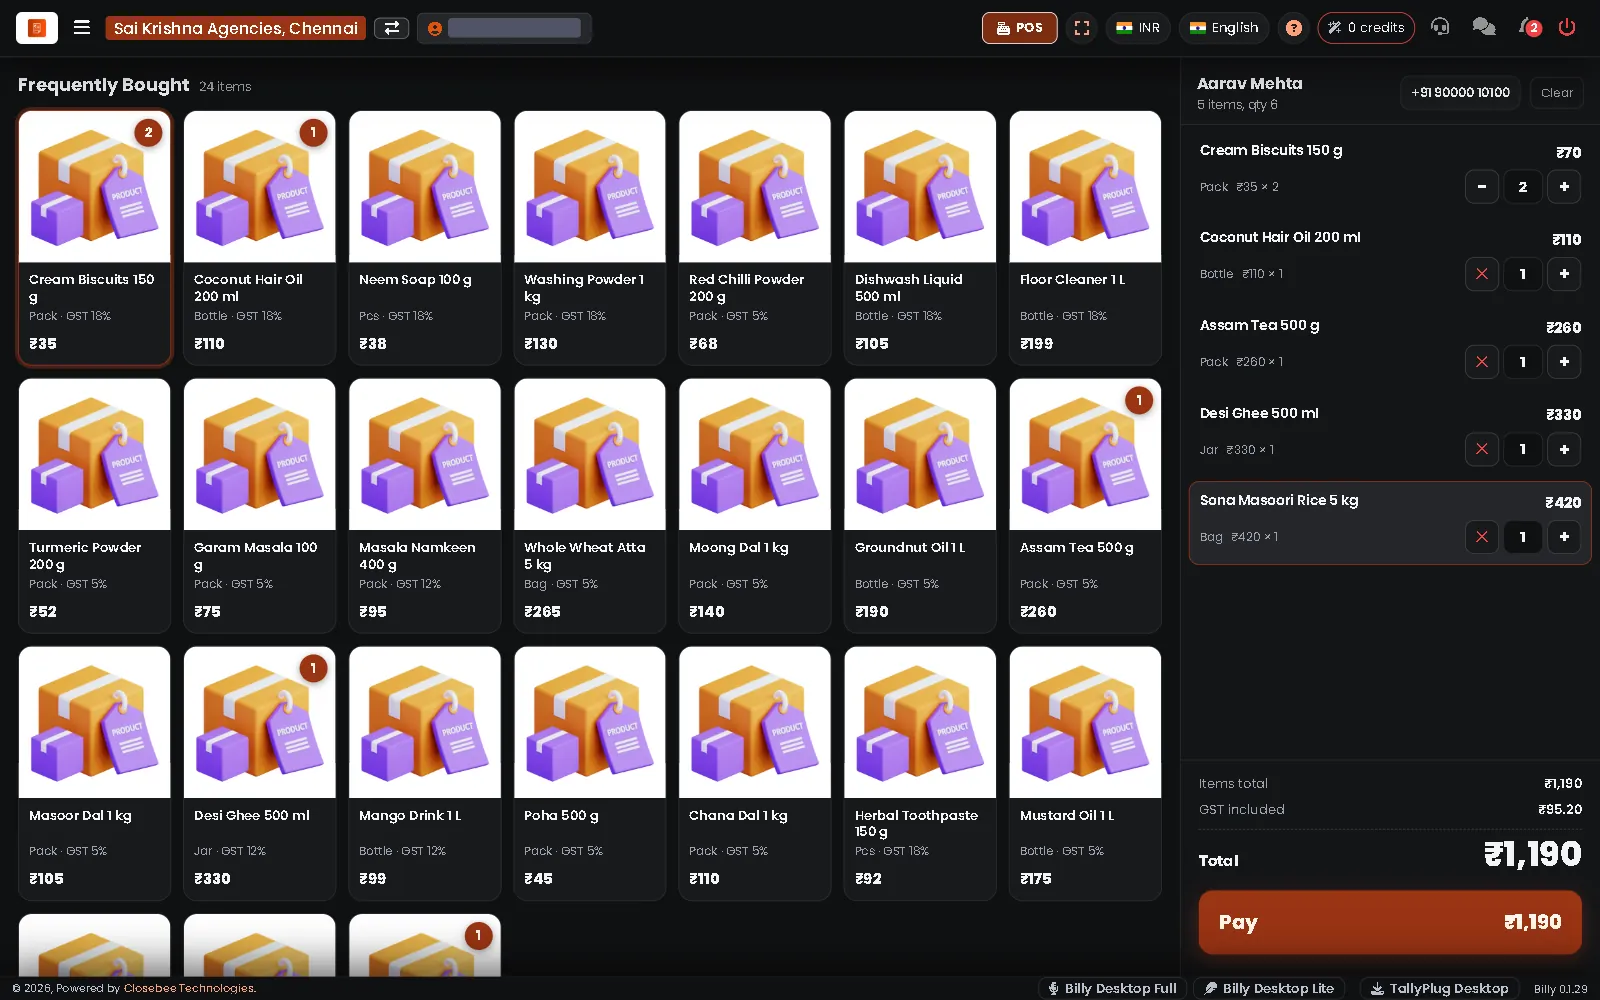
2Add items
Tap a product tile to add it; tap again for one more. The bill on the right has - and + on each line, and the total with GST included.
-
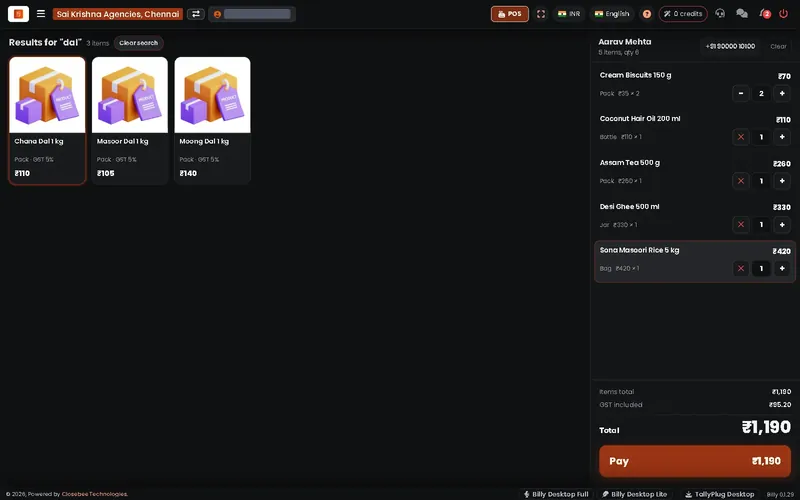
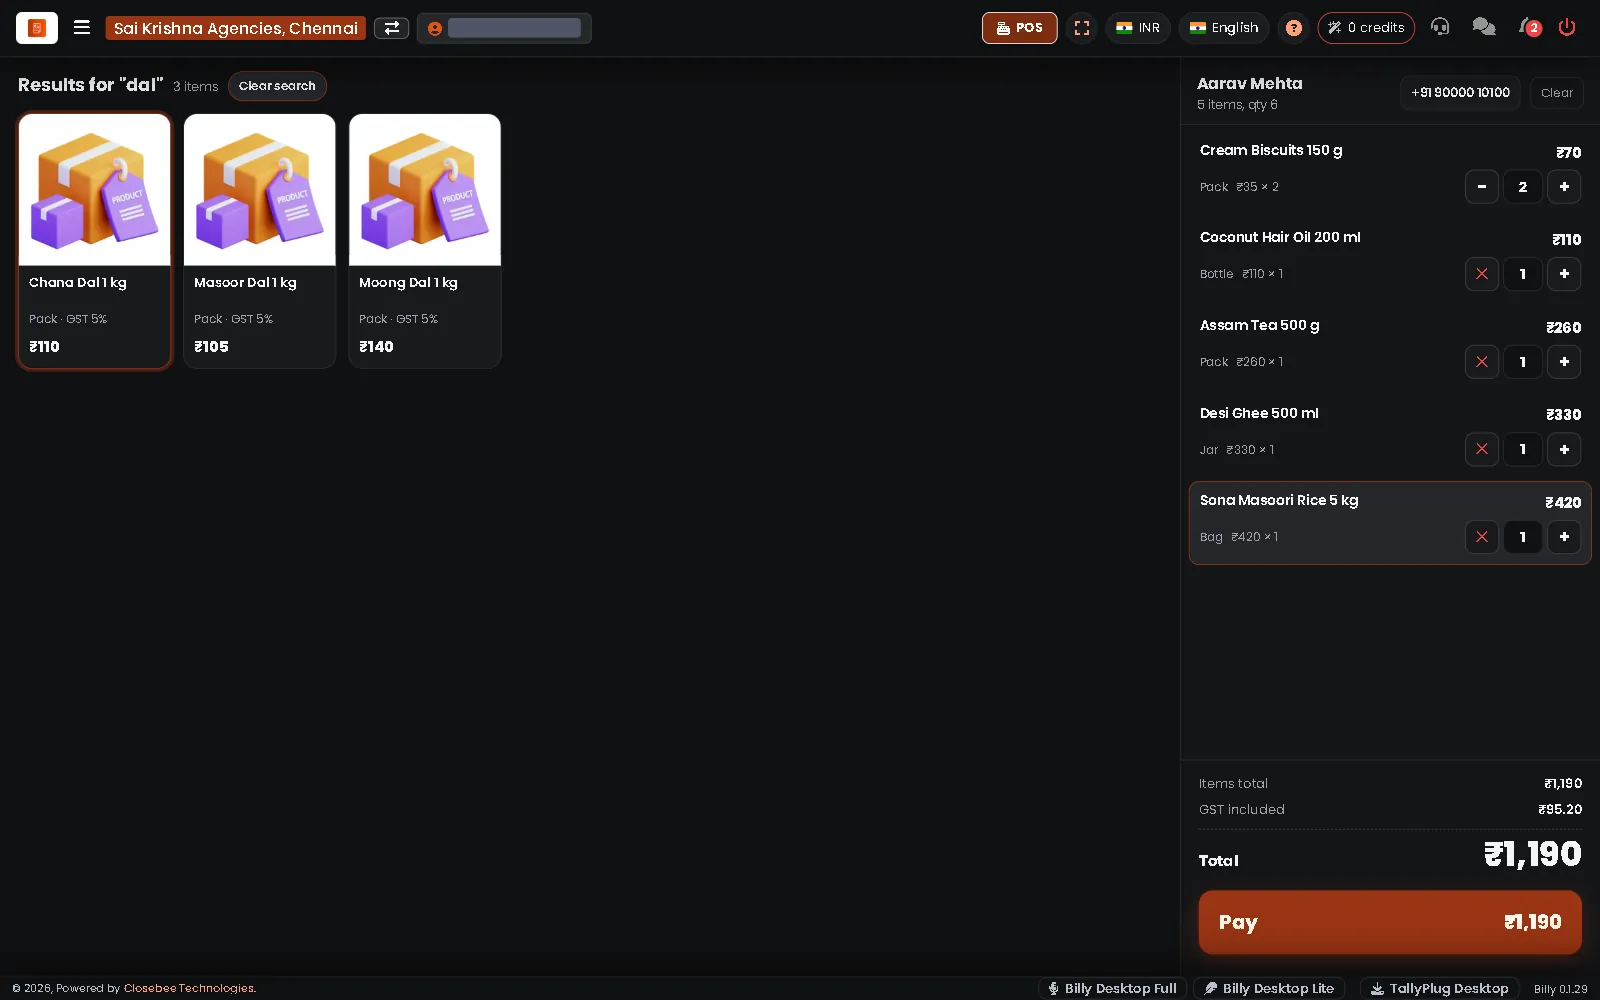
3Search for an item
Start typing an item name or brand anywhere on the POS and press Enter. Tap a matching tile to add it, or press Clear search to go back.
-
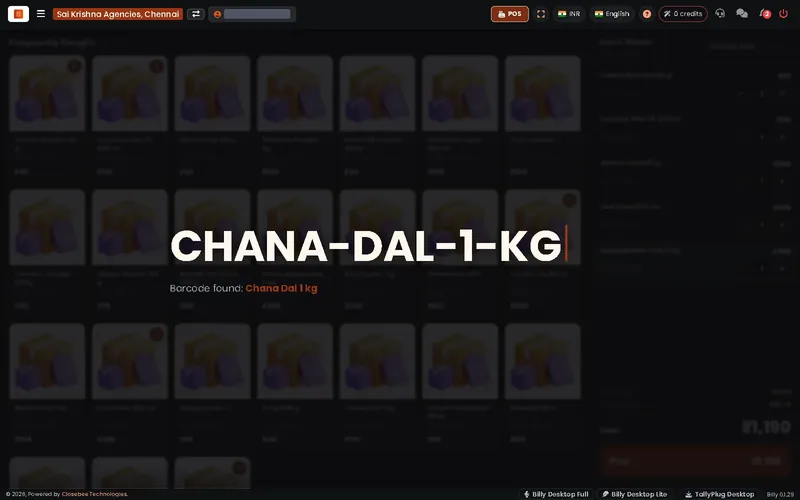
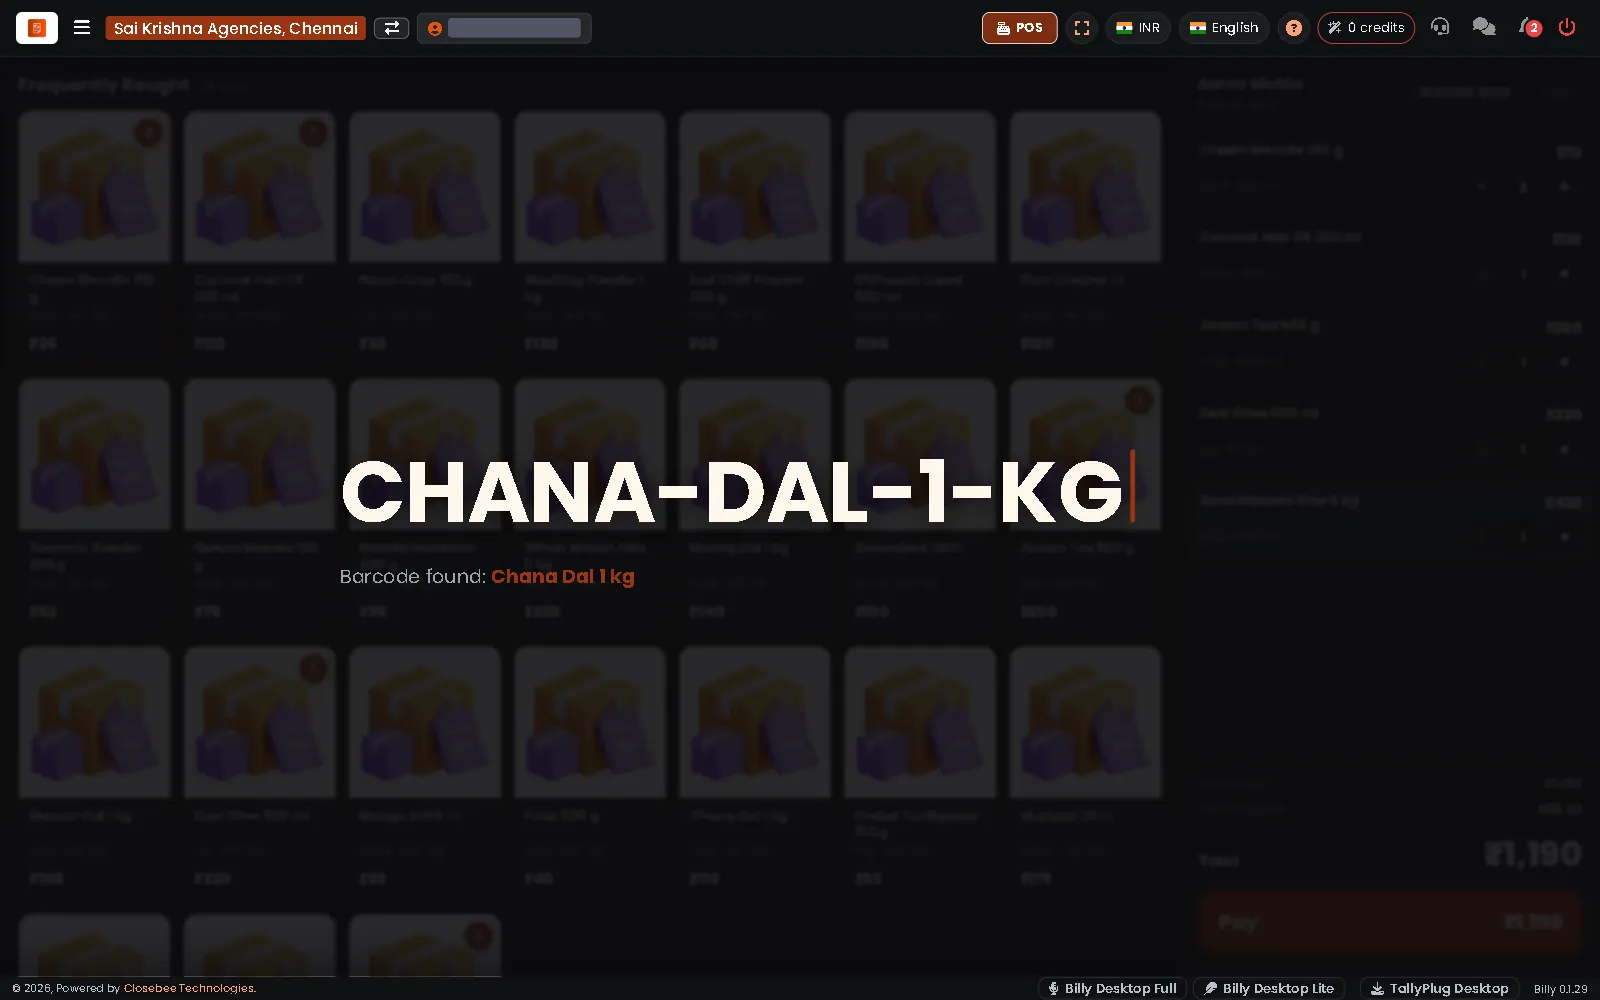
4Scan or type a barcode
Scan a barcode and the item goes straight on the bill. No scanner? Type the barcode or item code; Billy shows the item it found. Press Enter to add it.
-
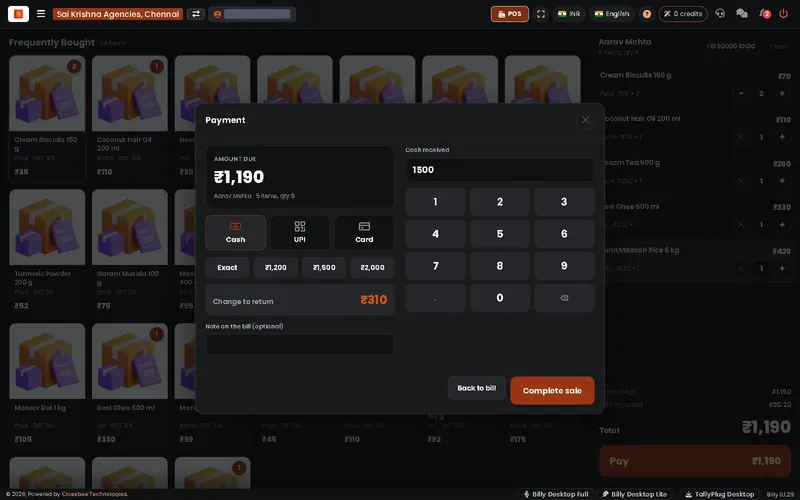
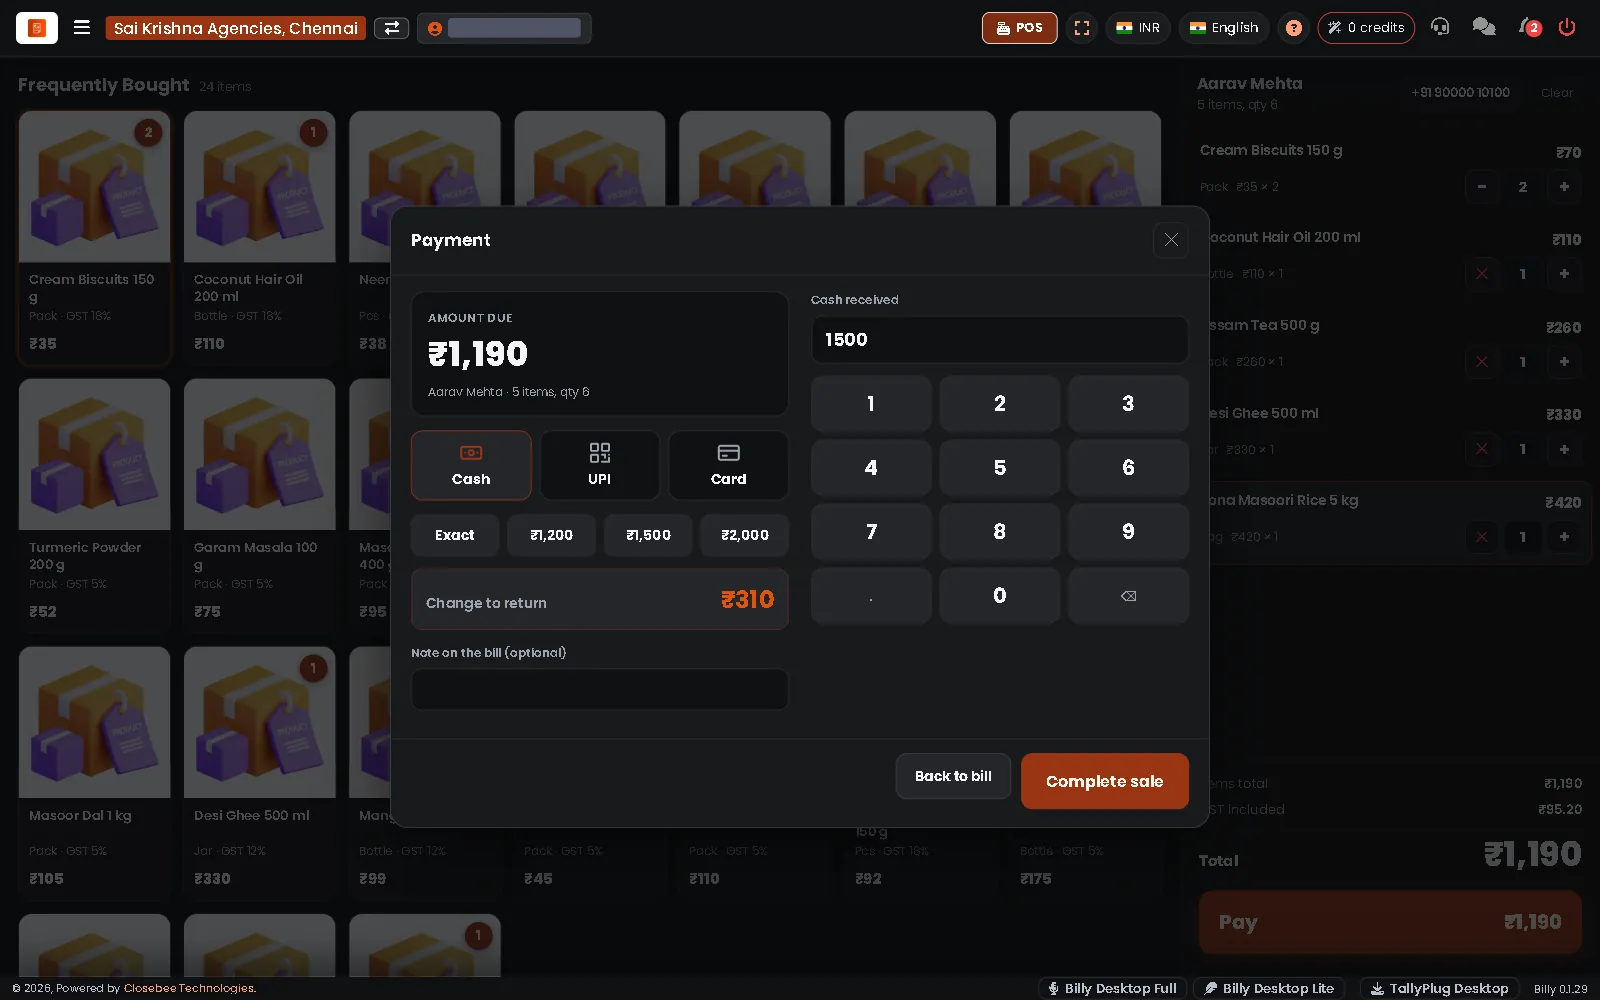
5Pay by cash
Press Pay, choose Cash and tap the note the customer gave you, or type the amount. Billy shows the change to return. Press Complete sale.
-
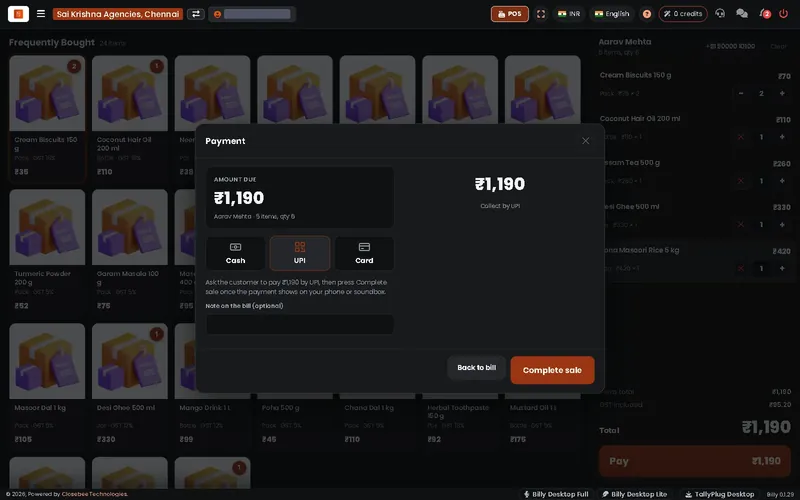
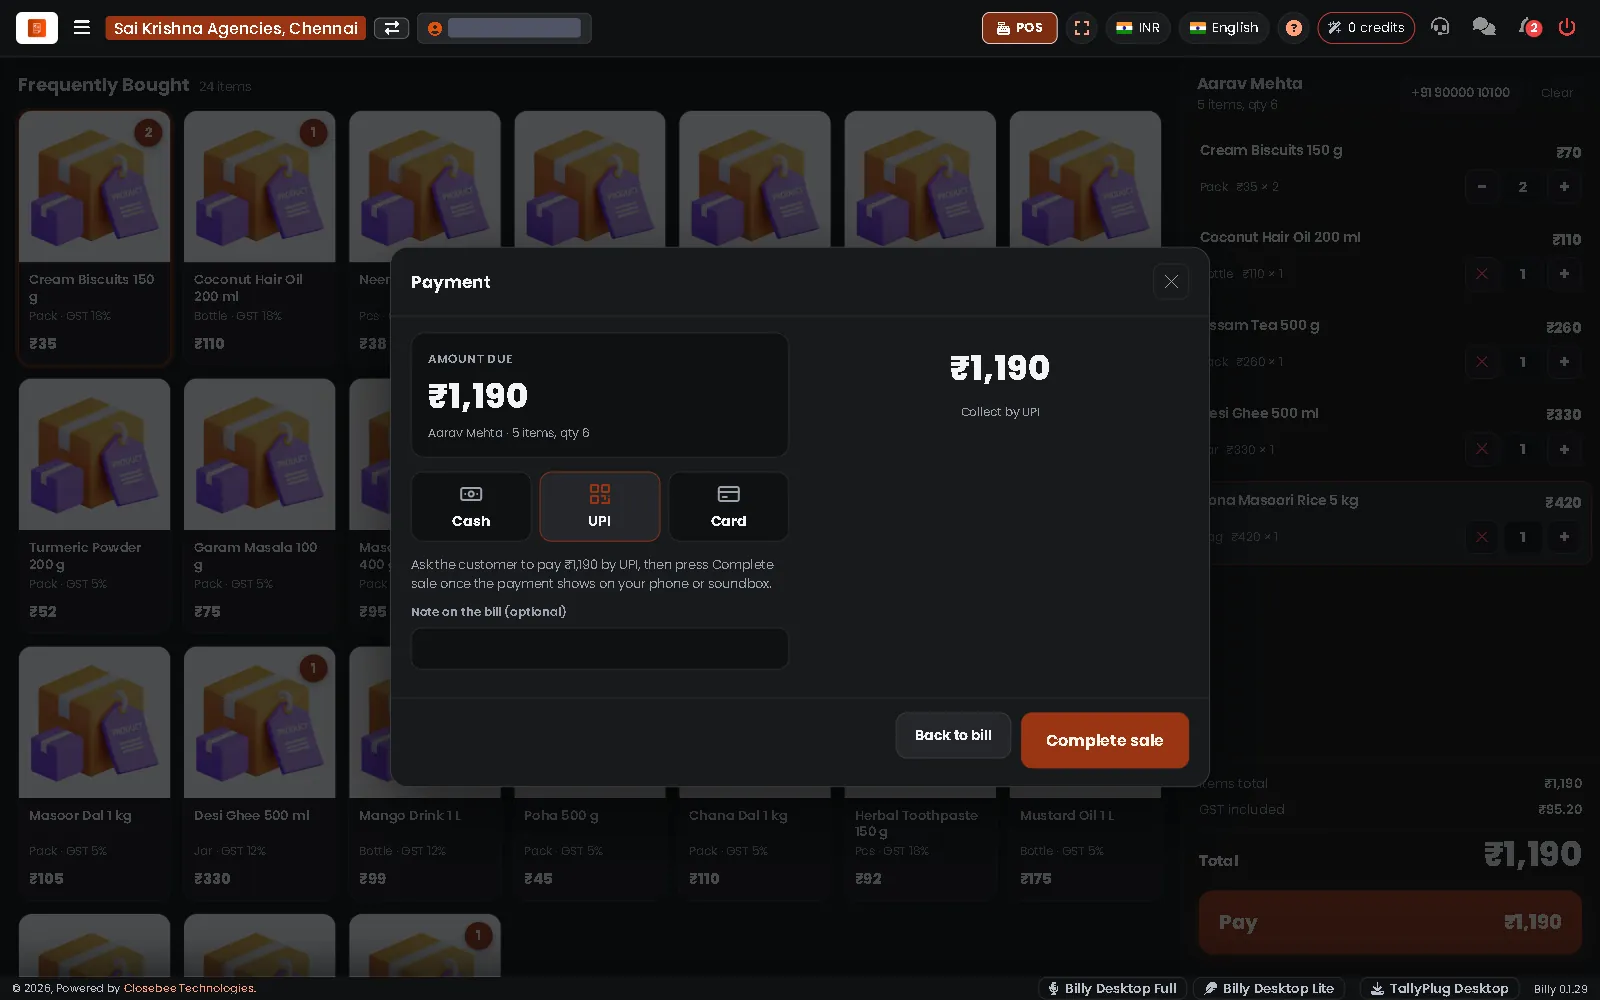
6Pay by UPI
Choose UPI and ask the customer to pay the amount shown. Press Complete sale once the payment shows on your phone or soundbox.
-
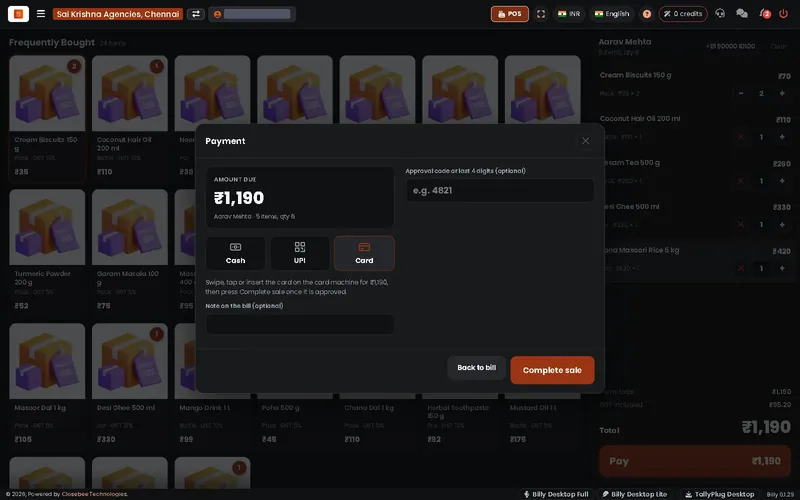
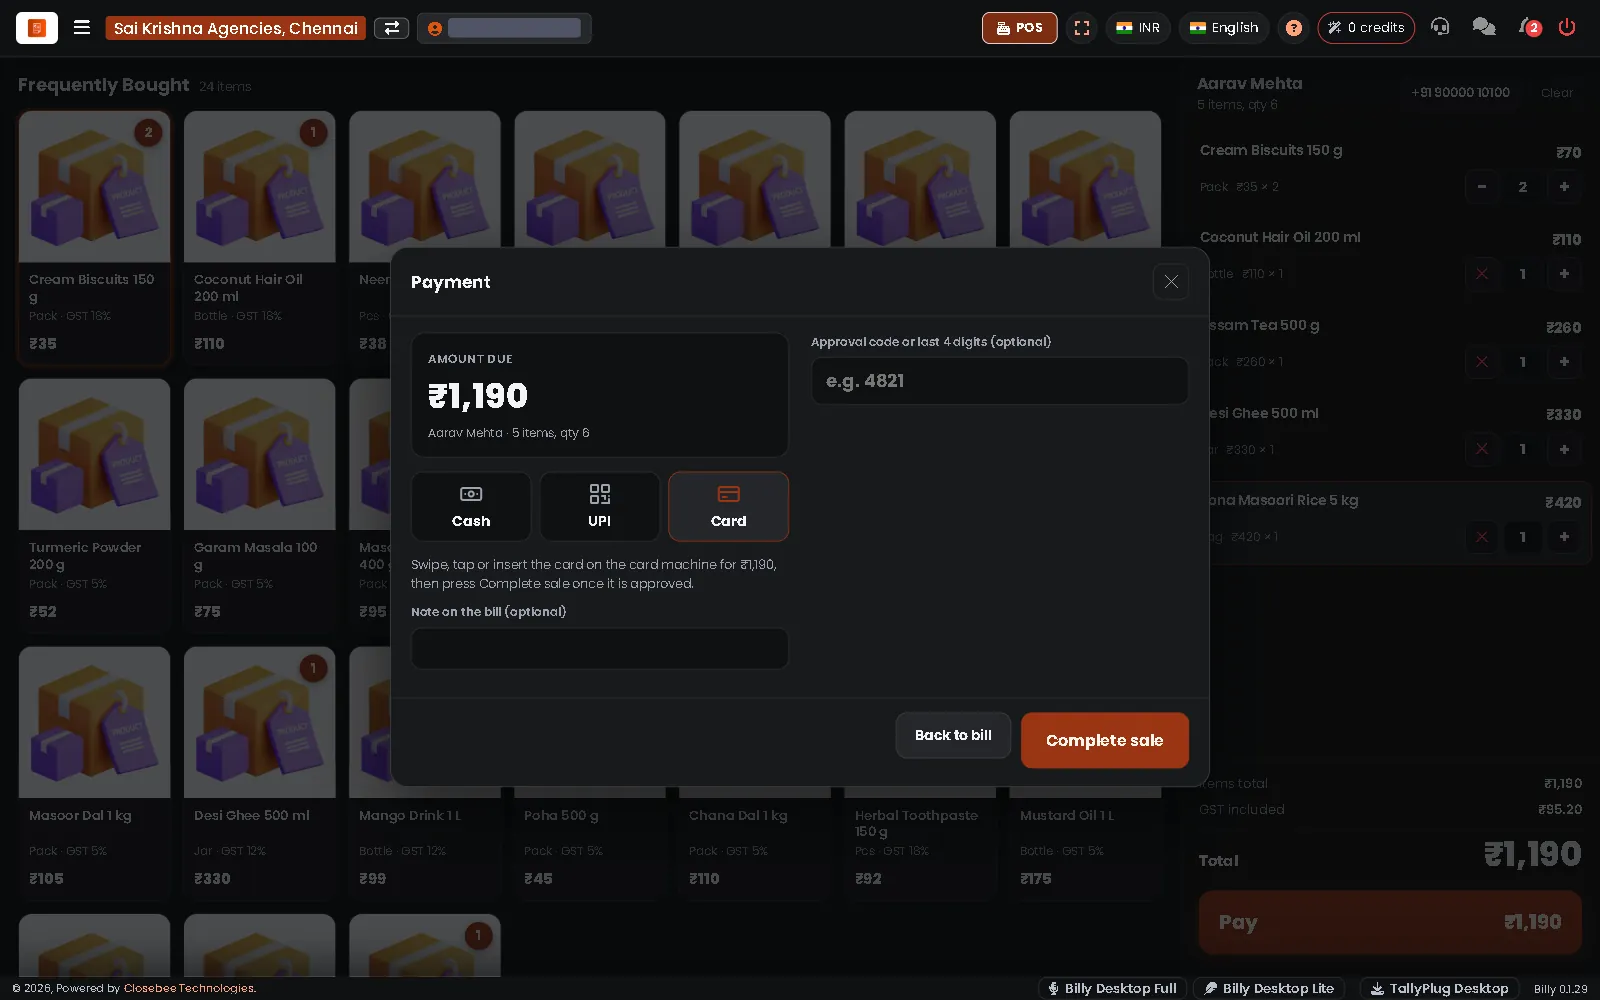
7Pay by card
Choose Card and run the card on your card machine. You can note the approval code or last 4 digits. Press Complete sale once it is approved.
-
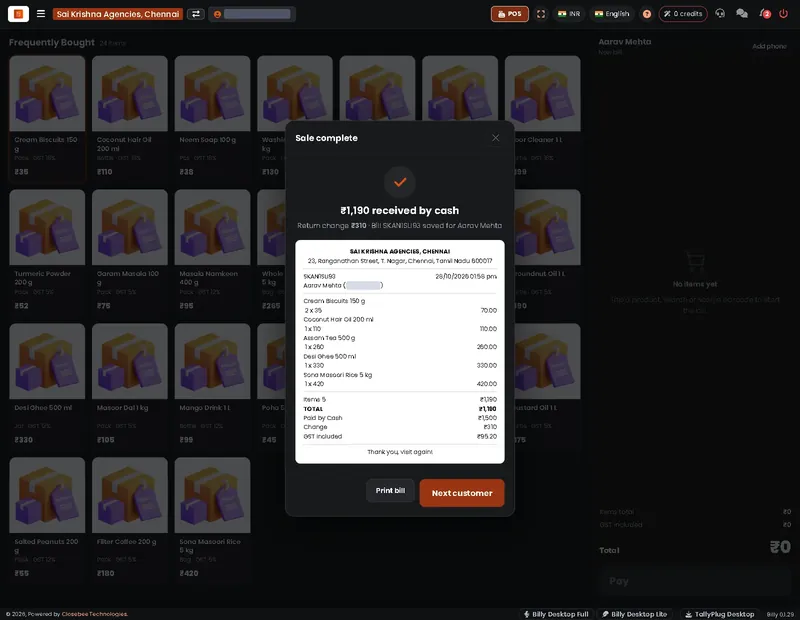
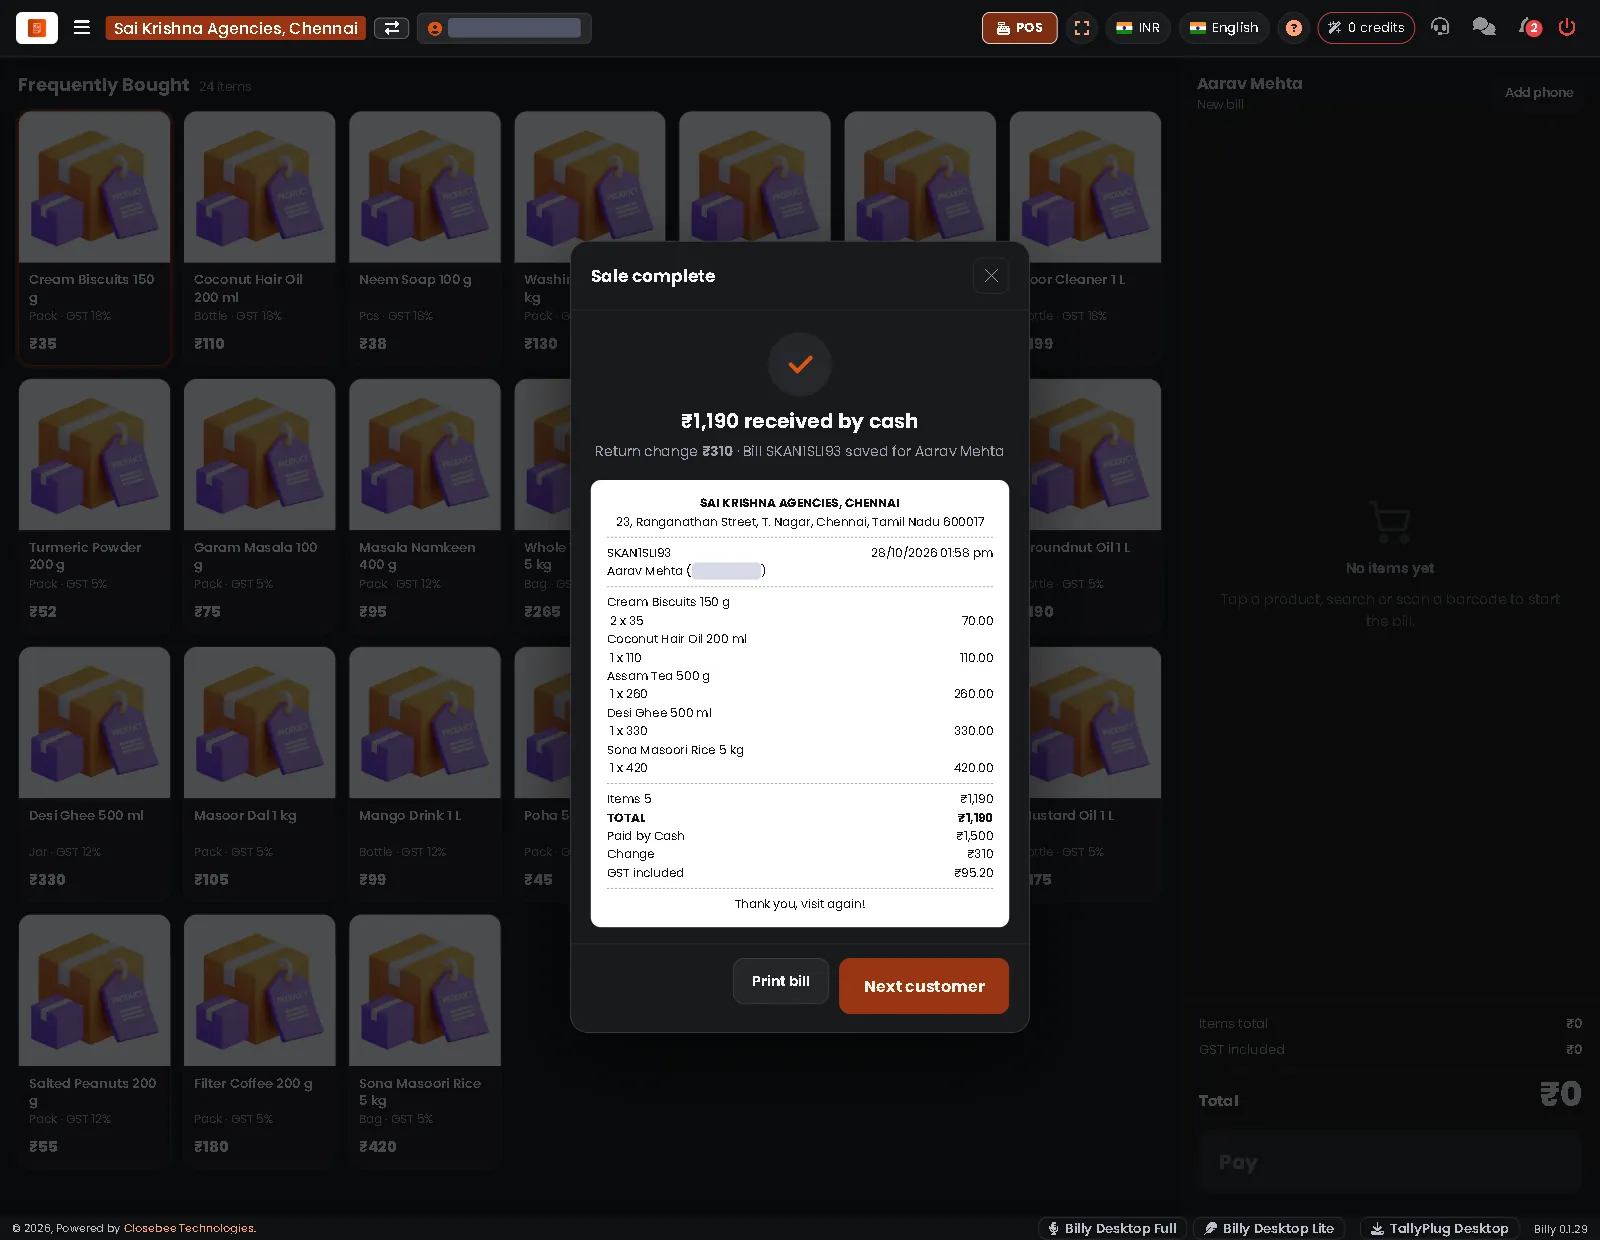
8The receipt
After the sale Billy shows the receipt with items, total, payment and GST. Press Print bill to print it, or Next customer for the next bill.
-
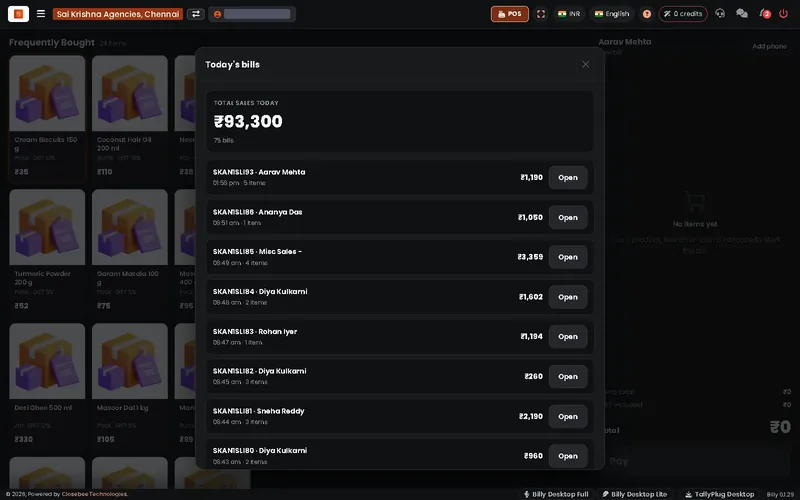
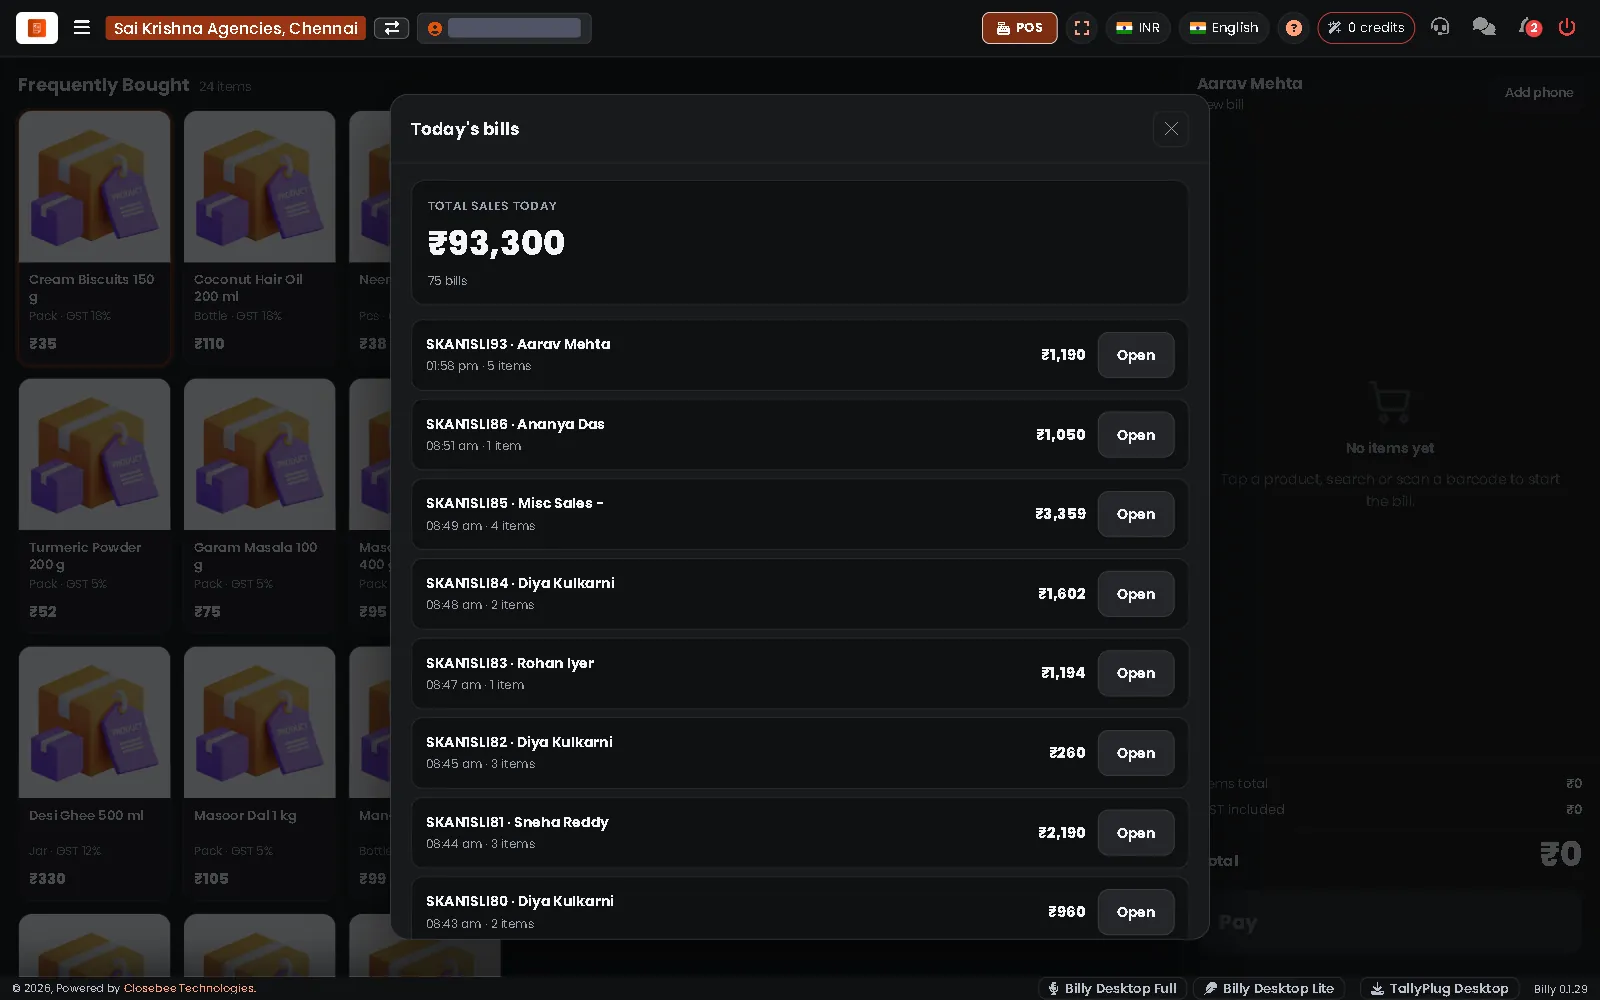
9Today's bills
Press the bills-today button at the bottom of the POS to see every bill made today and the day's total. Press Open to look at a bill again.
6Sales
Invoices and orders.
-
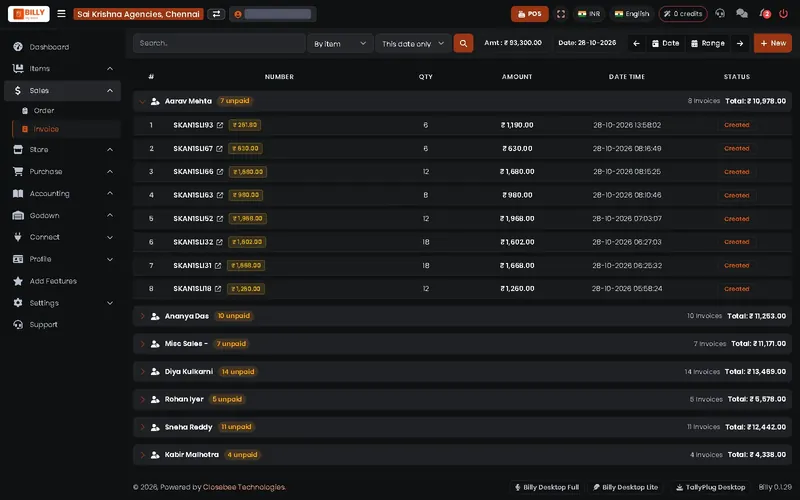
1Sales invoices
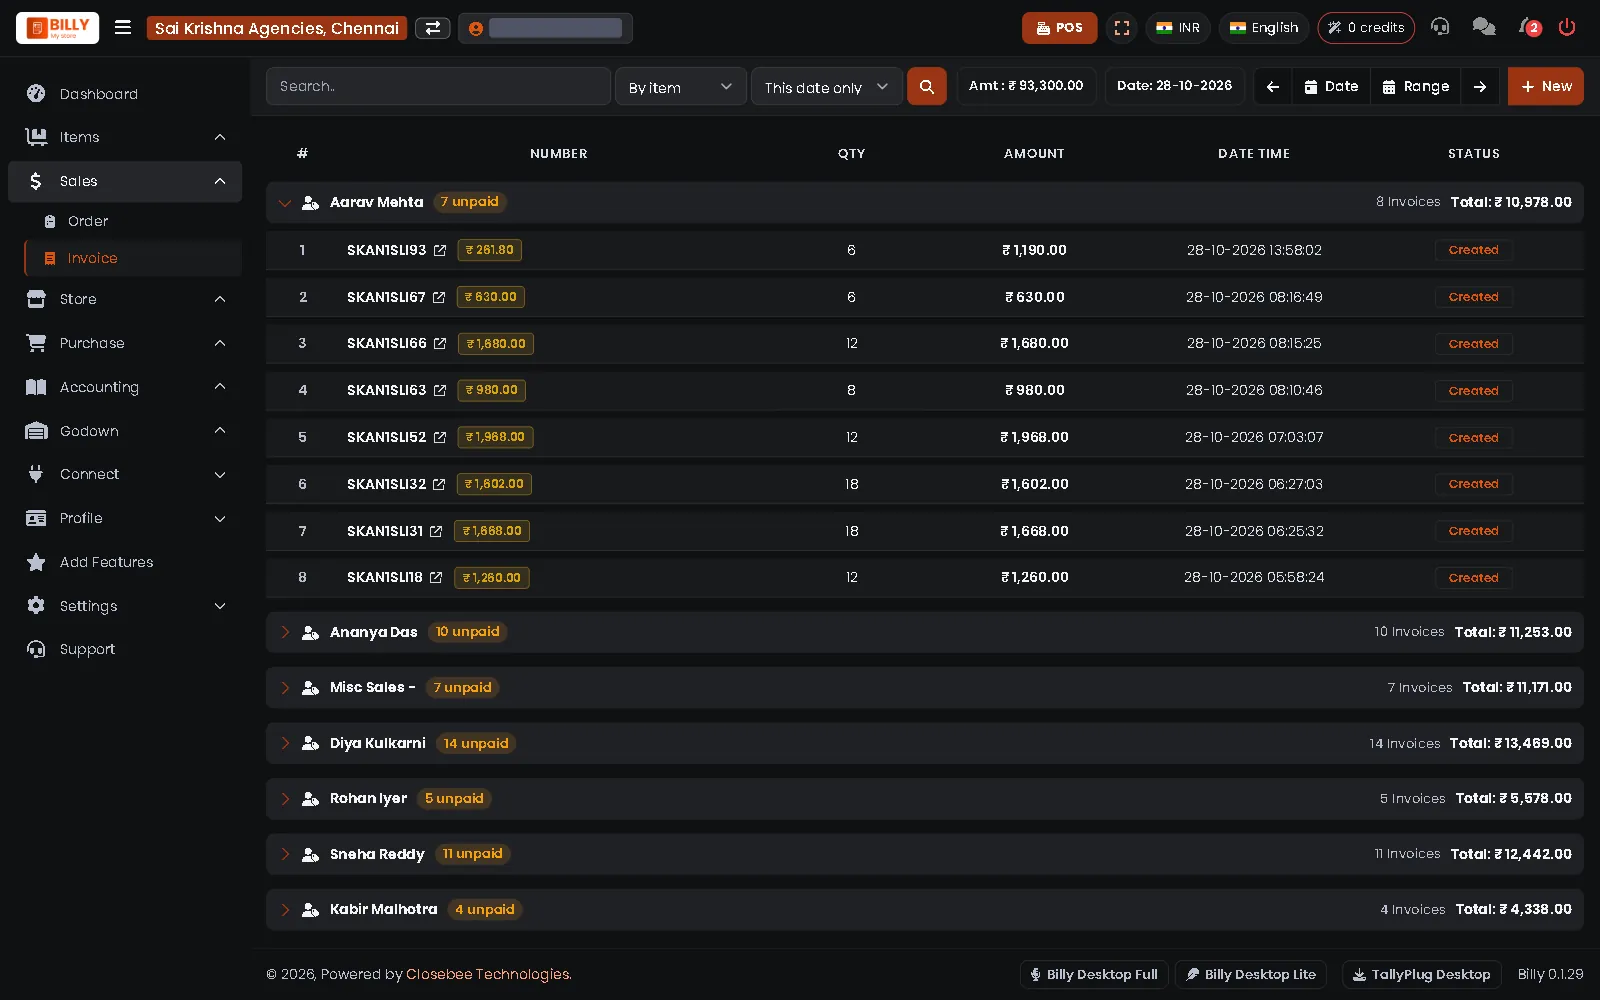
Sales > Invoice lists the day's invoices by customer, with how many are unpaid. Tap a customer to open their invoices. Use the date arrows or Range for other days.
-
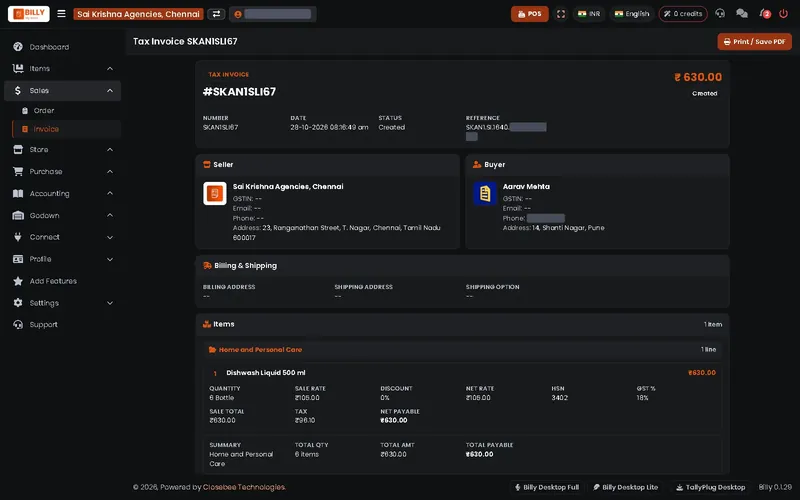
2Open an invoice
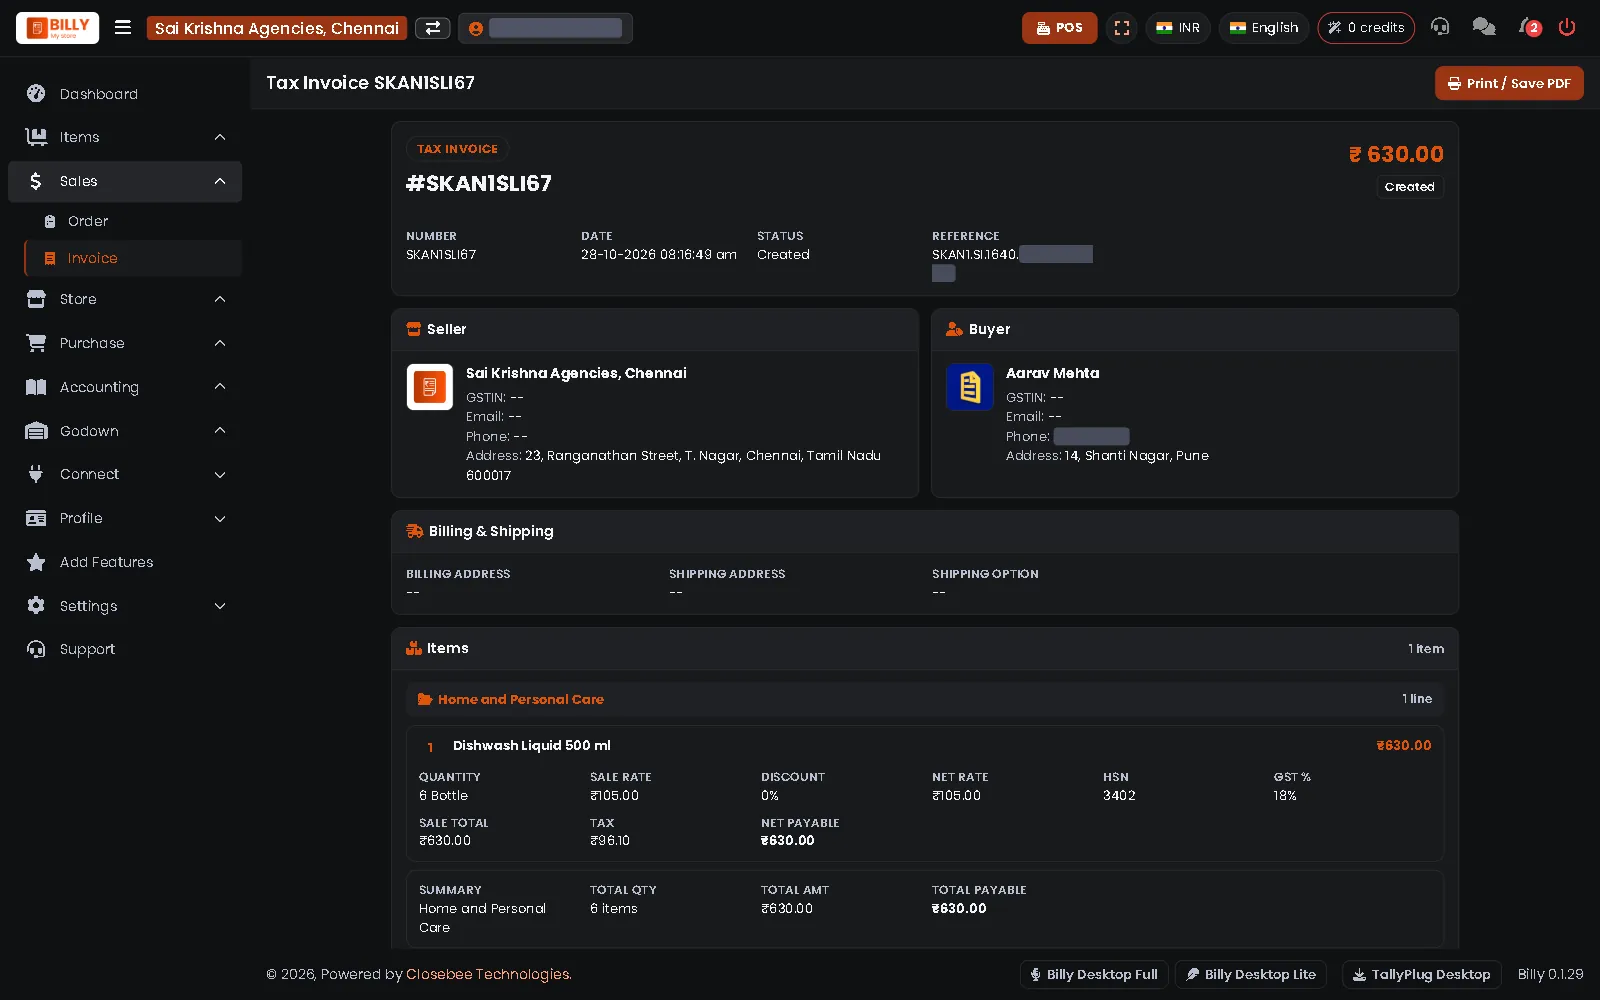
Open an invoice number to see the full tax invoice: seller, buyer, items, GST split and the amount in words. Press Print / Save PDF to print or share it.
-
3Sales orders
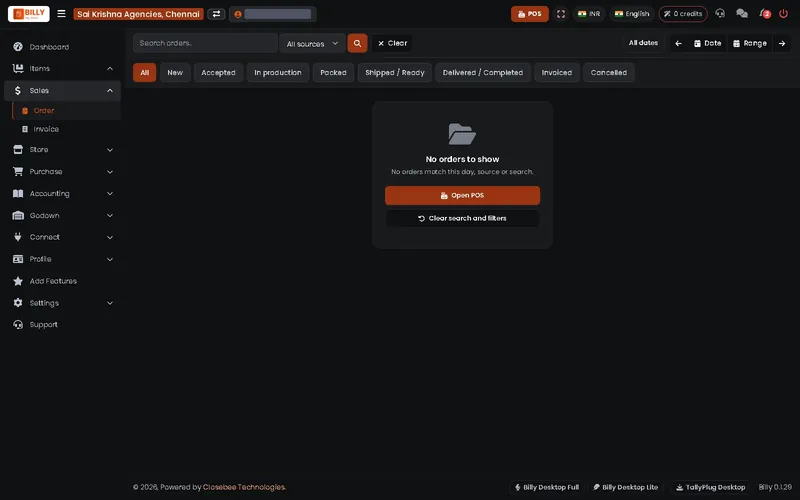
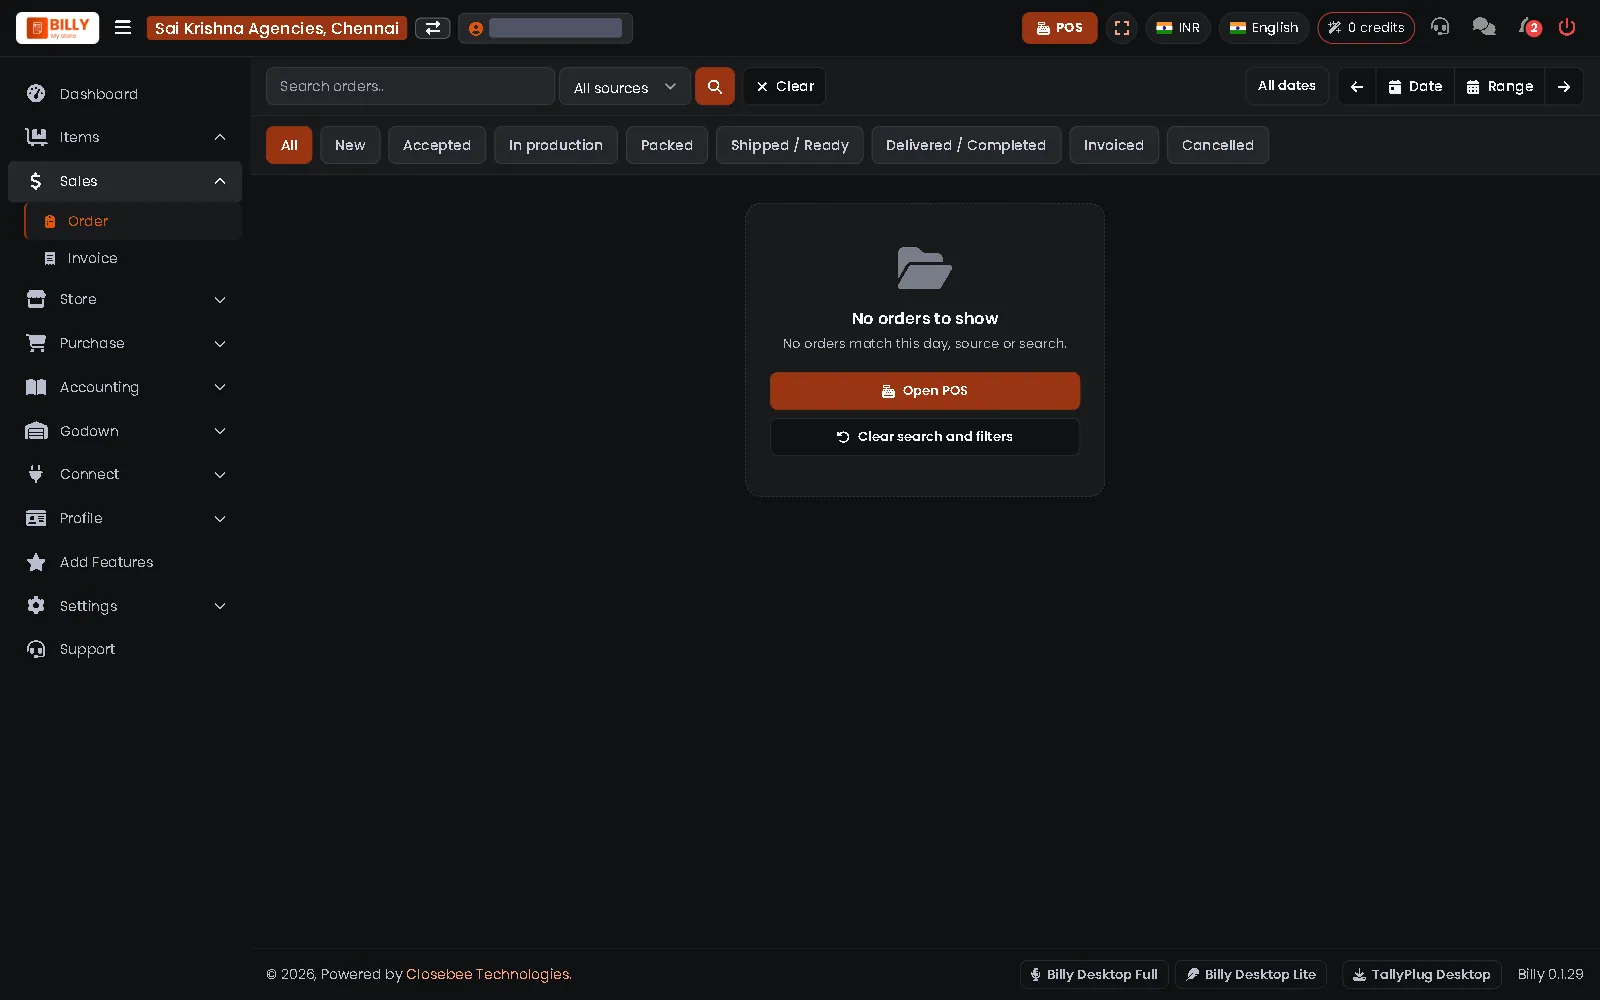
Sales > Order collects orders from your shop, your online store and connected businesses. Use the tabs (New, Accepted, Packed, Delivered and more) to move each order along.
7Purchase and suppliers
What you buy and whom you owe.
-
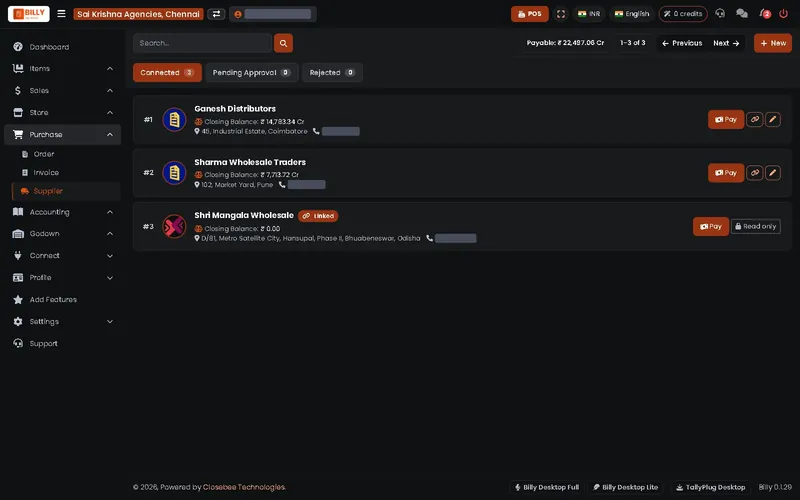
1Your suppliers
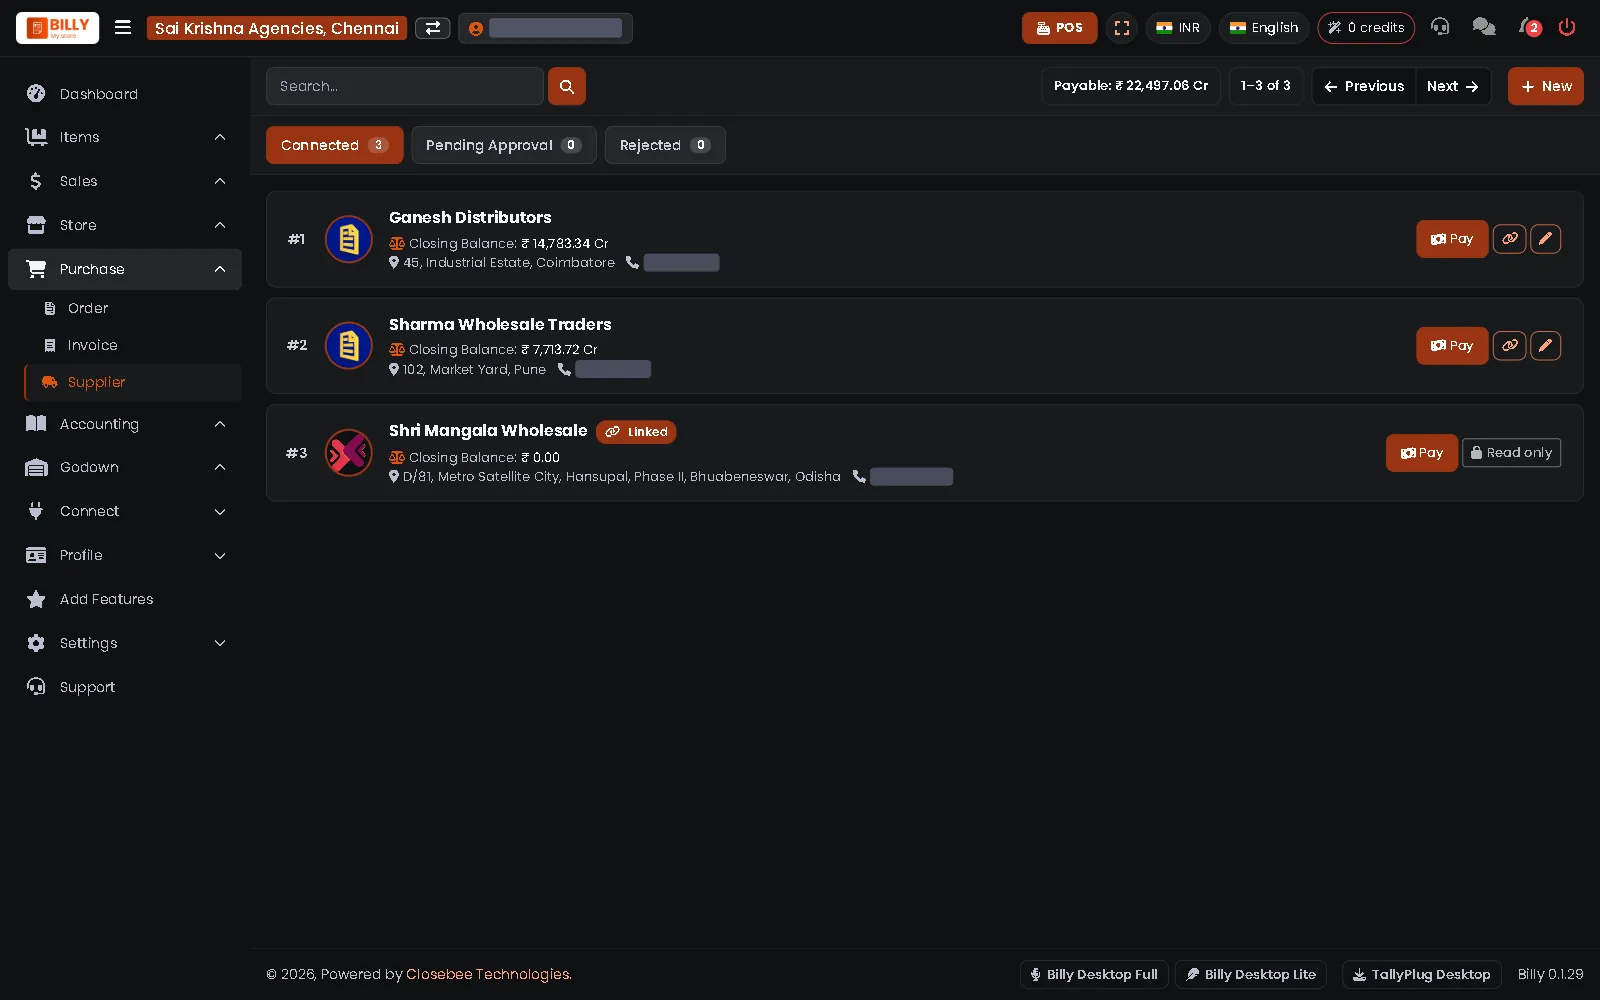
Purchase > Supplier lists your suppliers and what you owe each one. Press Pay to record a payment. Suppliers marked Linked send their bills to Billy by themselves.
-
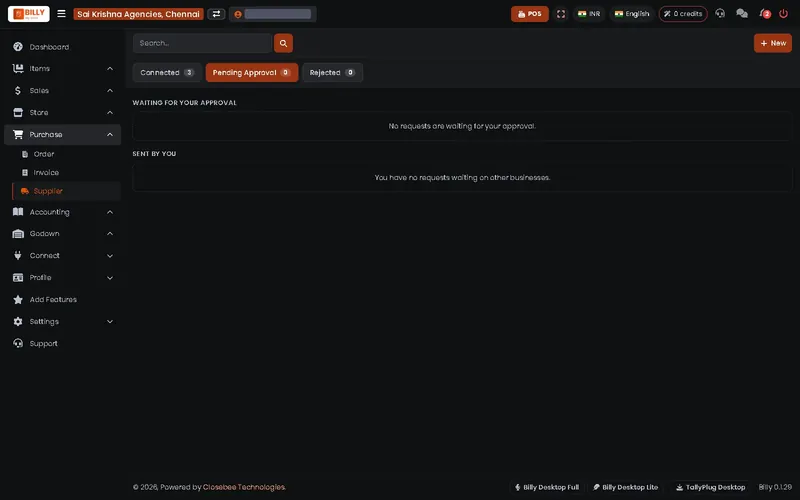
2Link requests
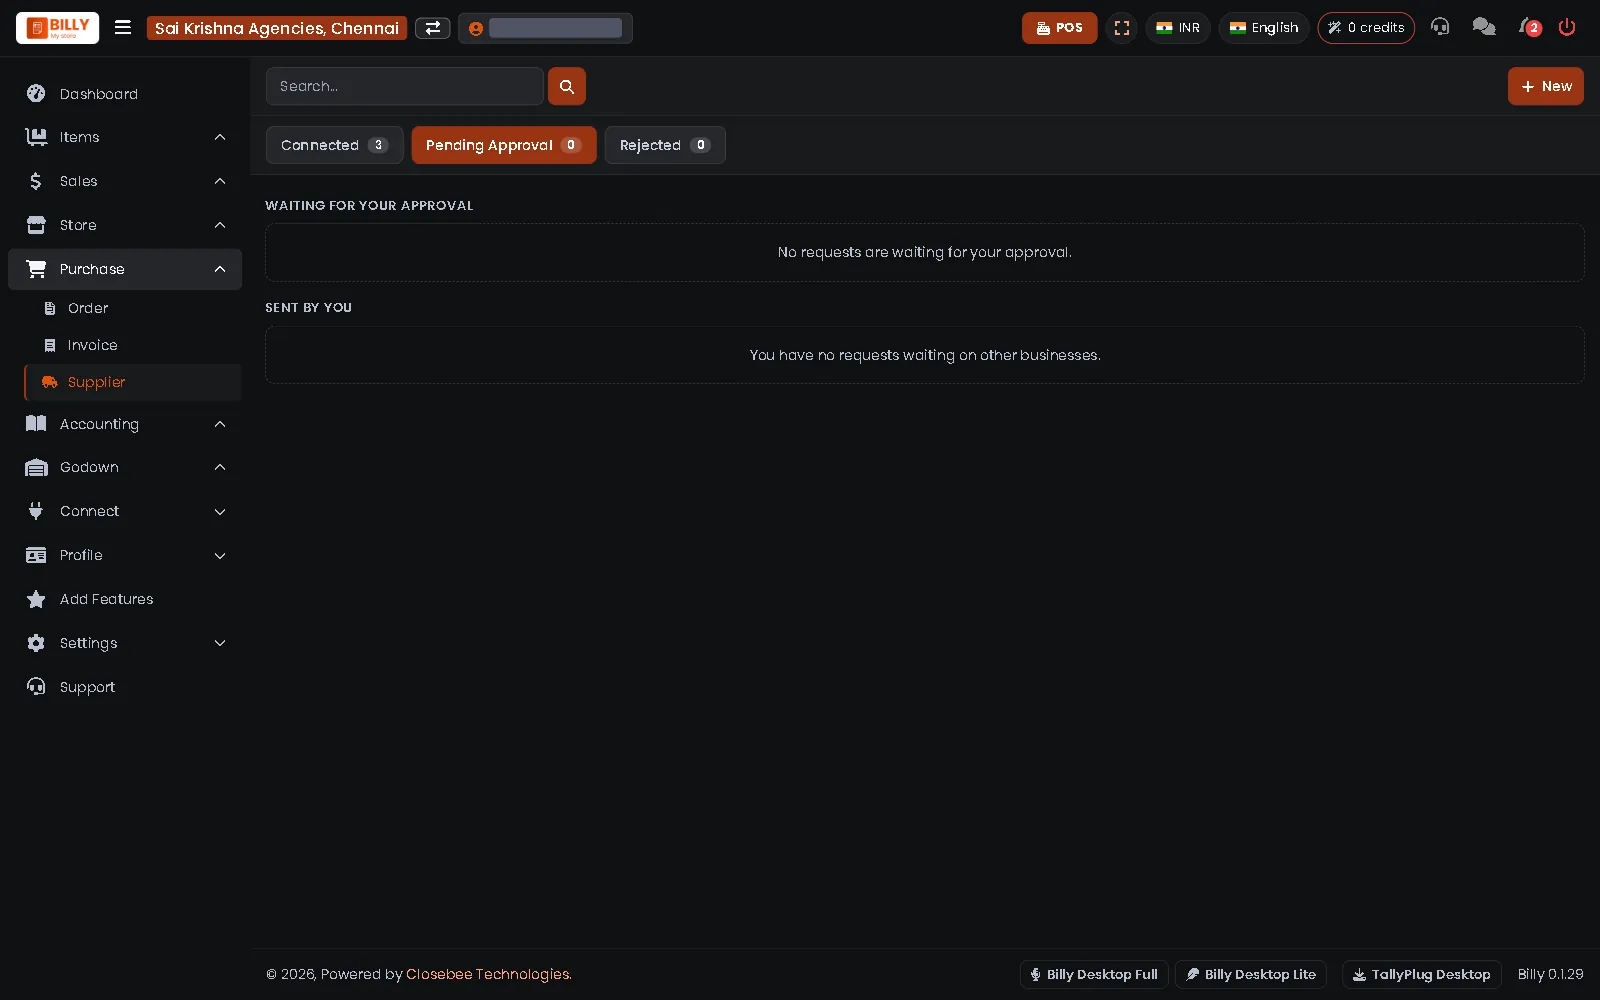
Pending Approval shows link requests waiting for you, and the ones you sent. Approve a request to start getting that supplier's bills automatically.
-
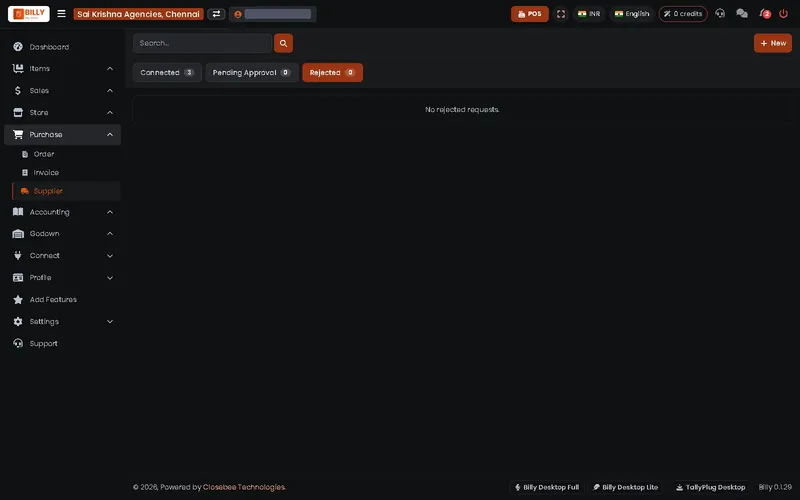
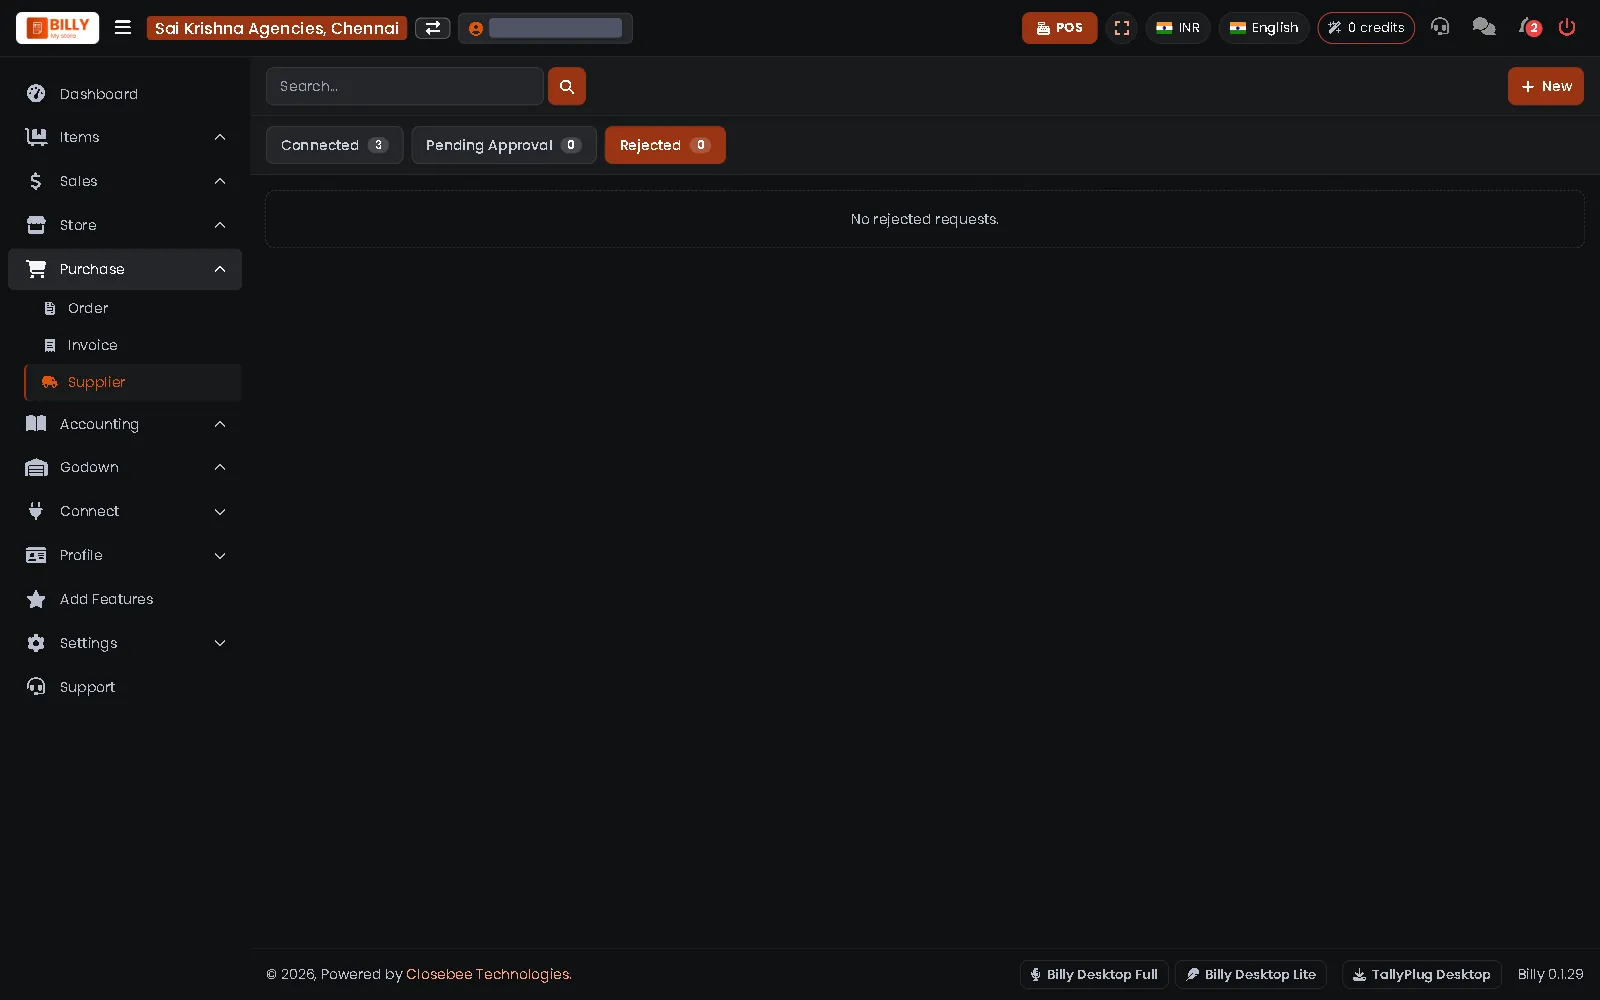
3Rejected requests
Requests you turned down stay here, so you can find them again later.
-
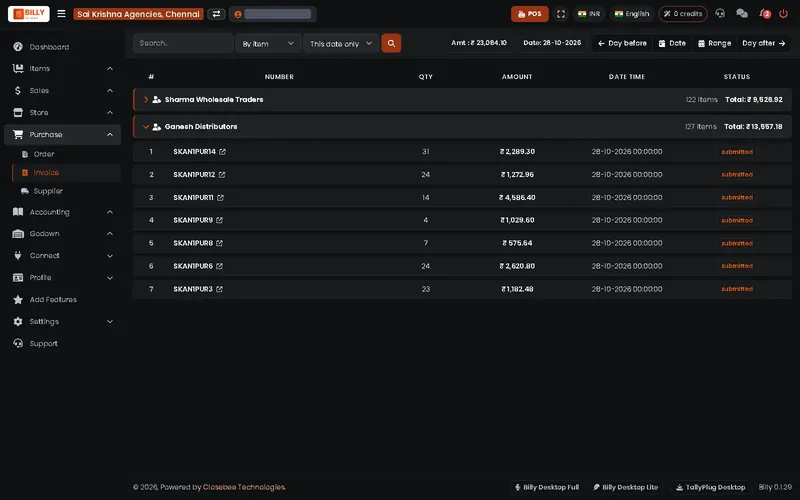
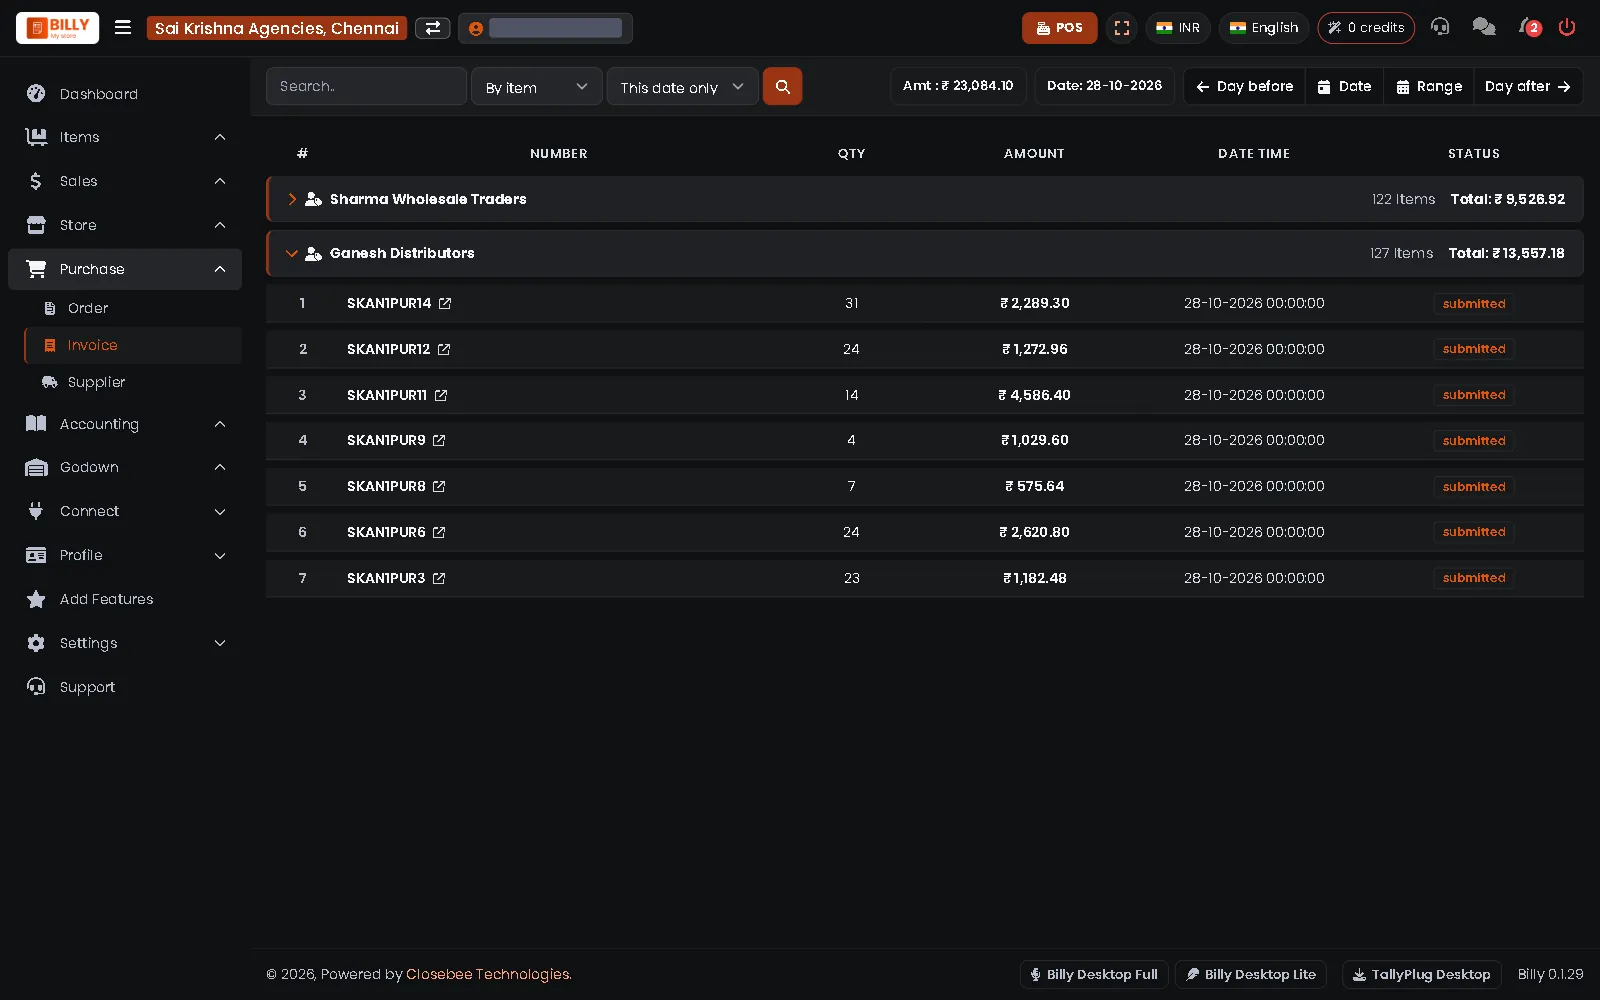
4Purchase invoices
Purchase > Invoice shows the bills you received, grouped by supplier. Tap a supplier to see each bill with quantity, amount and status.
-
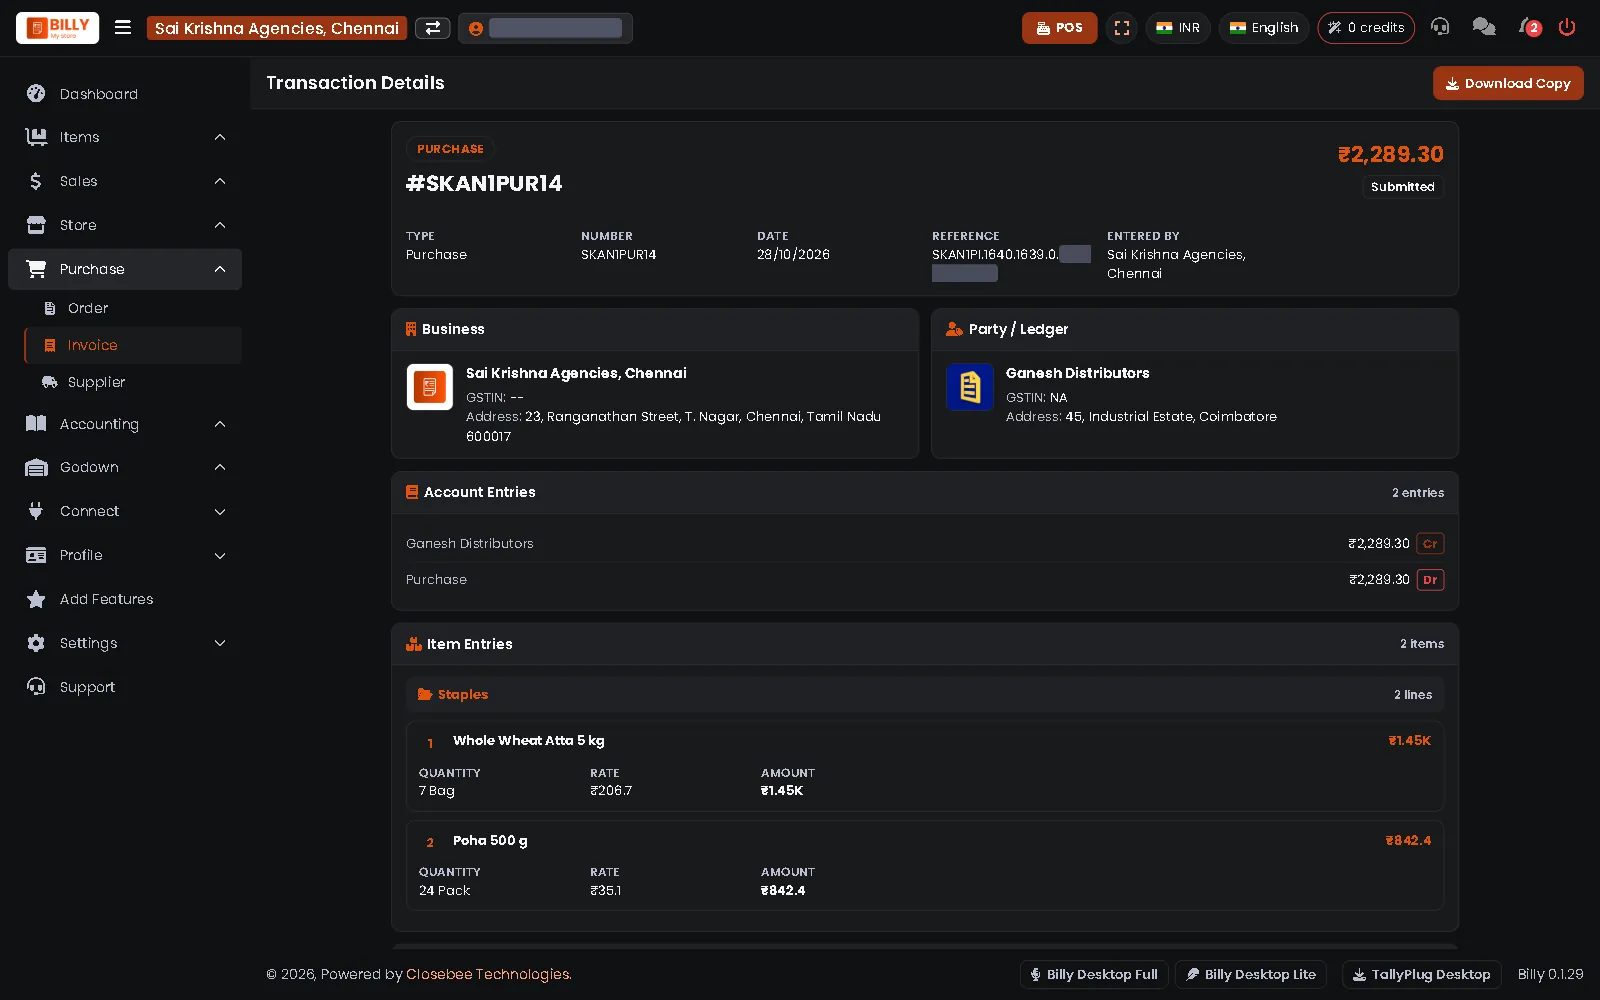
5Open a purchase bill
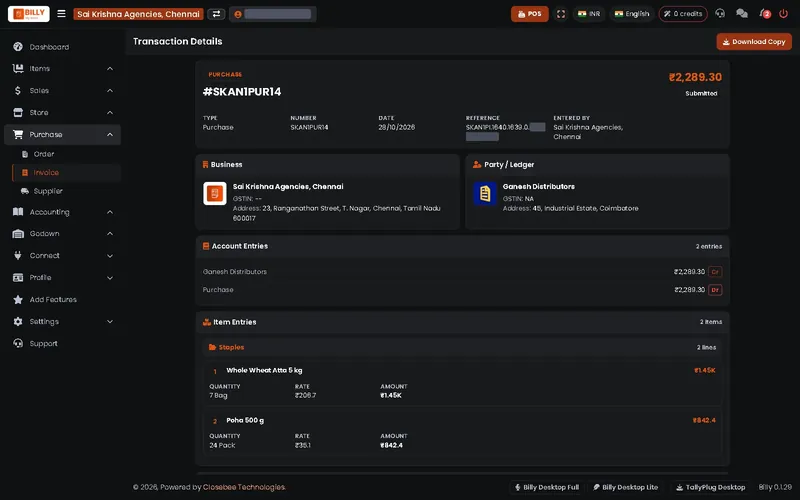
A purchase bill shows the supplier, the account entries and every item with quantity and rate. Press Download Copy to keep a copy.
-
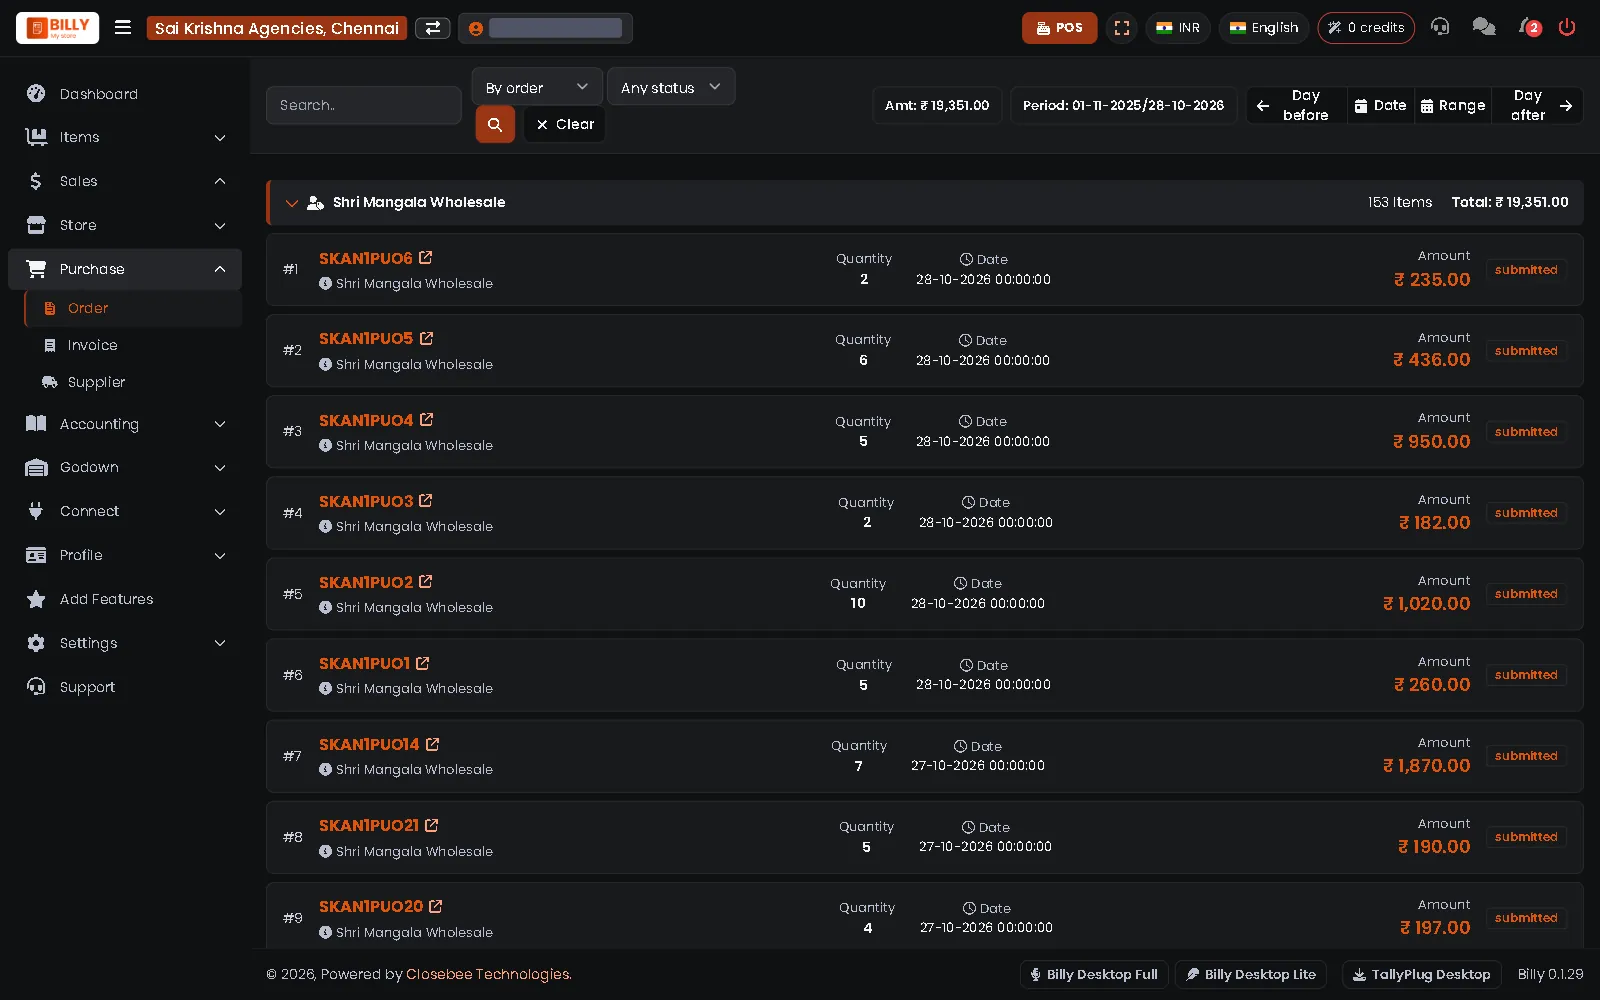
6Purchase orders
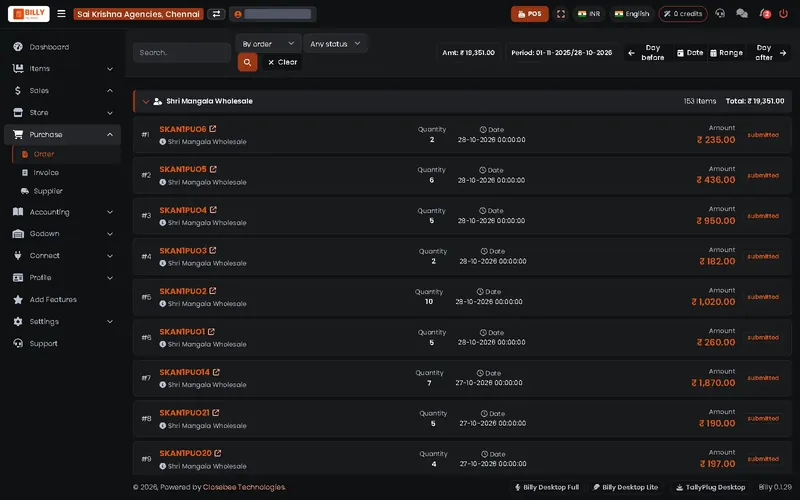
Purchase > Order lists the orders you placed. Tap a supplier to see each order and whether it is open, invoiced or a draft.
8Items
Everything you sell.
-
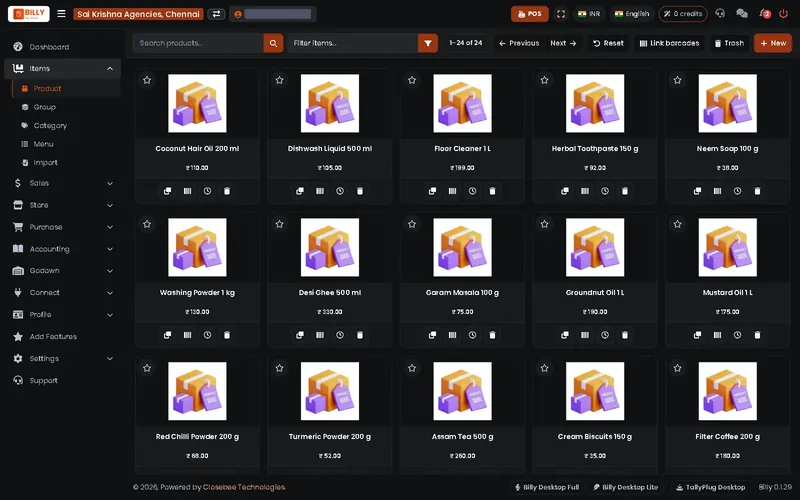
1Your items
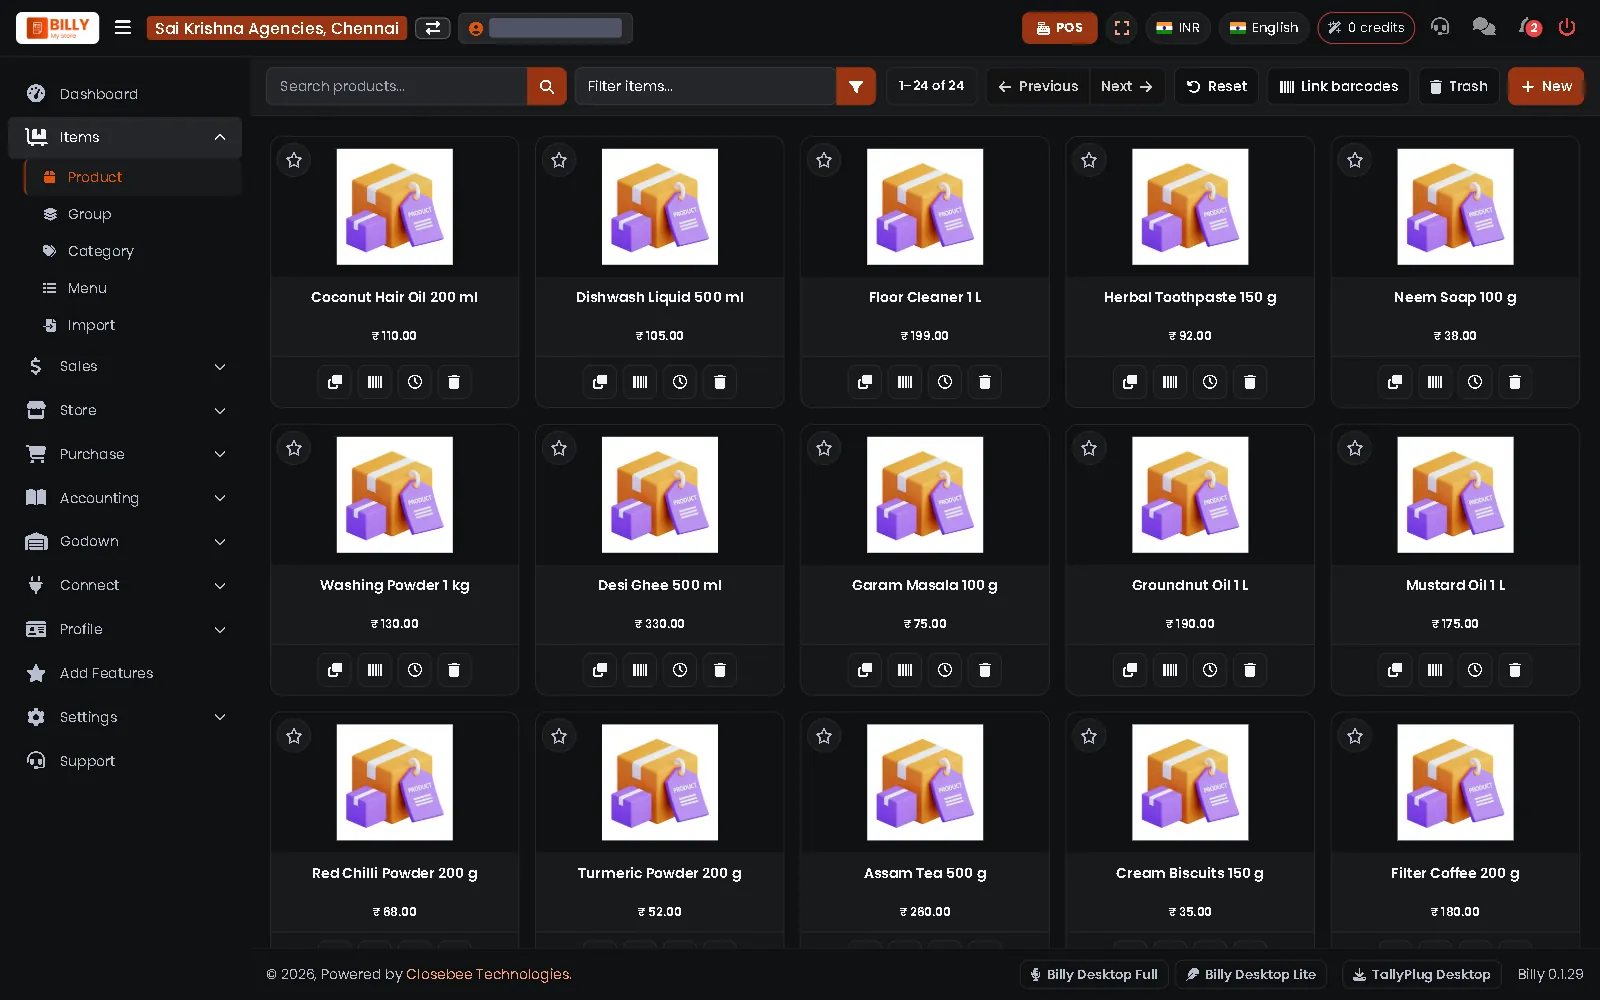
Items > Product shows everything you sell with its price. The buttons on each card copy an item, print barcodes or show who bought it. Press New to add an item.
-
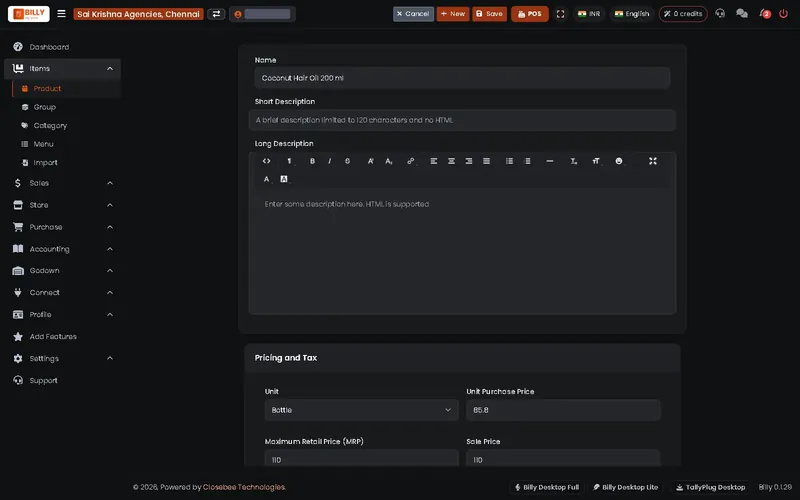
2Add or change an item
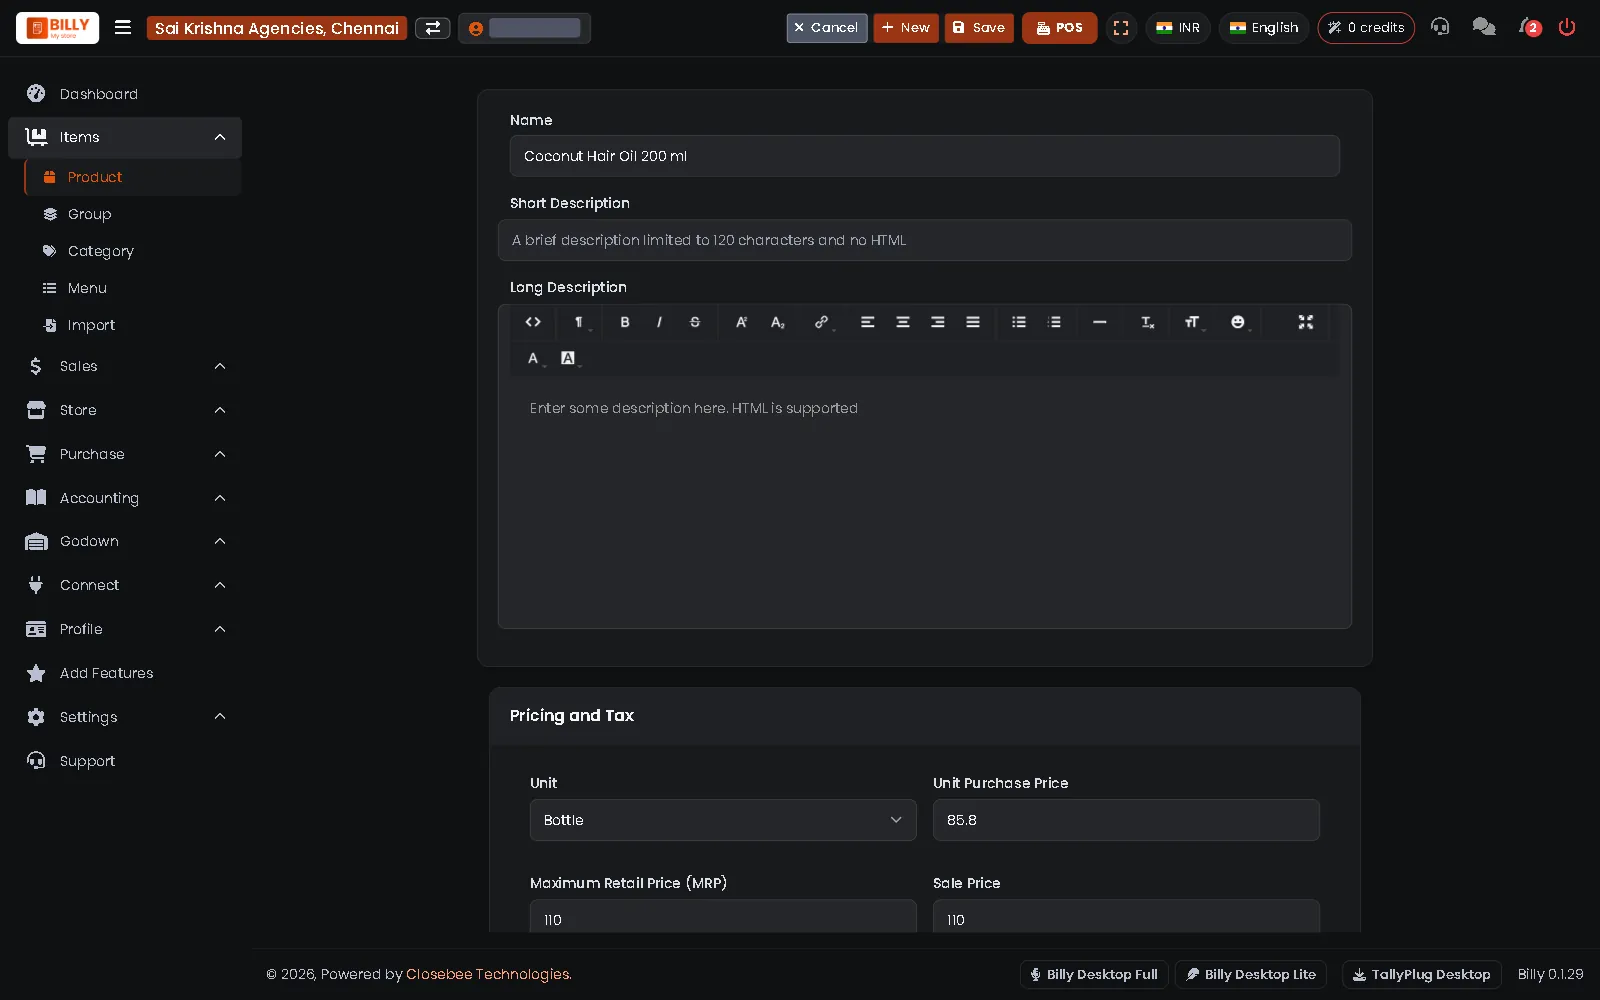
Fill in name, unit, purchase price, MRP, sale price and GST. Add a picture, group, category and the SKU or barcode, then press Save at the top.
-
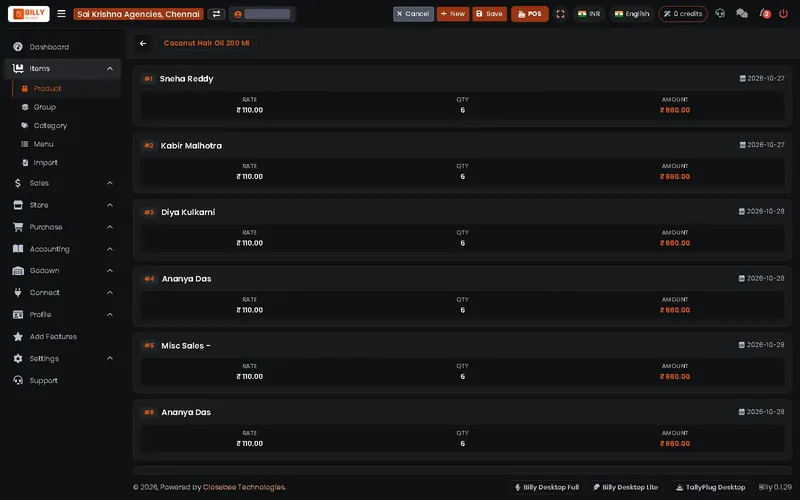
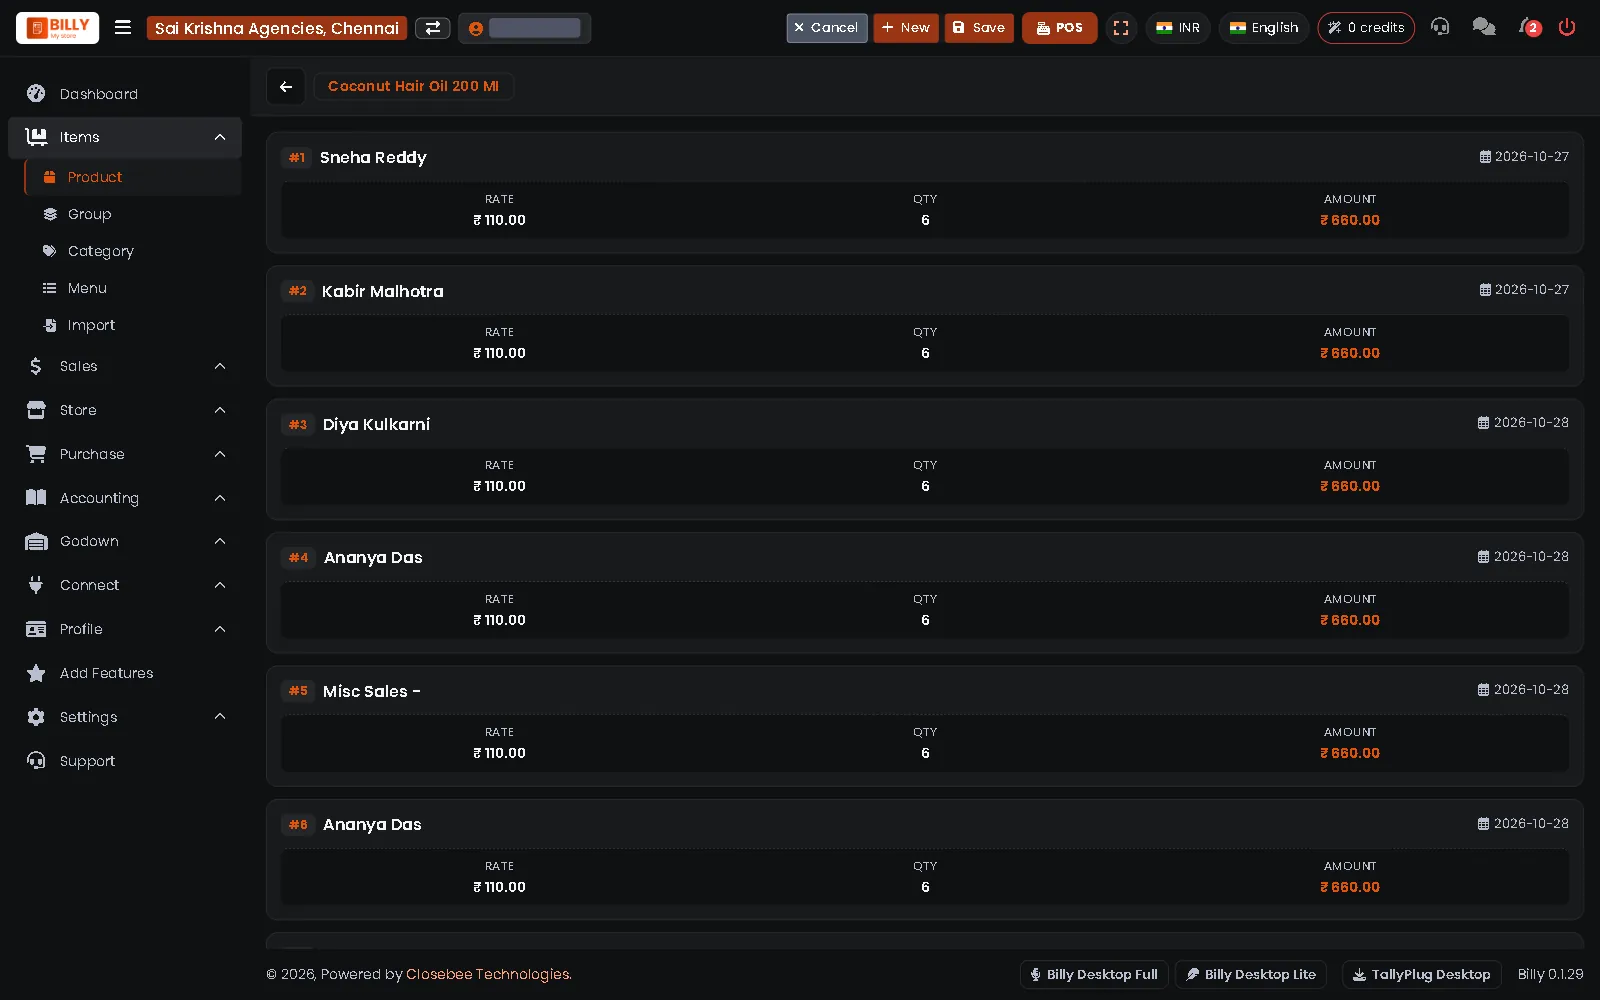
3Who bought this item
The history button on an item lists every sale of it: customer, date, rate, quantity and amount.
-
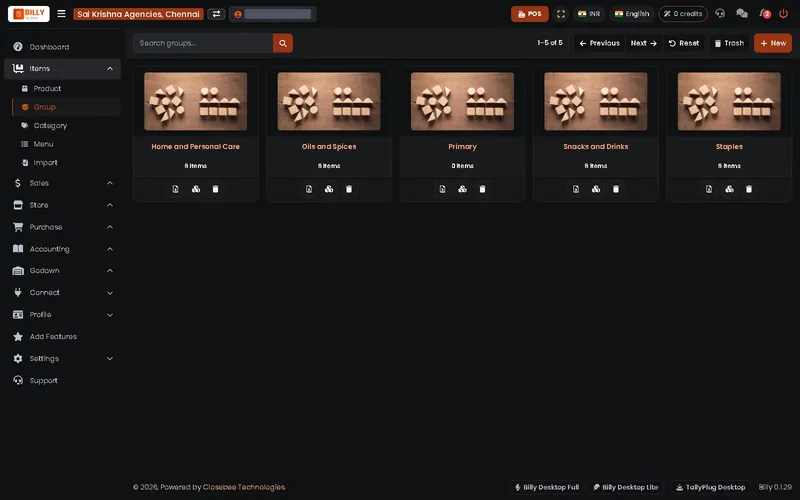
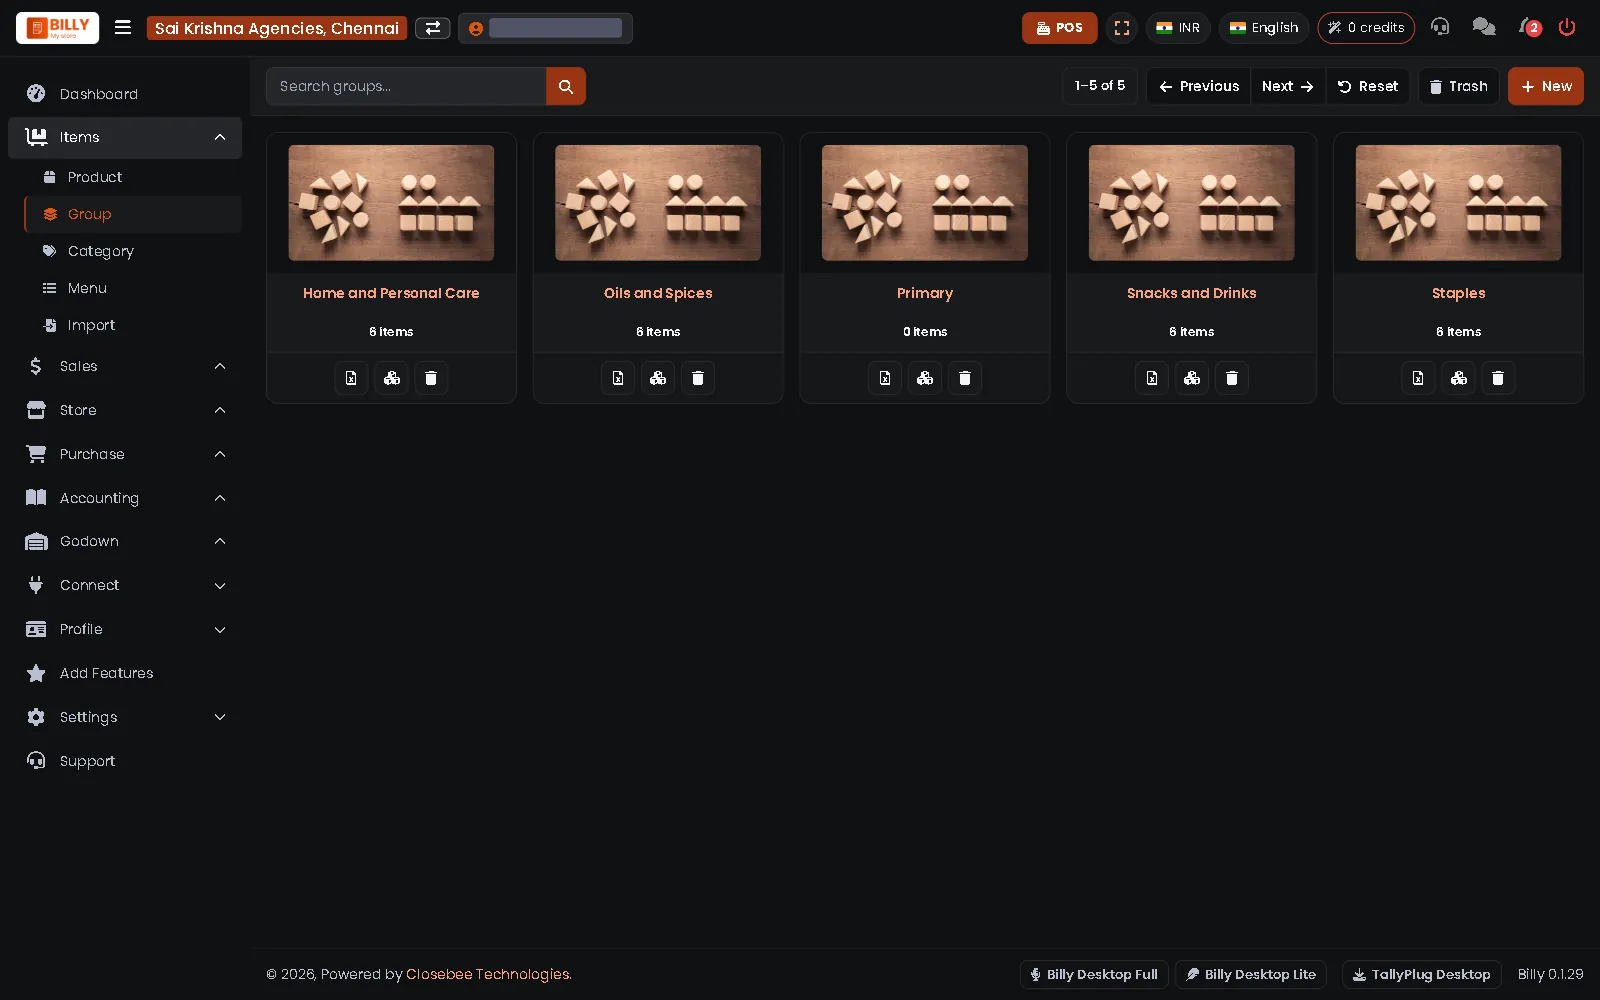
4Item groups
Items > Group sorts items into groups such as Staples or Snacks and Drinks, so the POS and reports are easier to read.
-
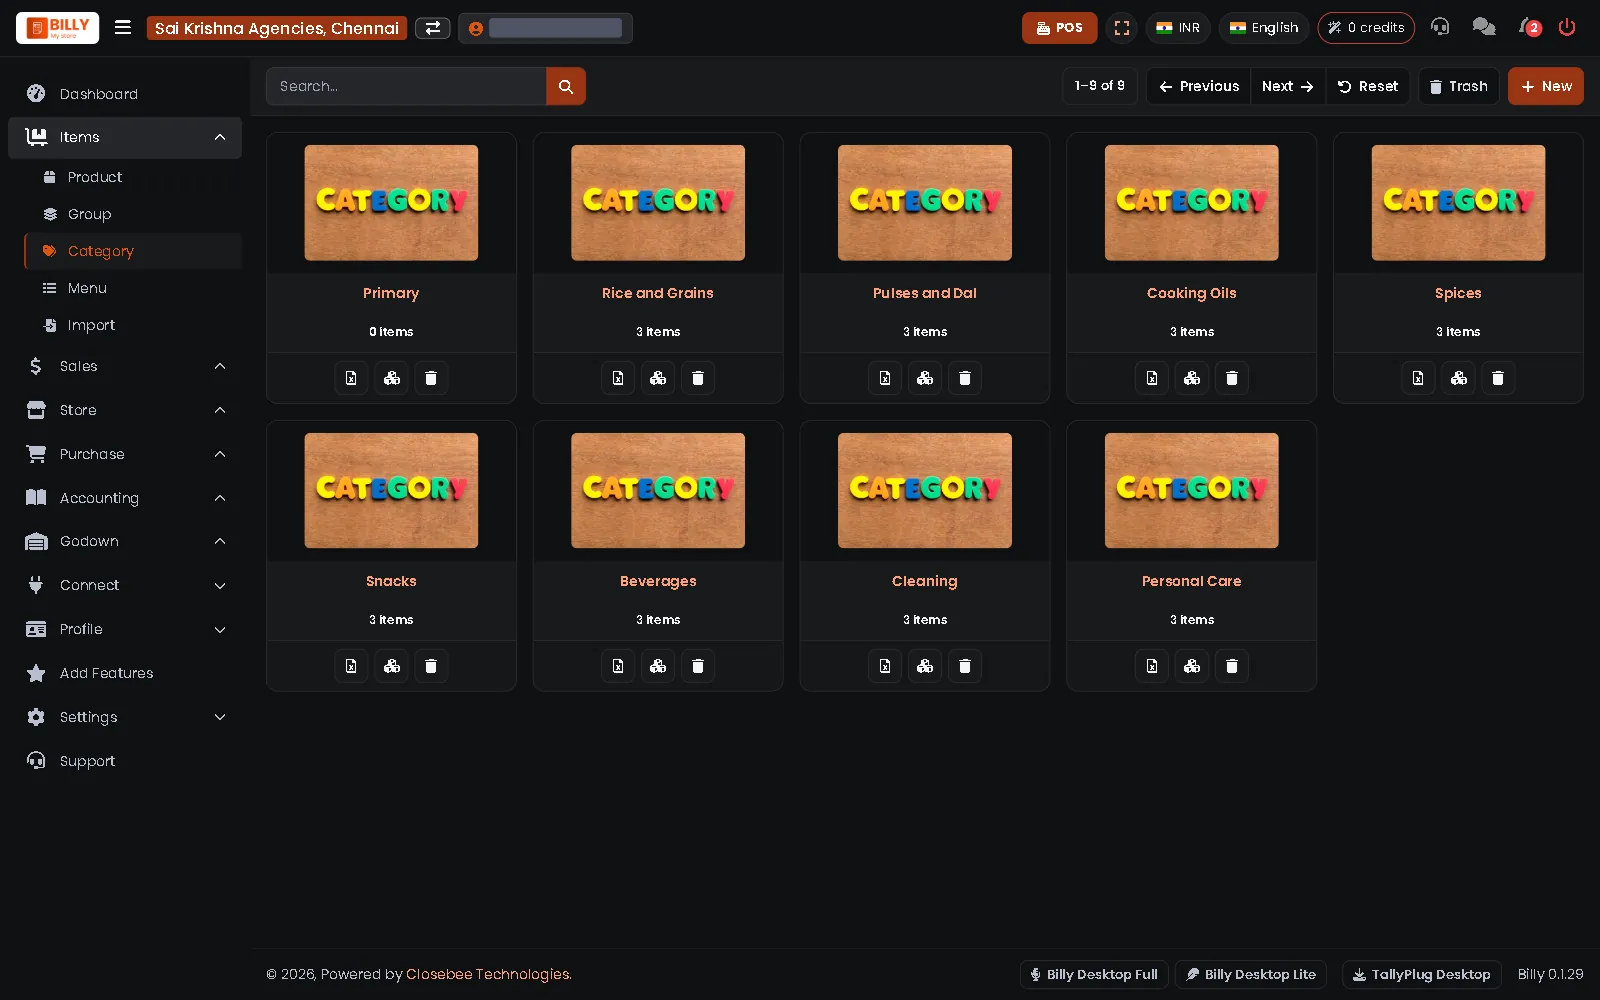
5Item categories
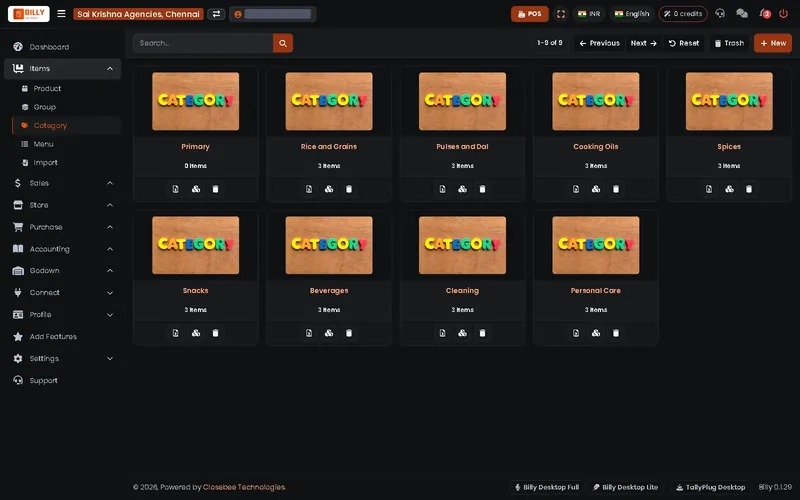
Items > Category is a second way to sort items, for example Pulses and Dal or Beverages. Press New to add one.
-
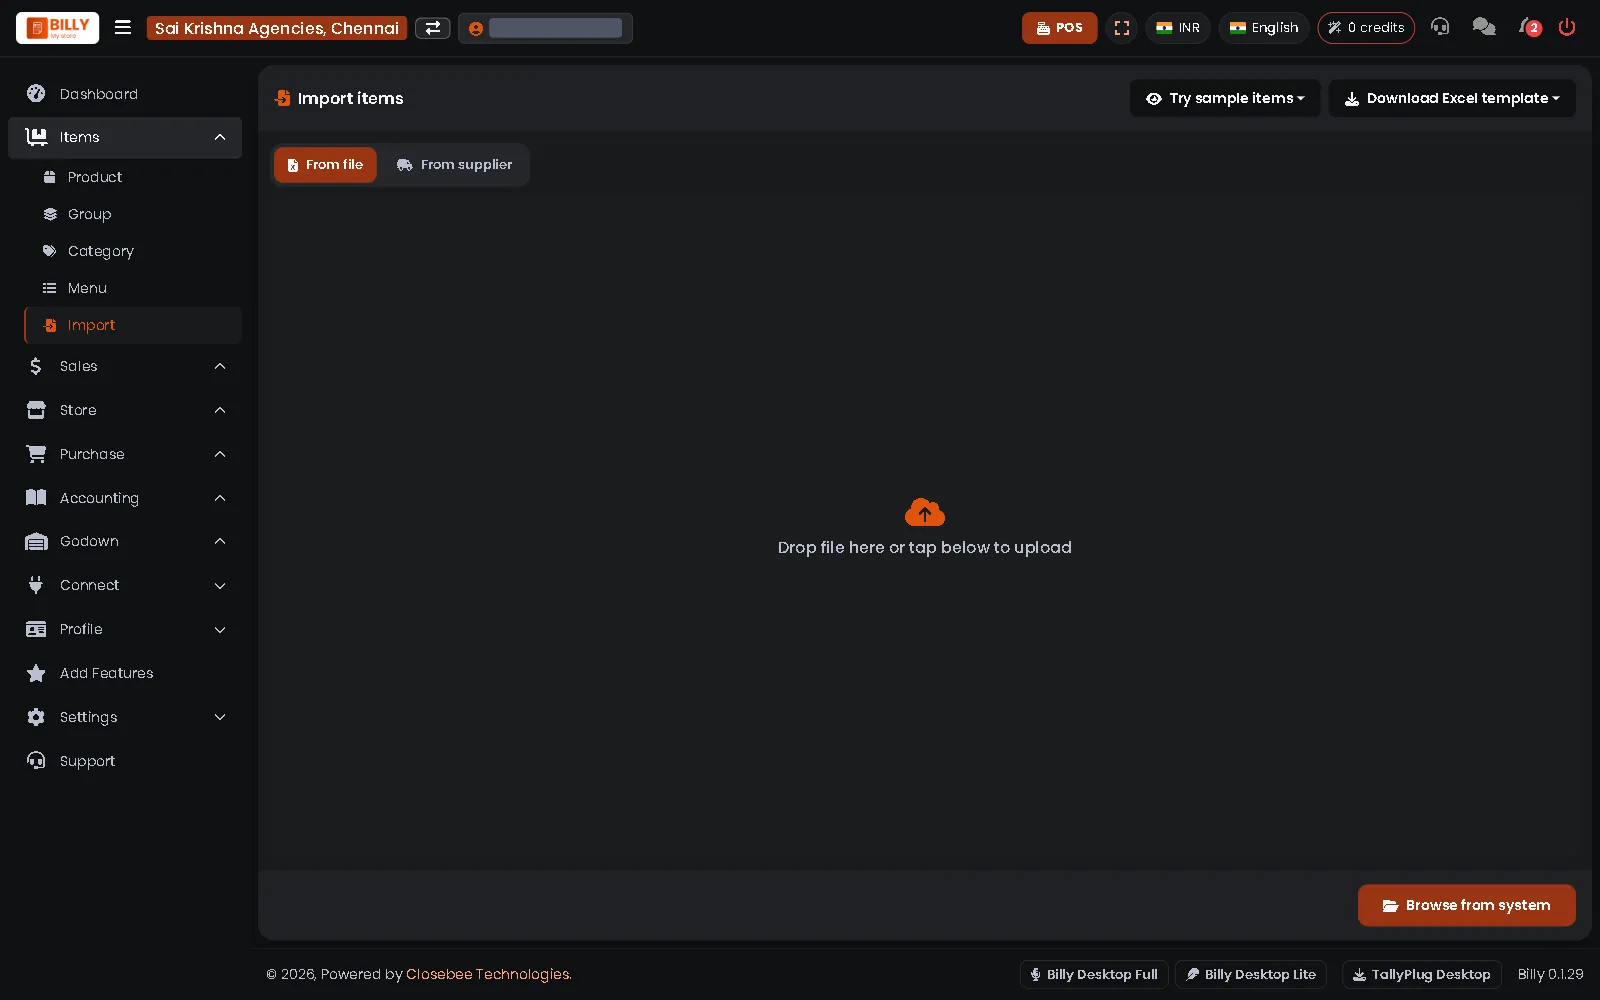
6Import from Excel
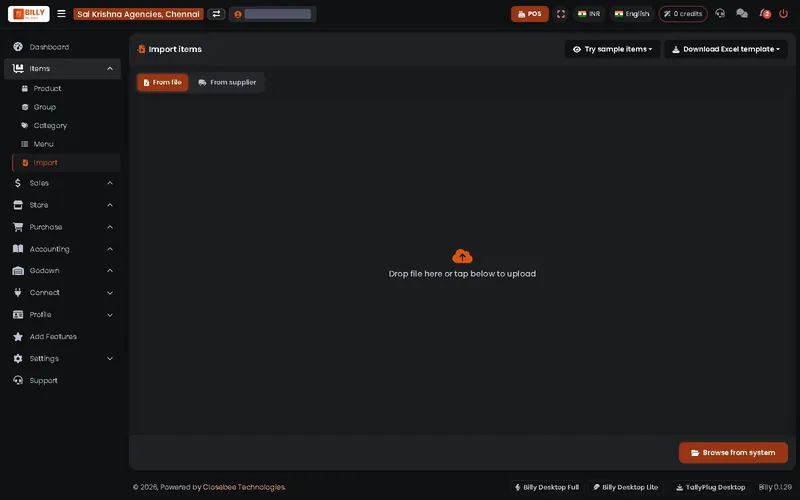
Items > Import loads many items at once. Download the Excel template, fill it in and drop the file here, or bring in items from a supplier.
9Stock and godowns
How much you have, and where.
-
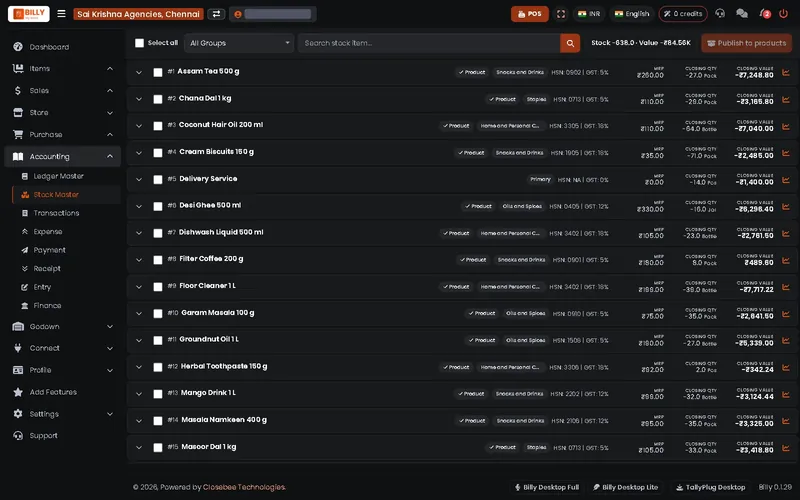
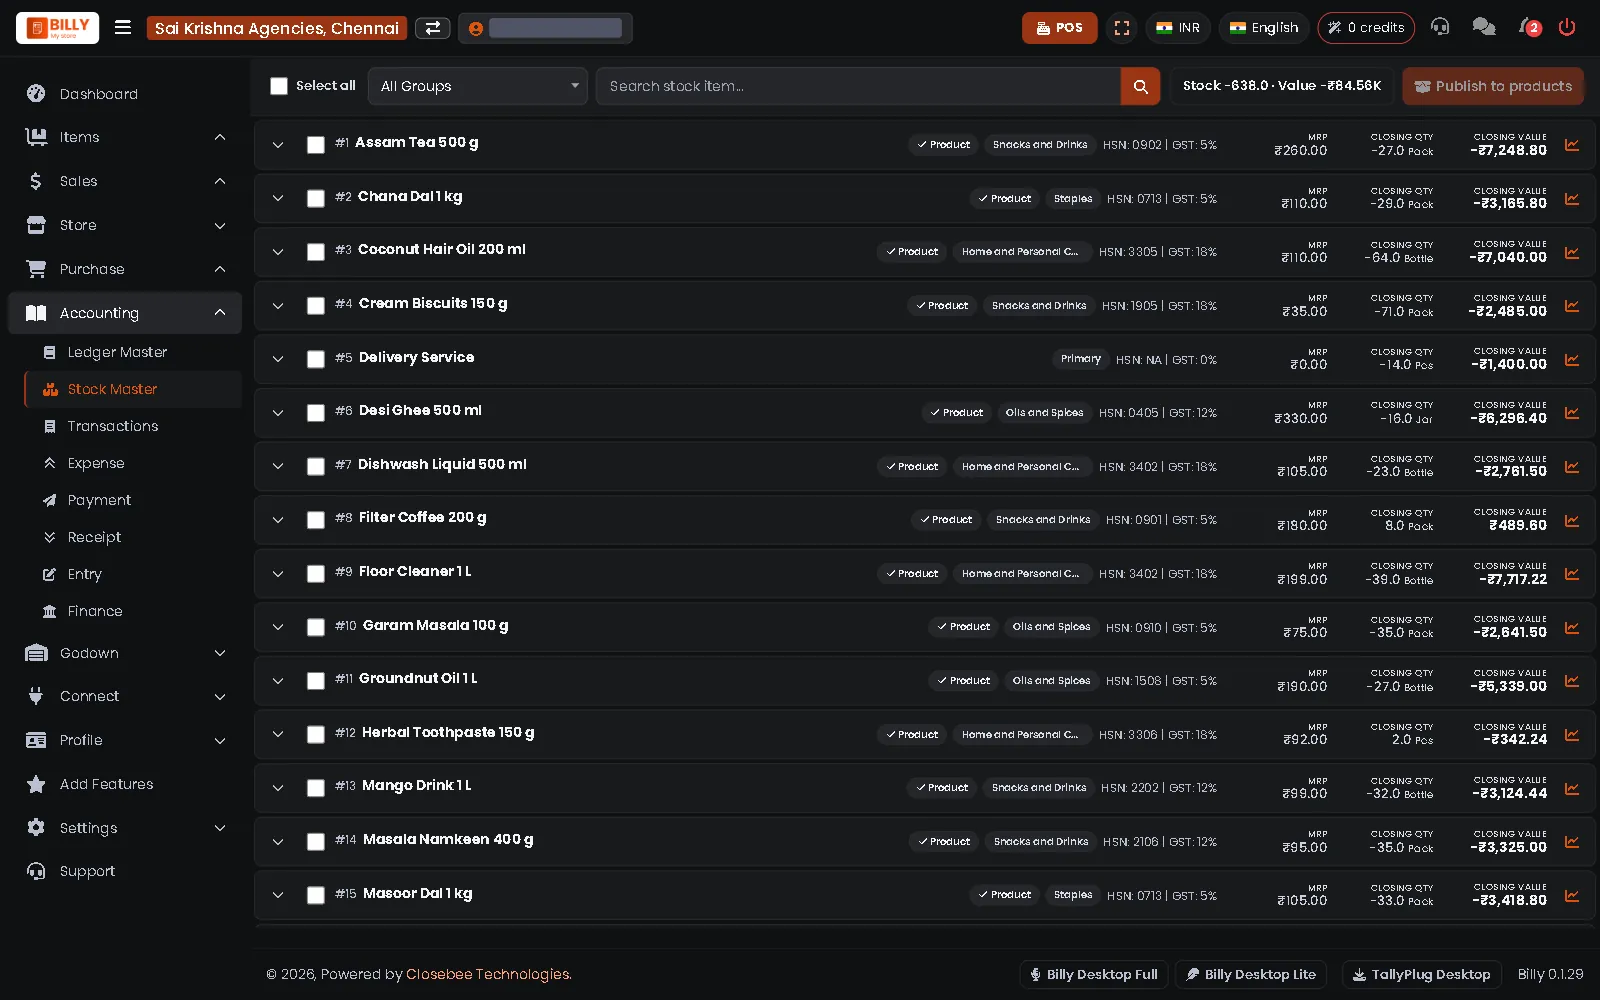
1Stock of every item
Accounting > Stock Master shows each item's closing stock and value. A red figure means more was sold than recorded as bought: check purchases or add stock.
-
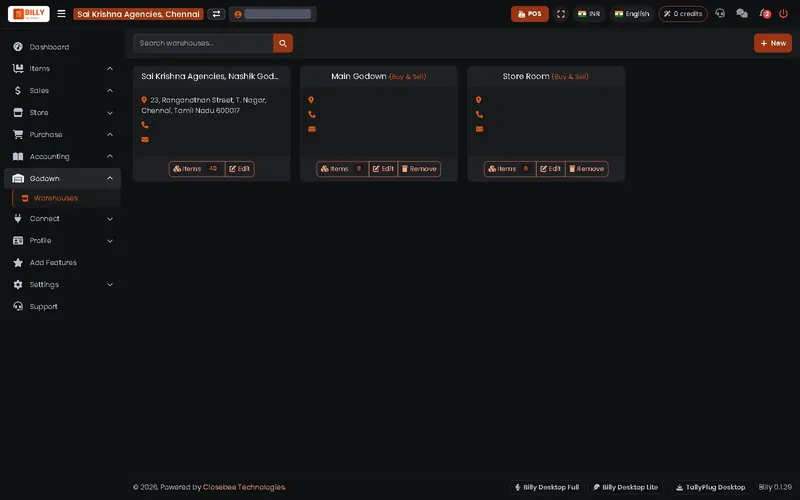
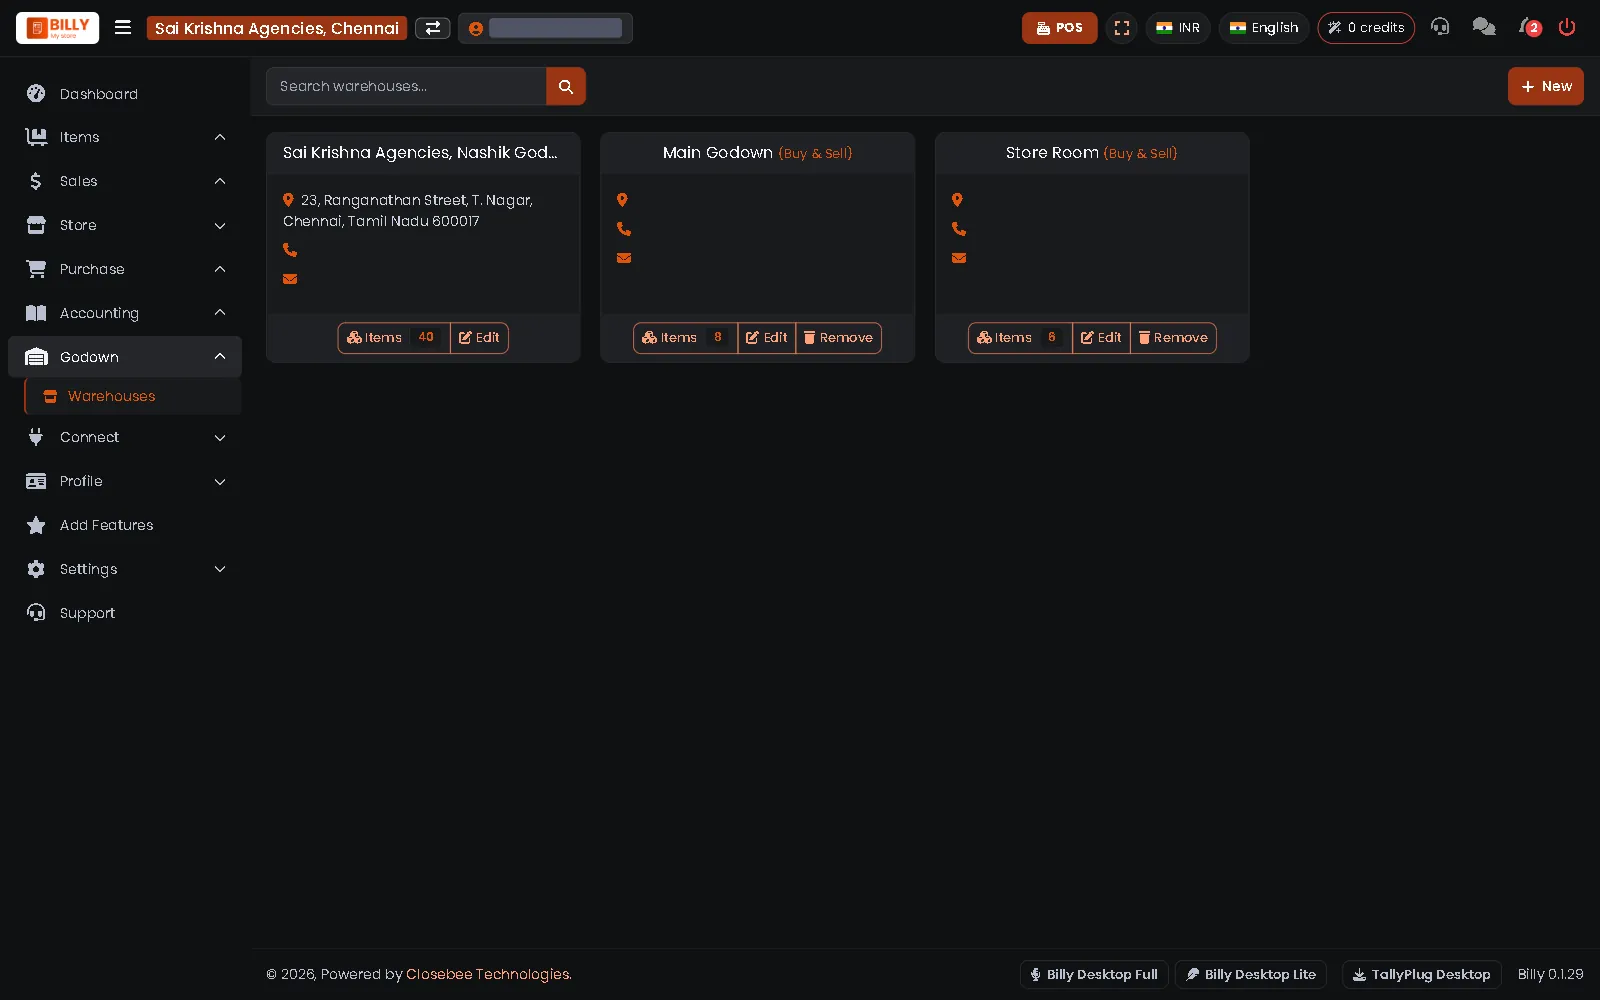
2Godowns
Godown > Warehouses lists your shop and store rooms. Press Items on a godown to see what is kept there, or New to add one.
-
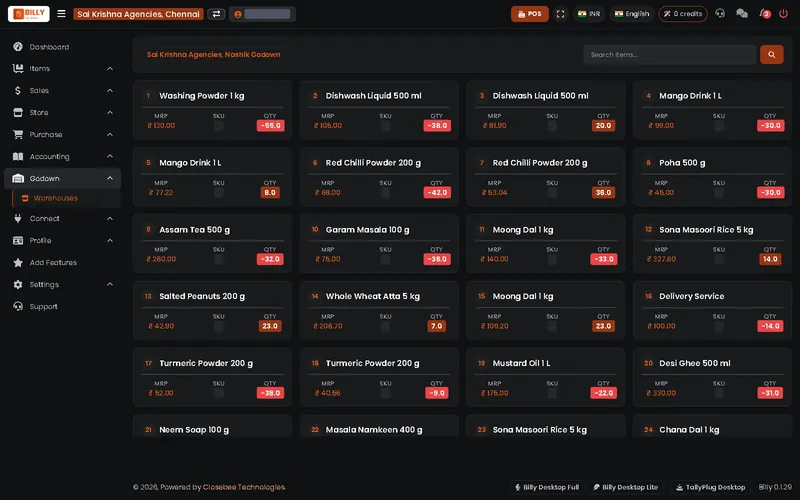
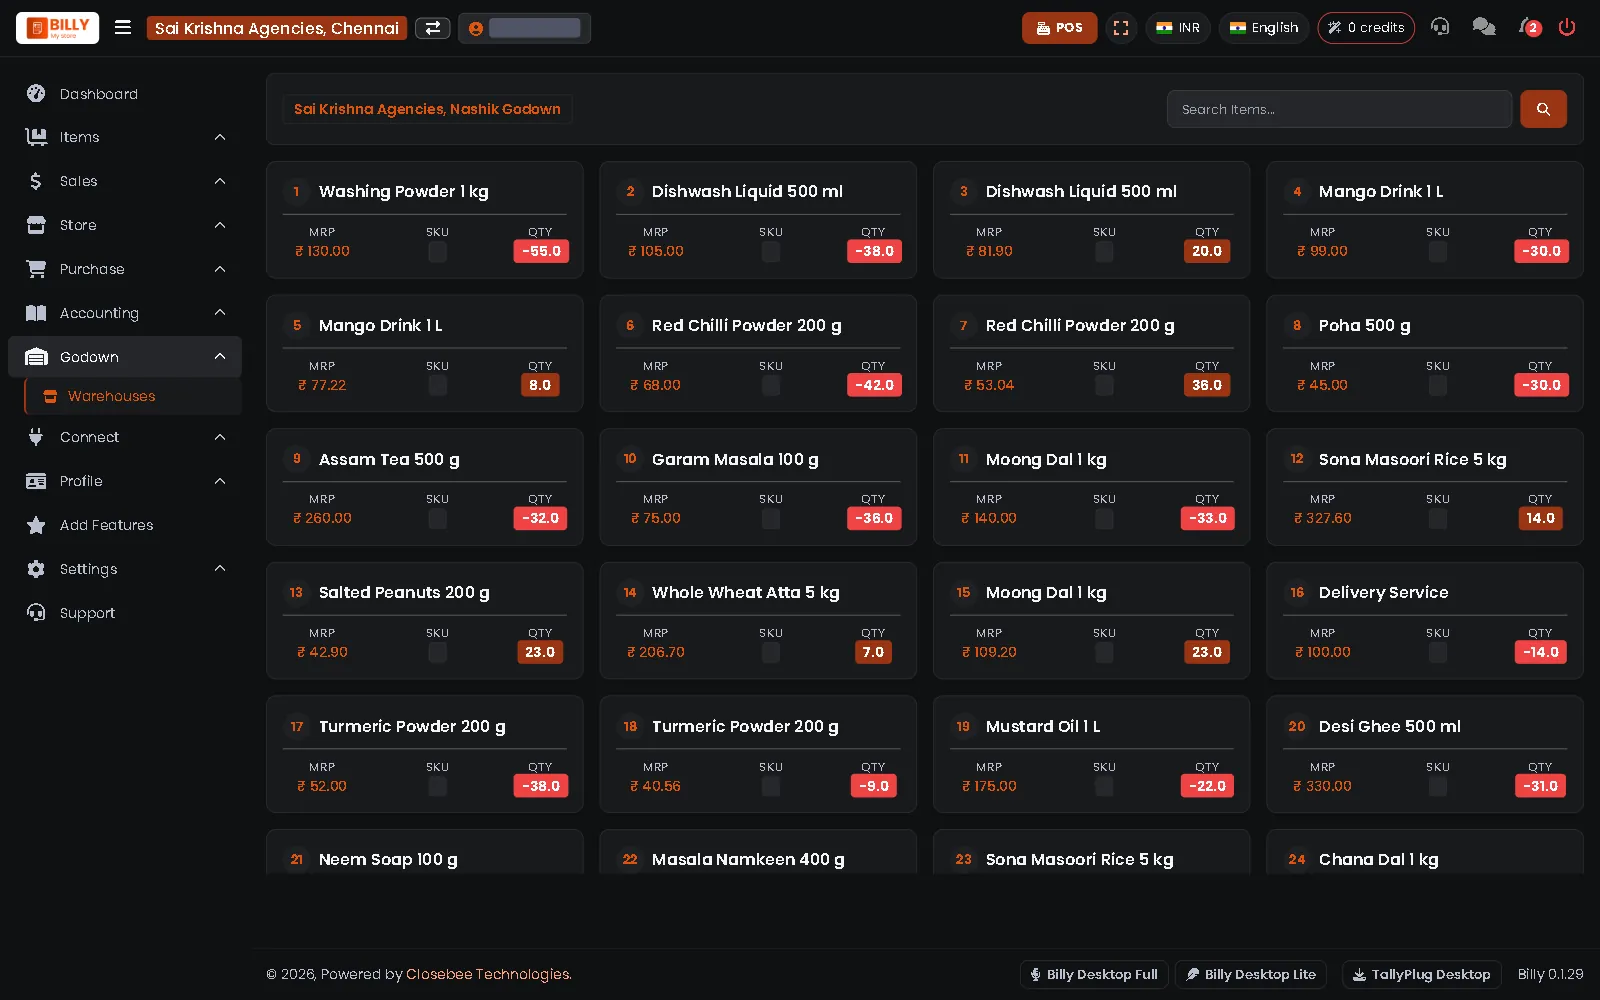
3Items in a godown
Each godown lists its items with MRP and quantity, so you know where stock sits.
10Customers
Balances and who to call.
-
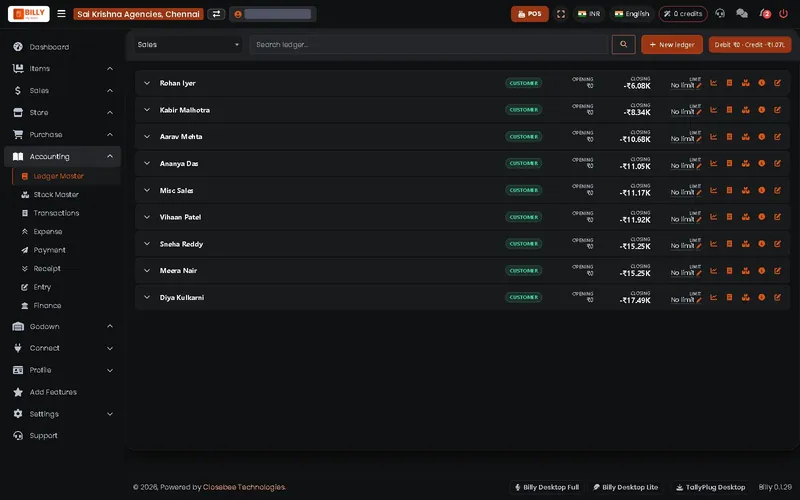
1Customer accounts
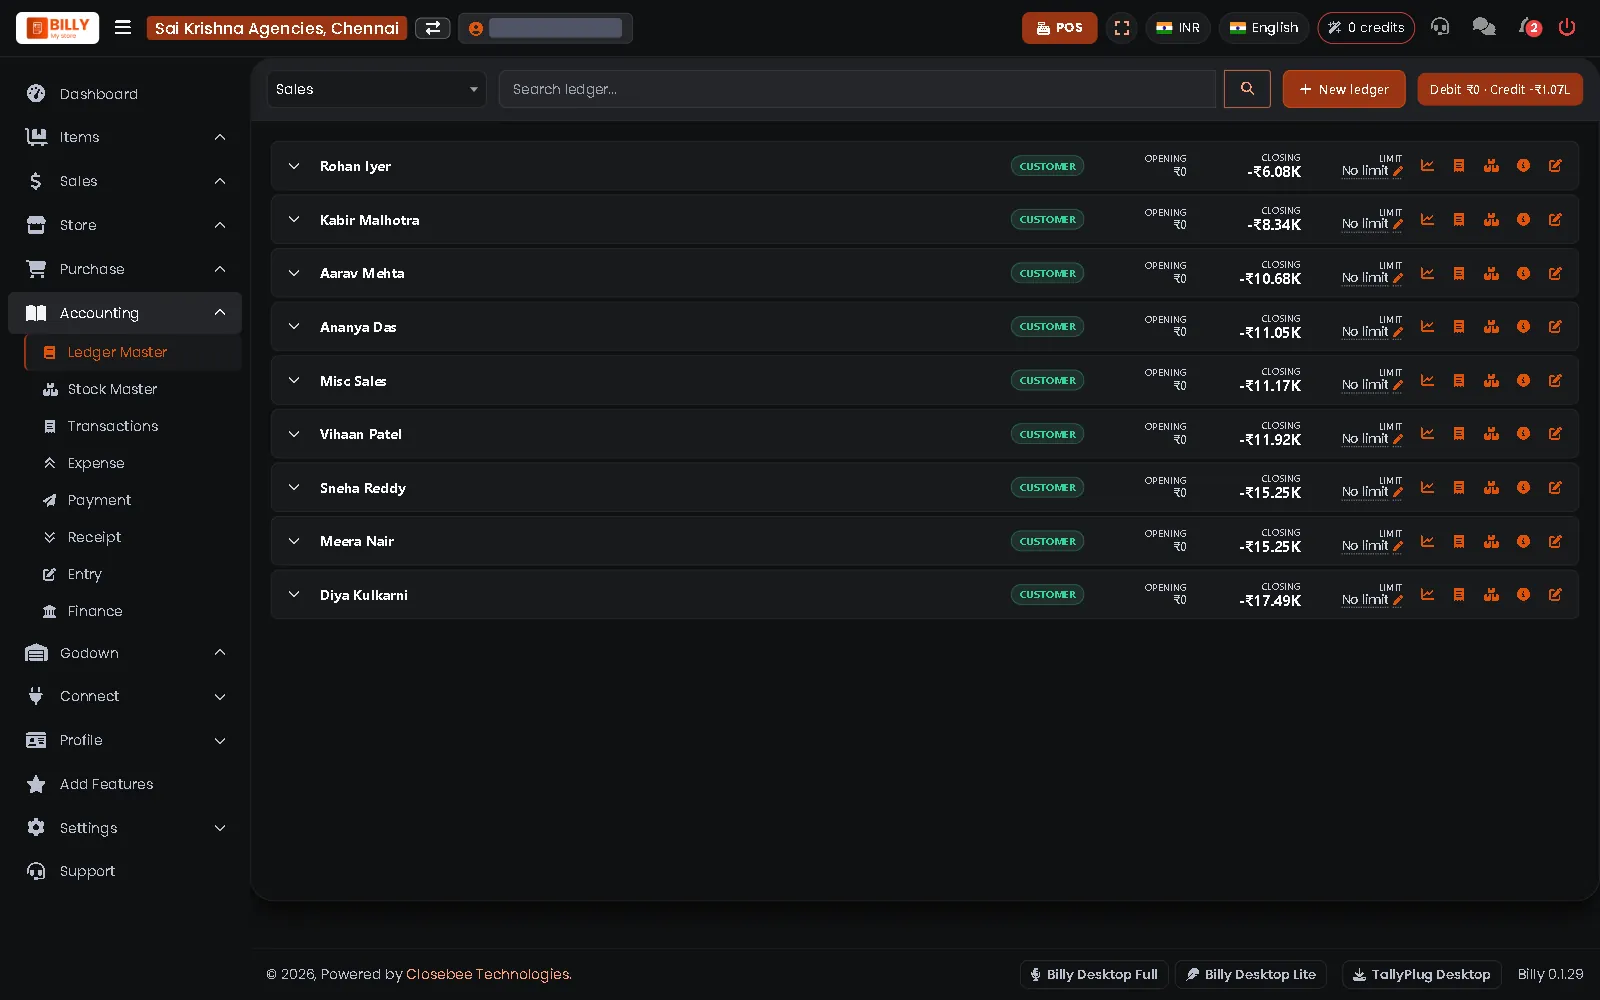
Accounting > Ledger Master lists every customer with opening and closing balance and credit limit. The row buttons open their statement or invoices, or edit them.
-
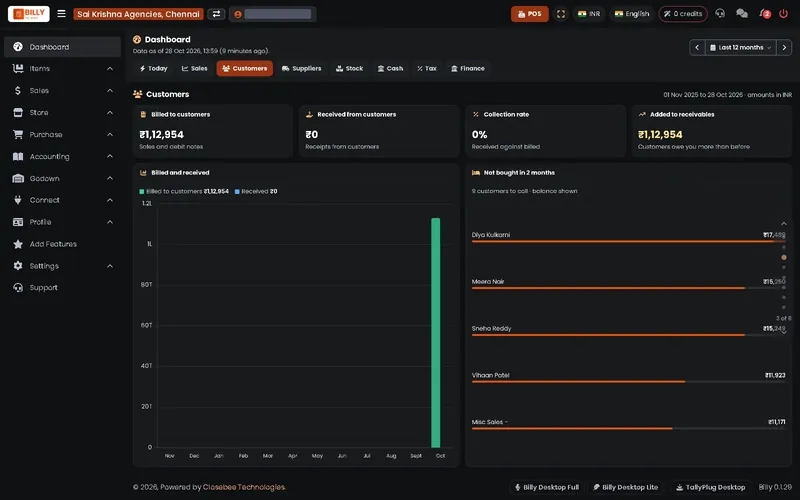
2Customers on the dashboard
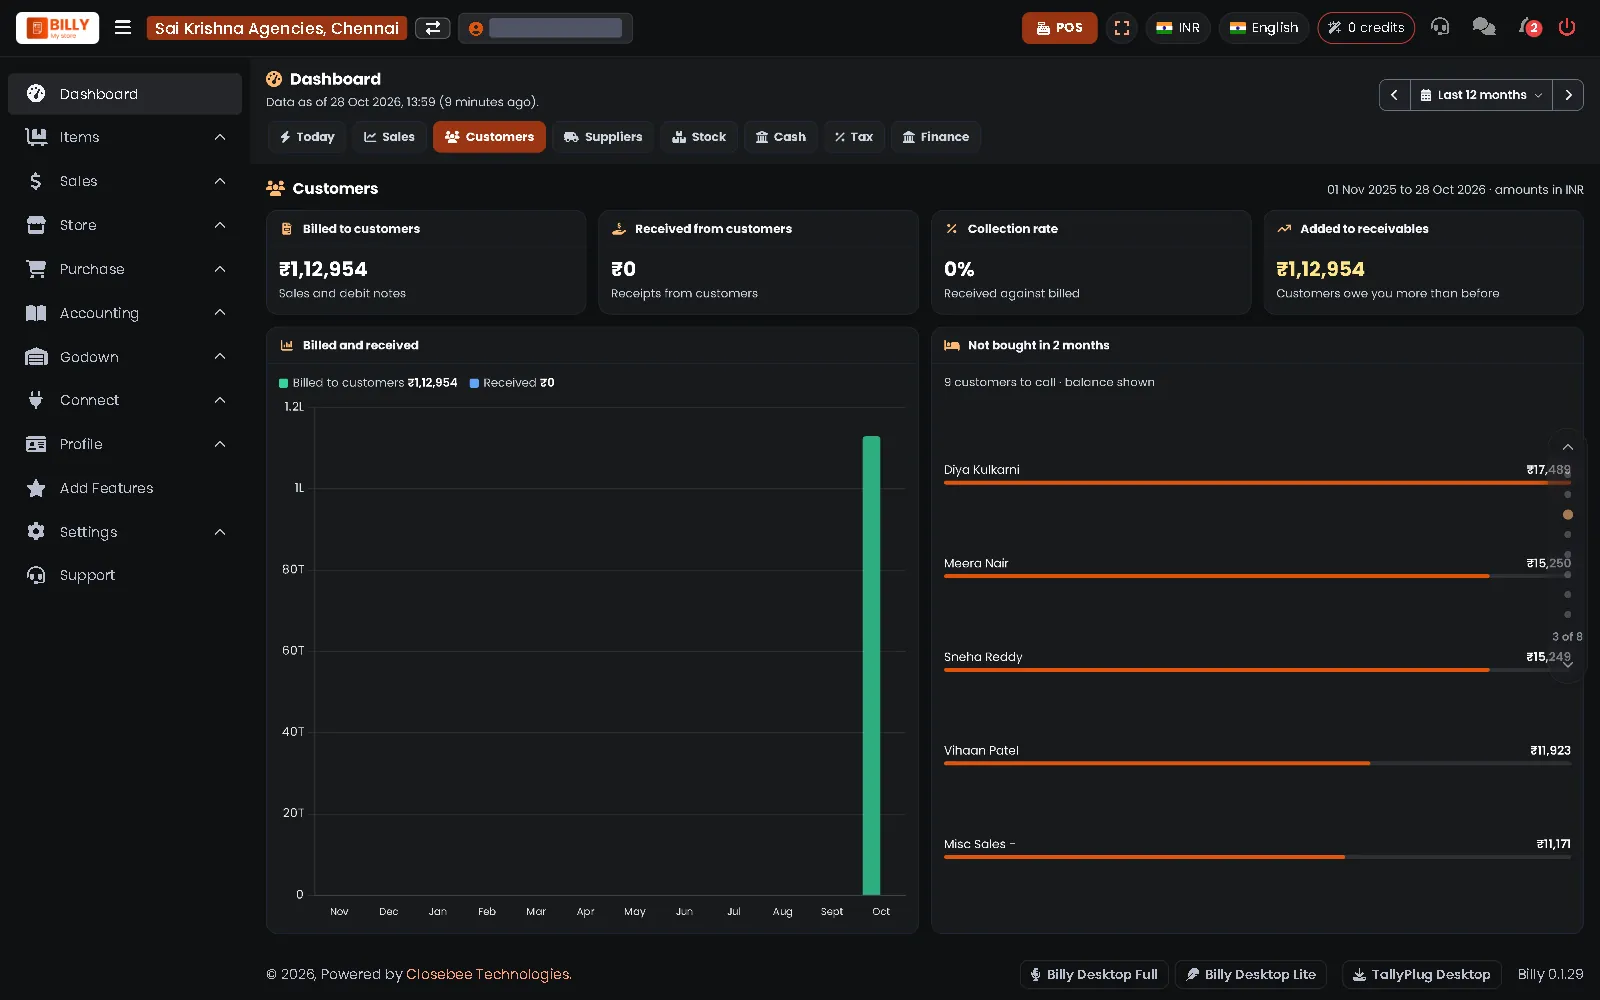
The Customers tab shows what you billed, what you received and who has not bought in two months.
11Campaigns and banners
Menus, banners and festival offers.
-
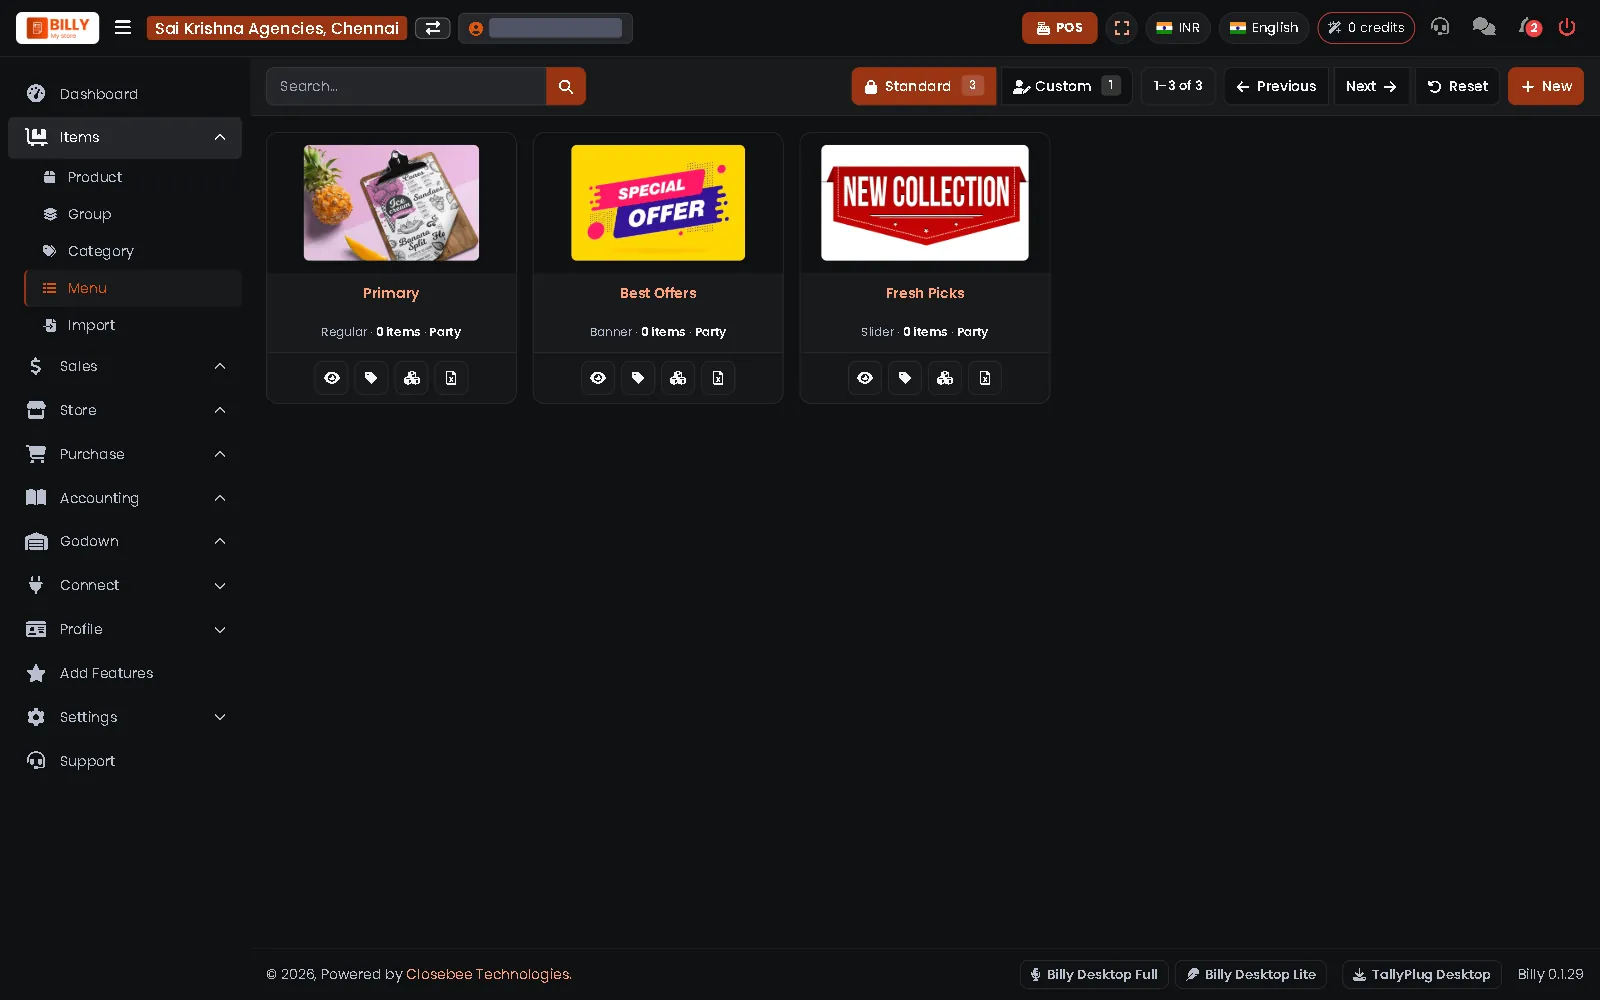
1Menus, banners and sliders
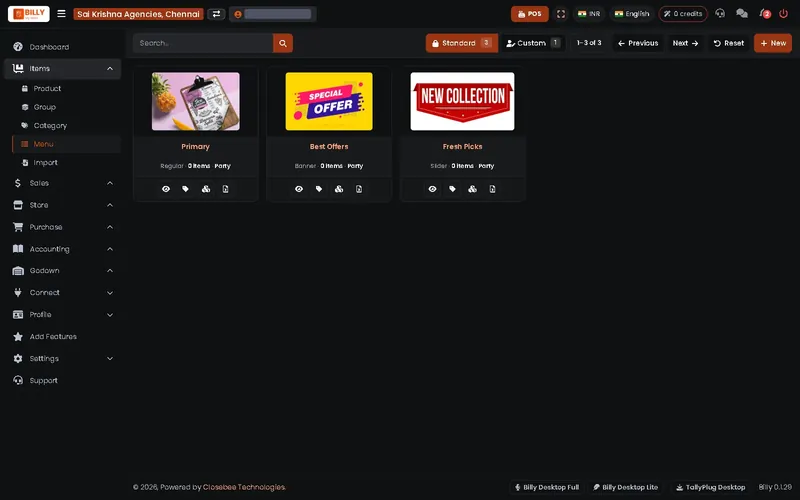
Items > Menu holds the item lists your store and POS show, such as a Best Offers banner or a Fresh Picks slider. Press New to make one for a festival or offer.
-
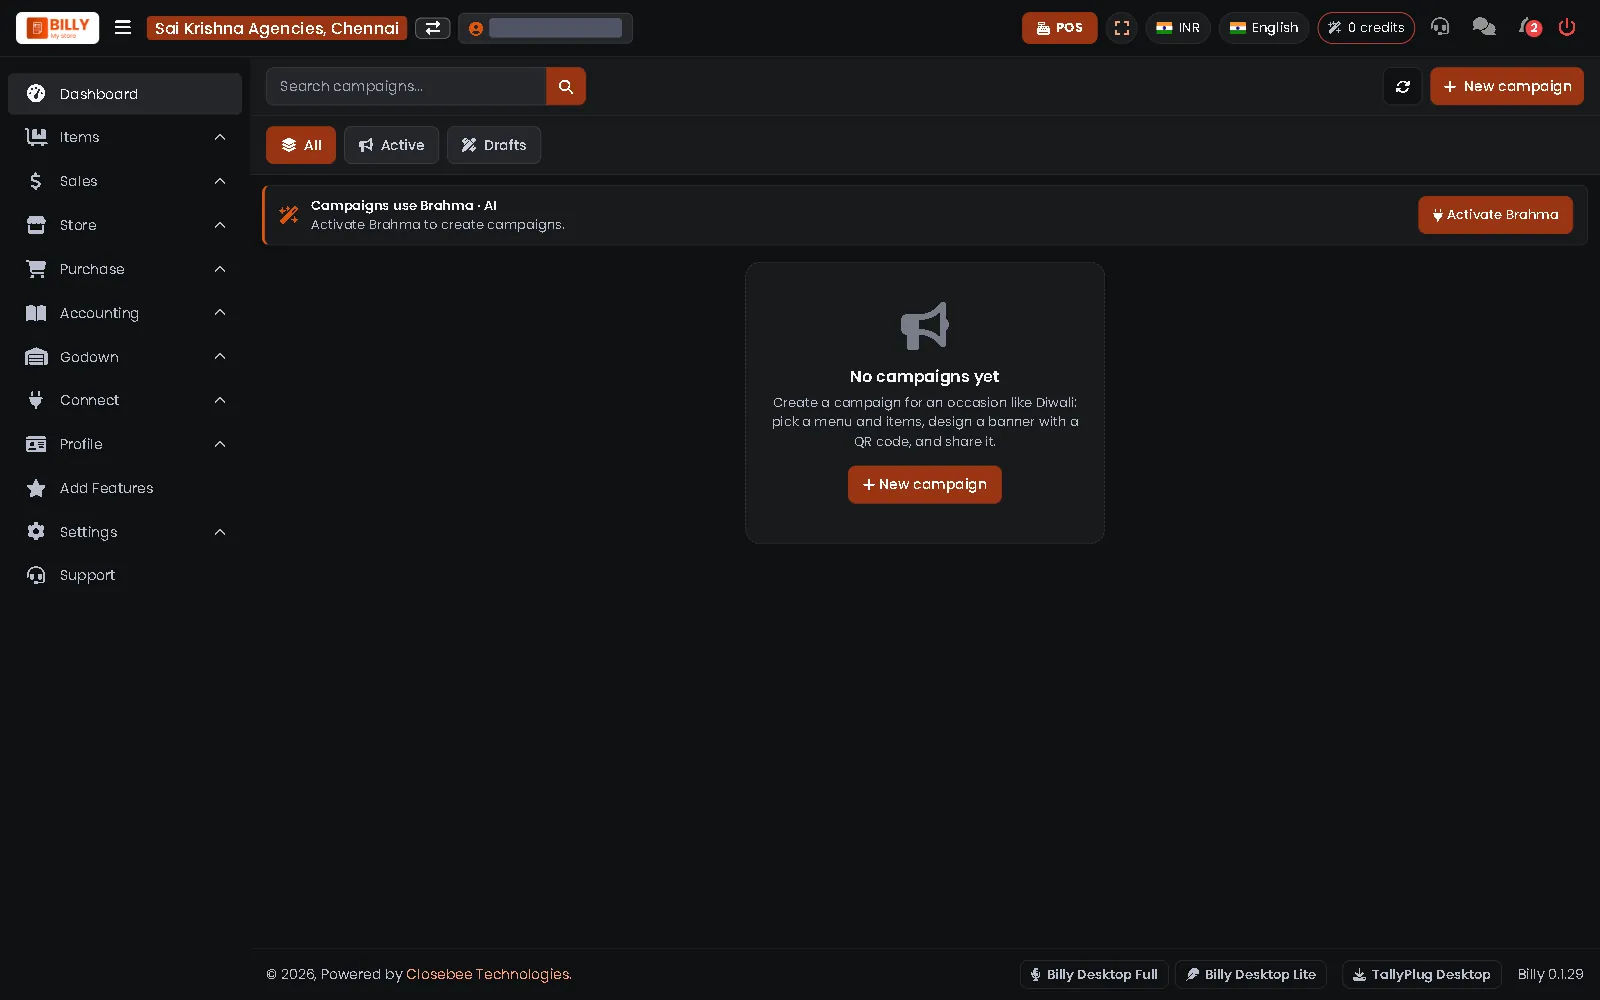
2Campaigns
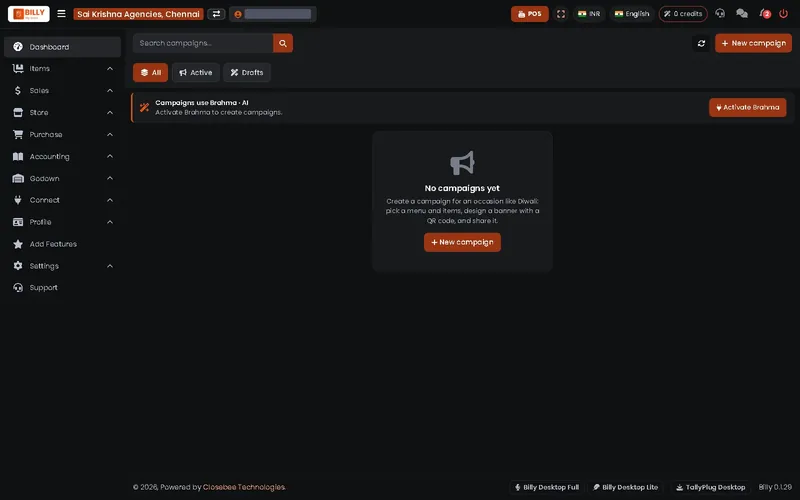
A campaign takes a menu and items and turns them into a banner with a QR code to share. The screen asks you to activate Brahma before you can create one.
12Store
Your shop online.
-
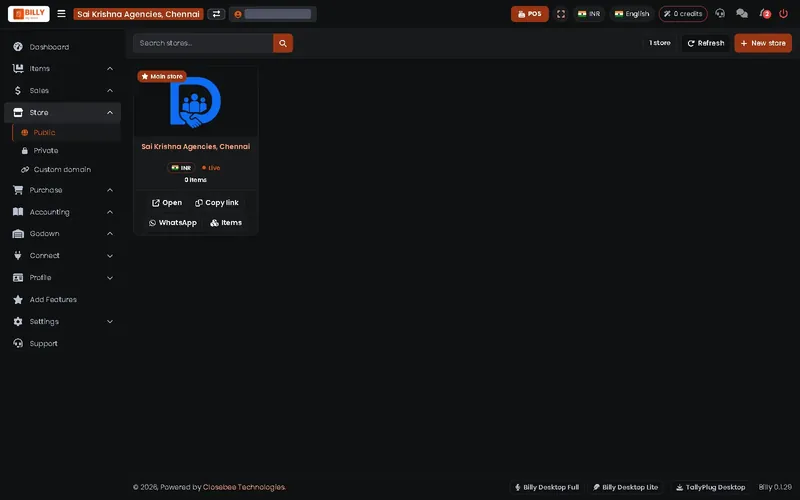
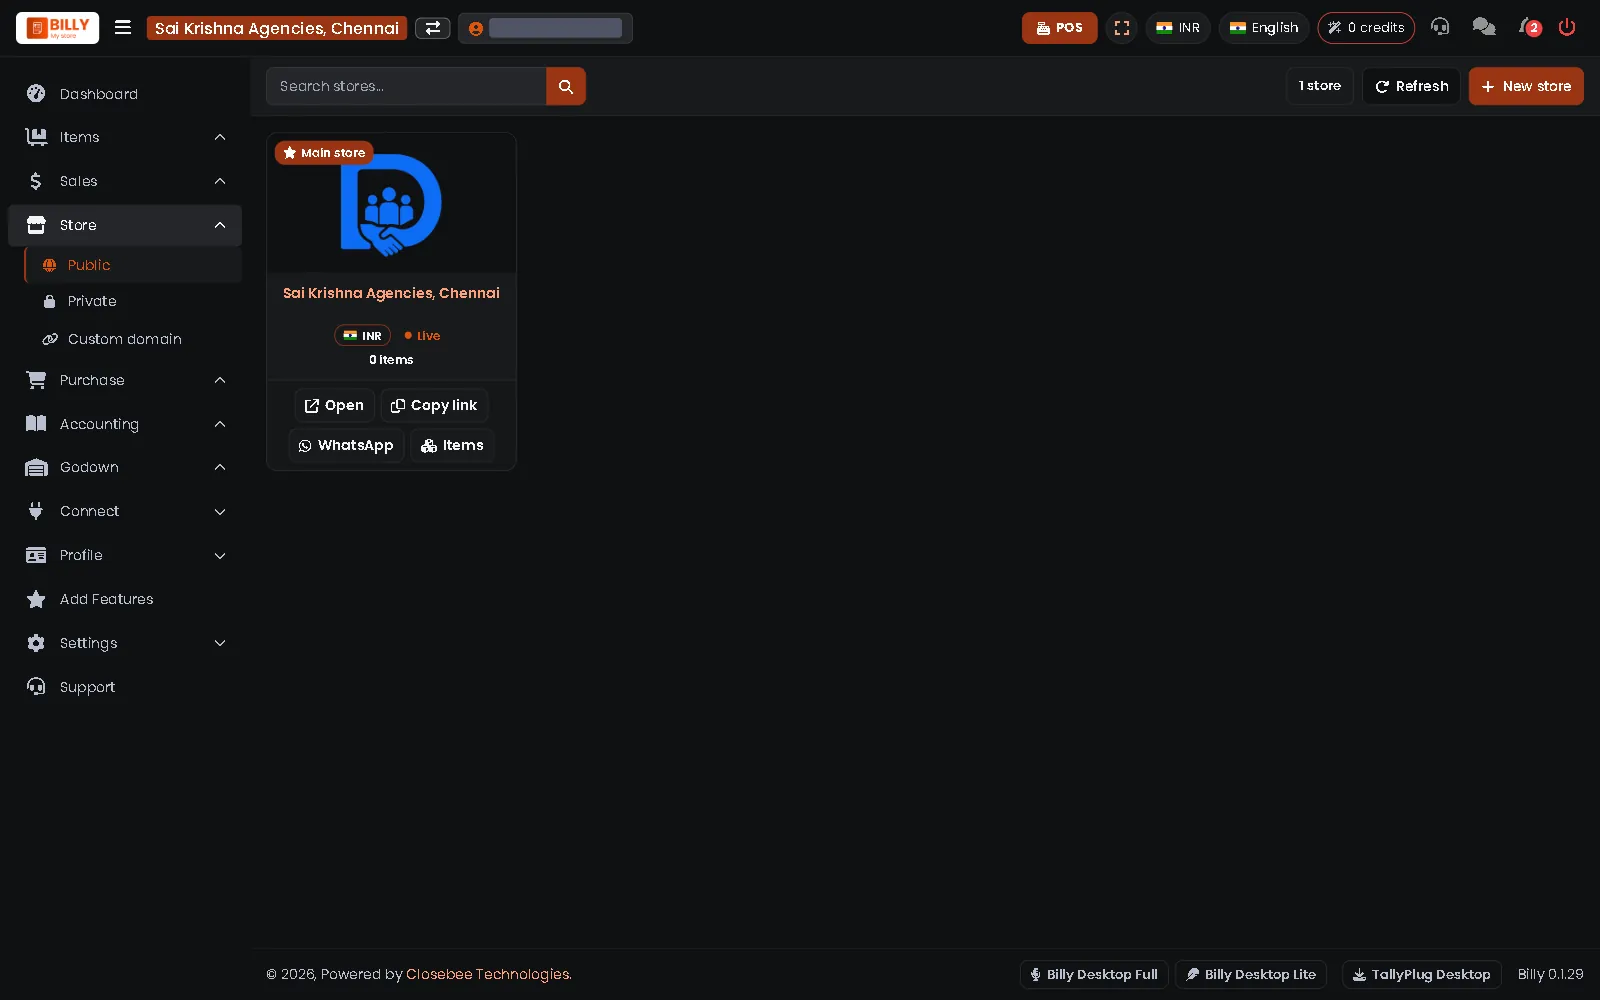
1Your public store
Store > Public shows your online store. Press Open to see it, Copy link or WhatsApp to share it, and Items to choose what it sells.
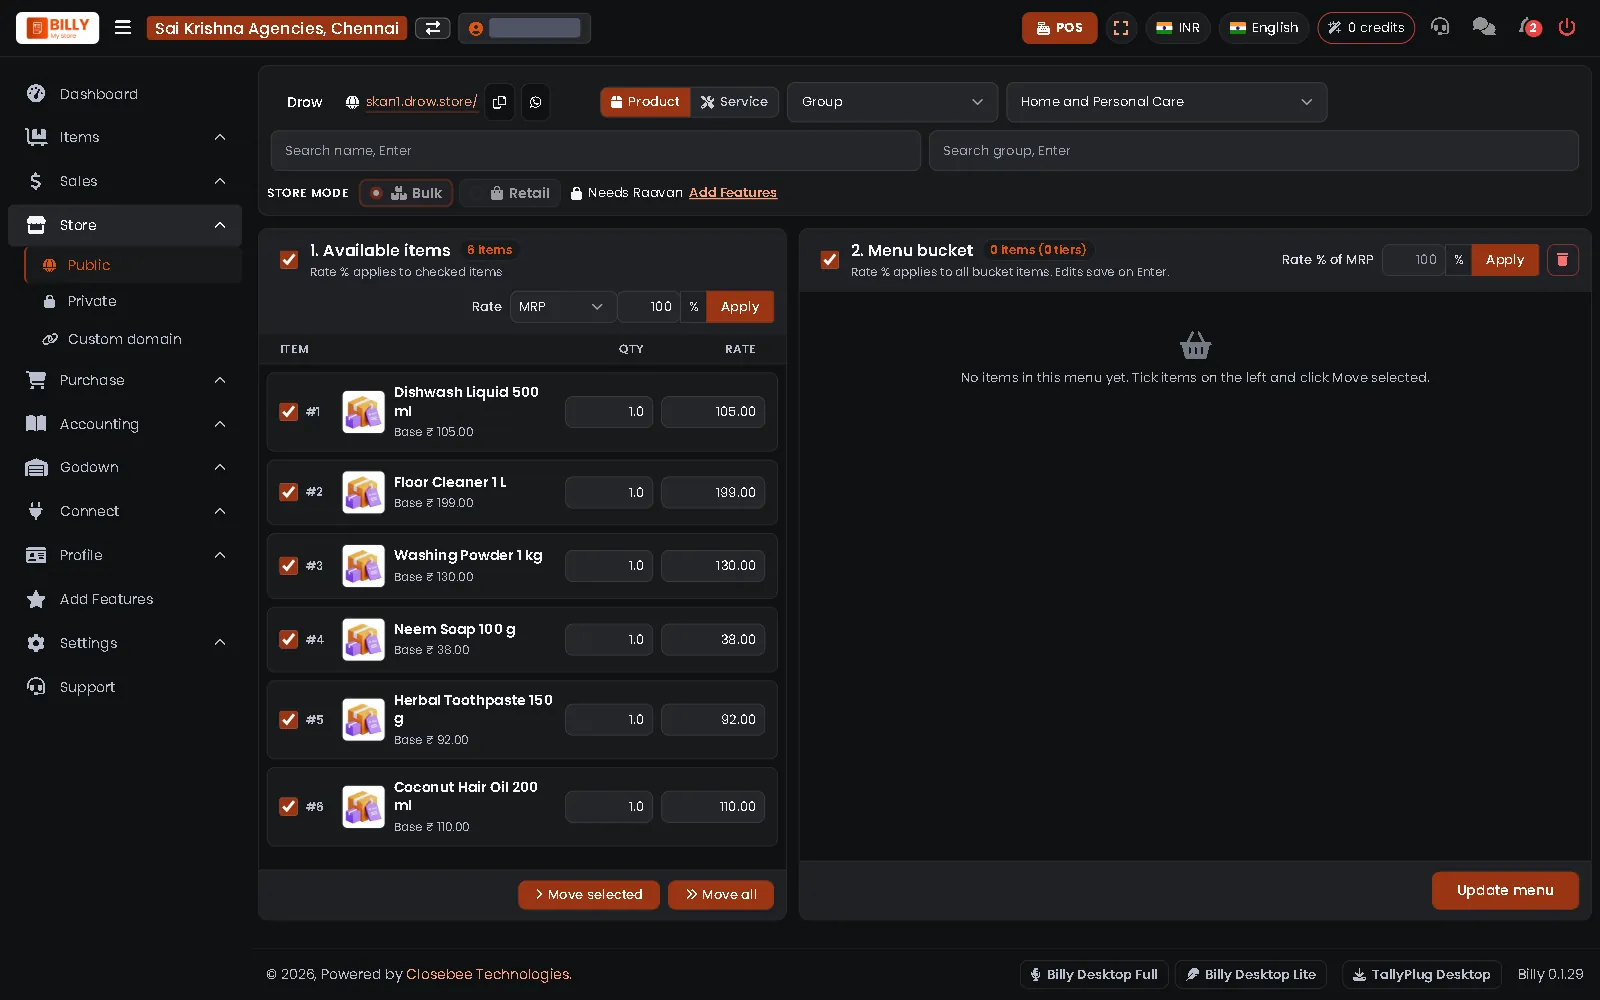
-
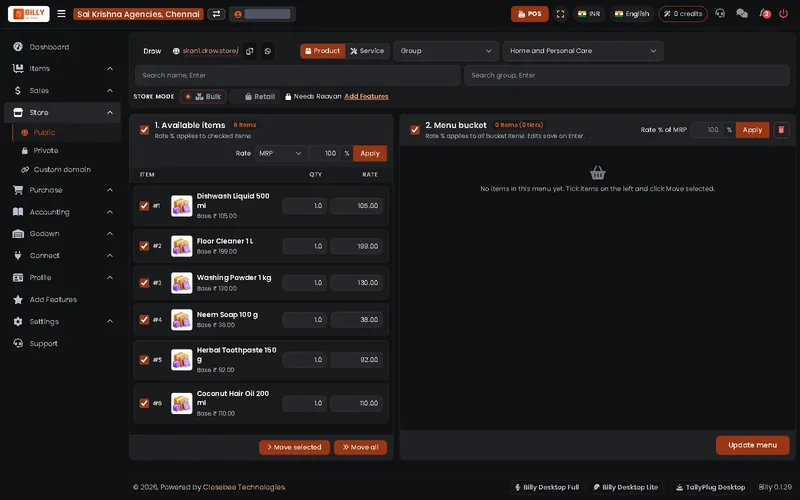
2Choose store items
Tick items on the left, press Move selected, set the rate and press Update menu.
-
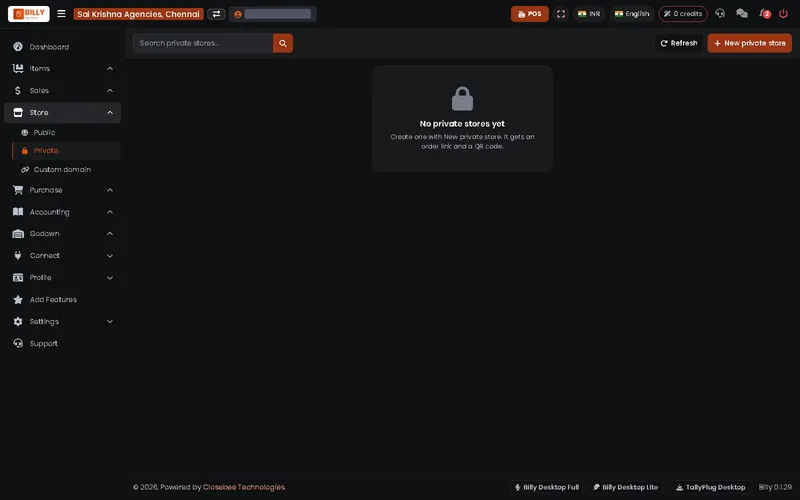
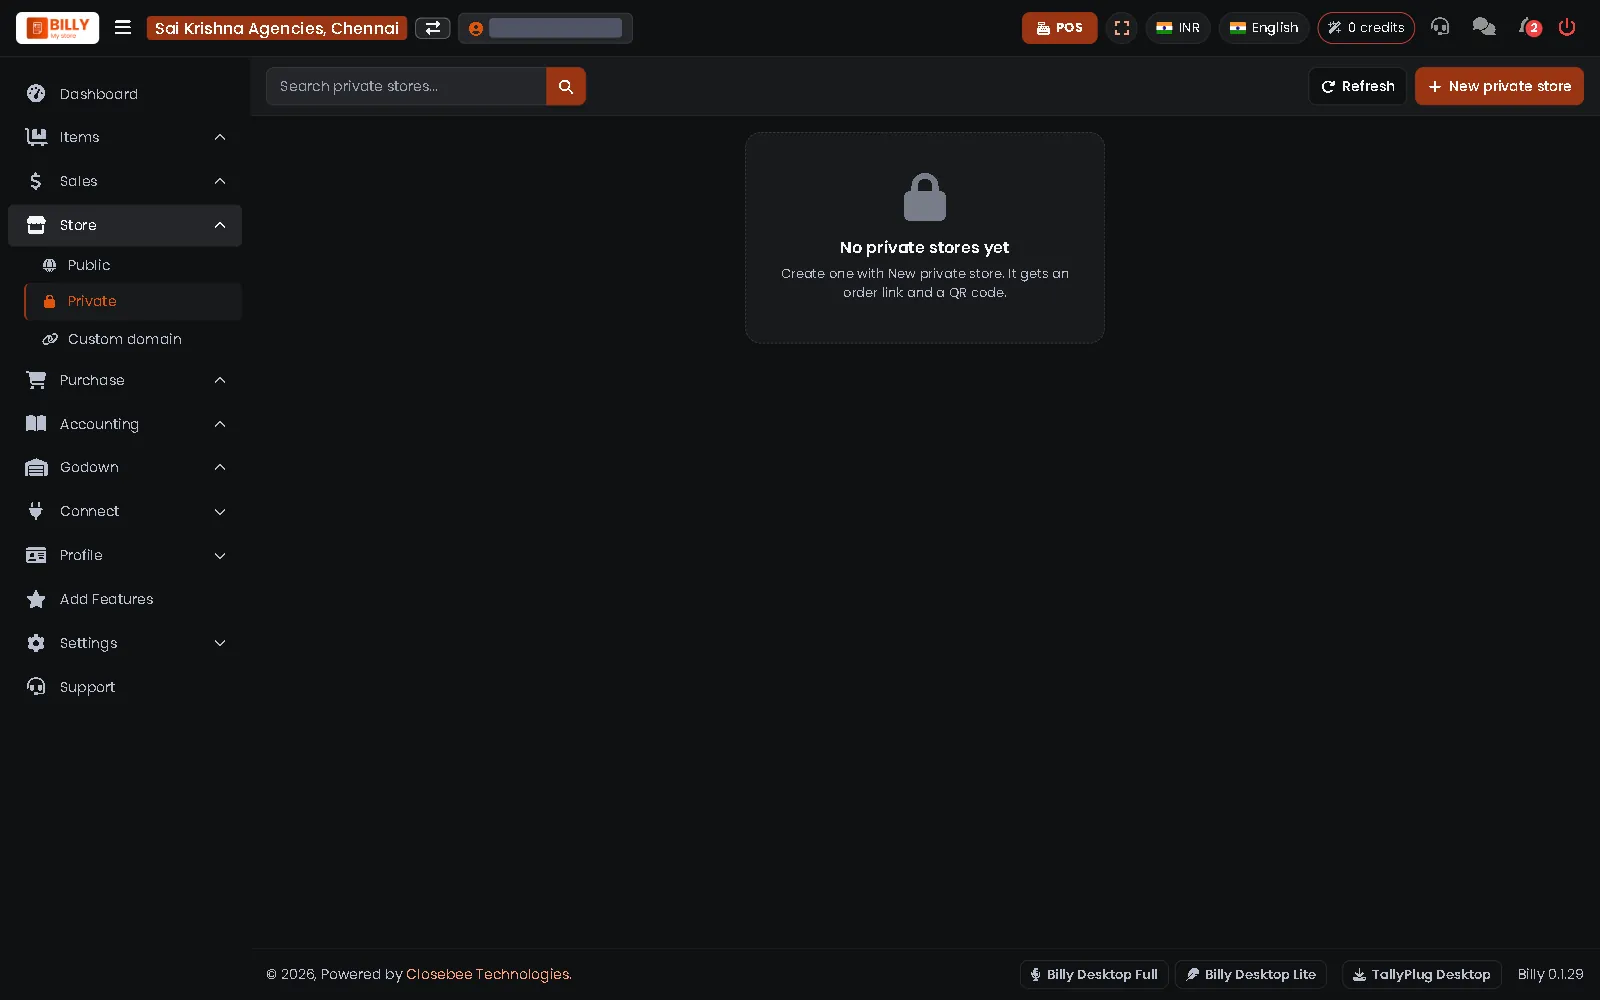
3Private stores
Store > Private makes a store only invited buyers can see, with its own order link and QR code. Press New private store.
-
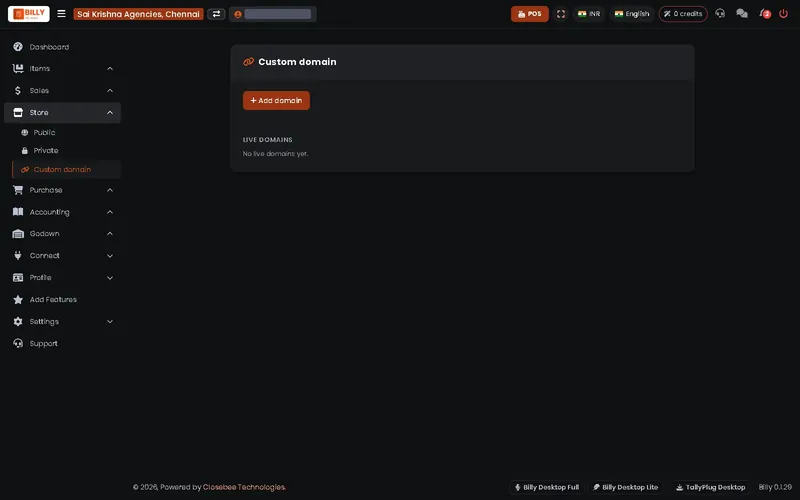
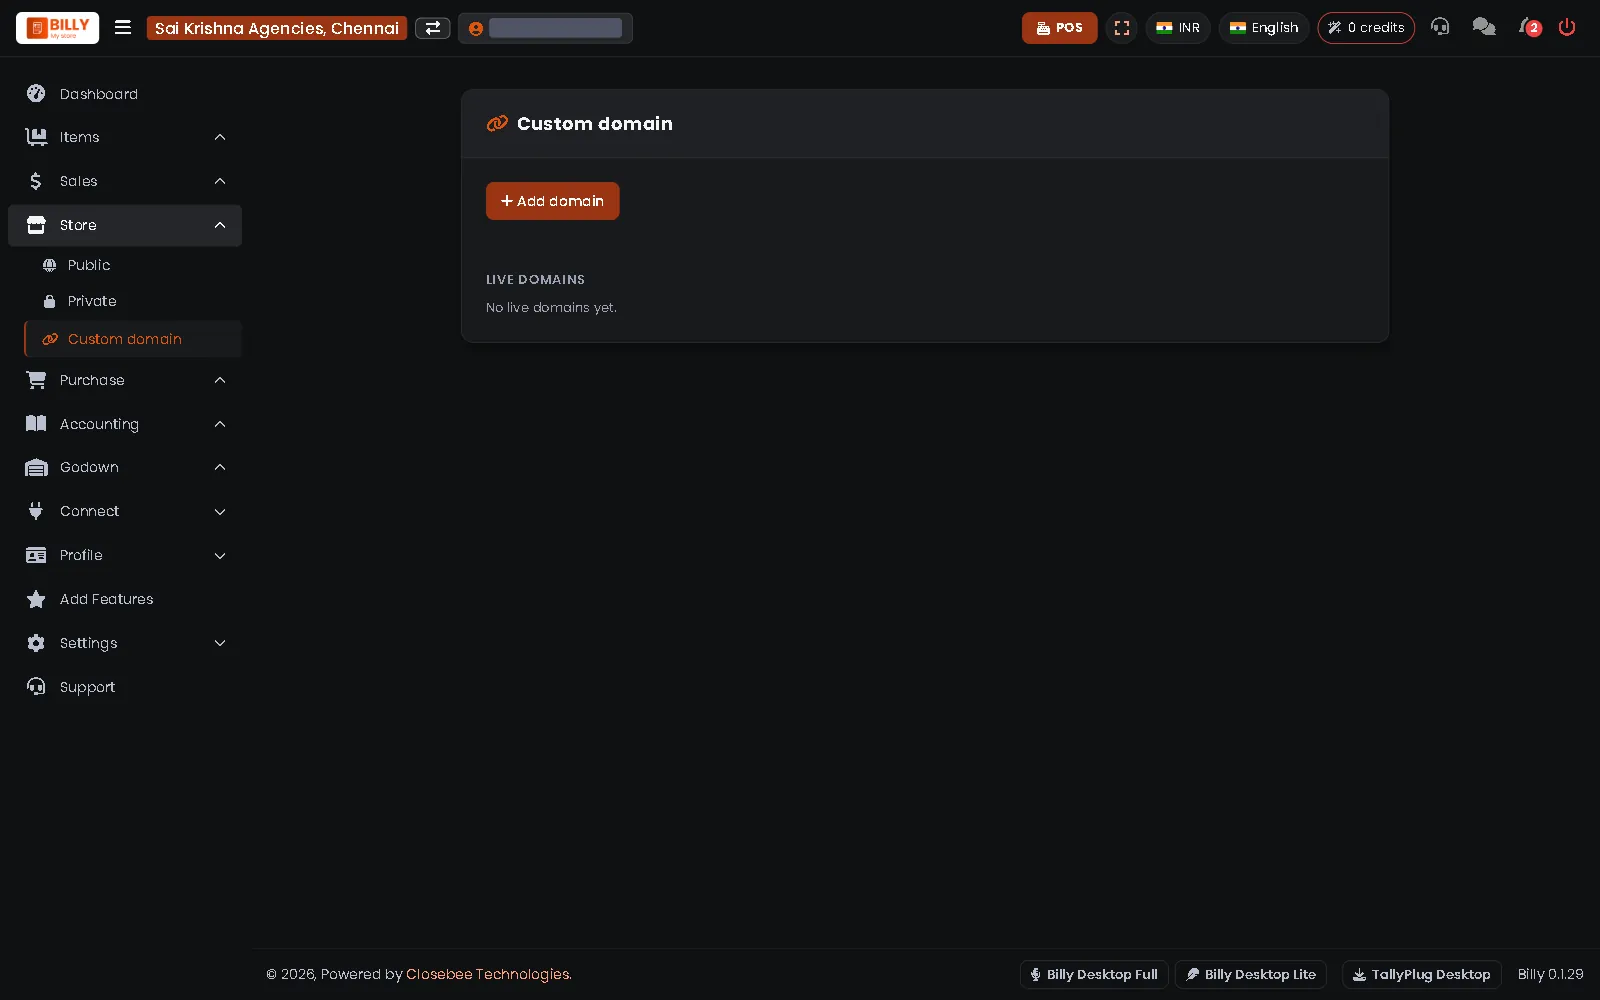
4Your own domain
Store > Custom domain opens your store on your own web address. Press Add domain and follow the steps.
13Reports
The dashboard tabs and every voucher.
-
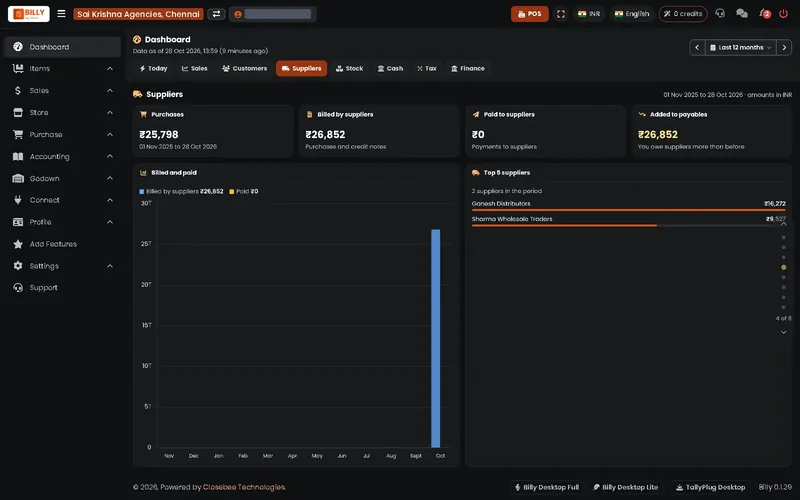
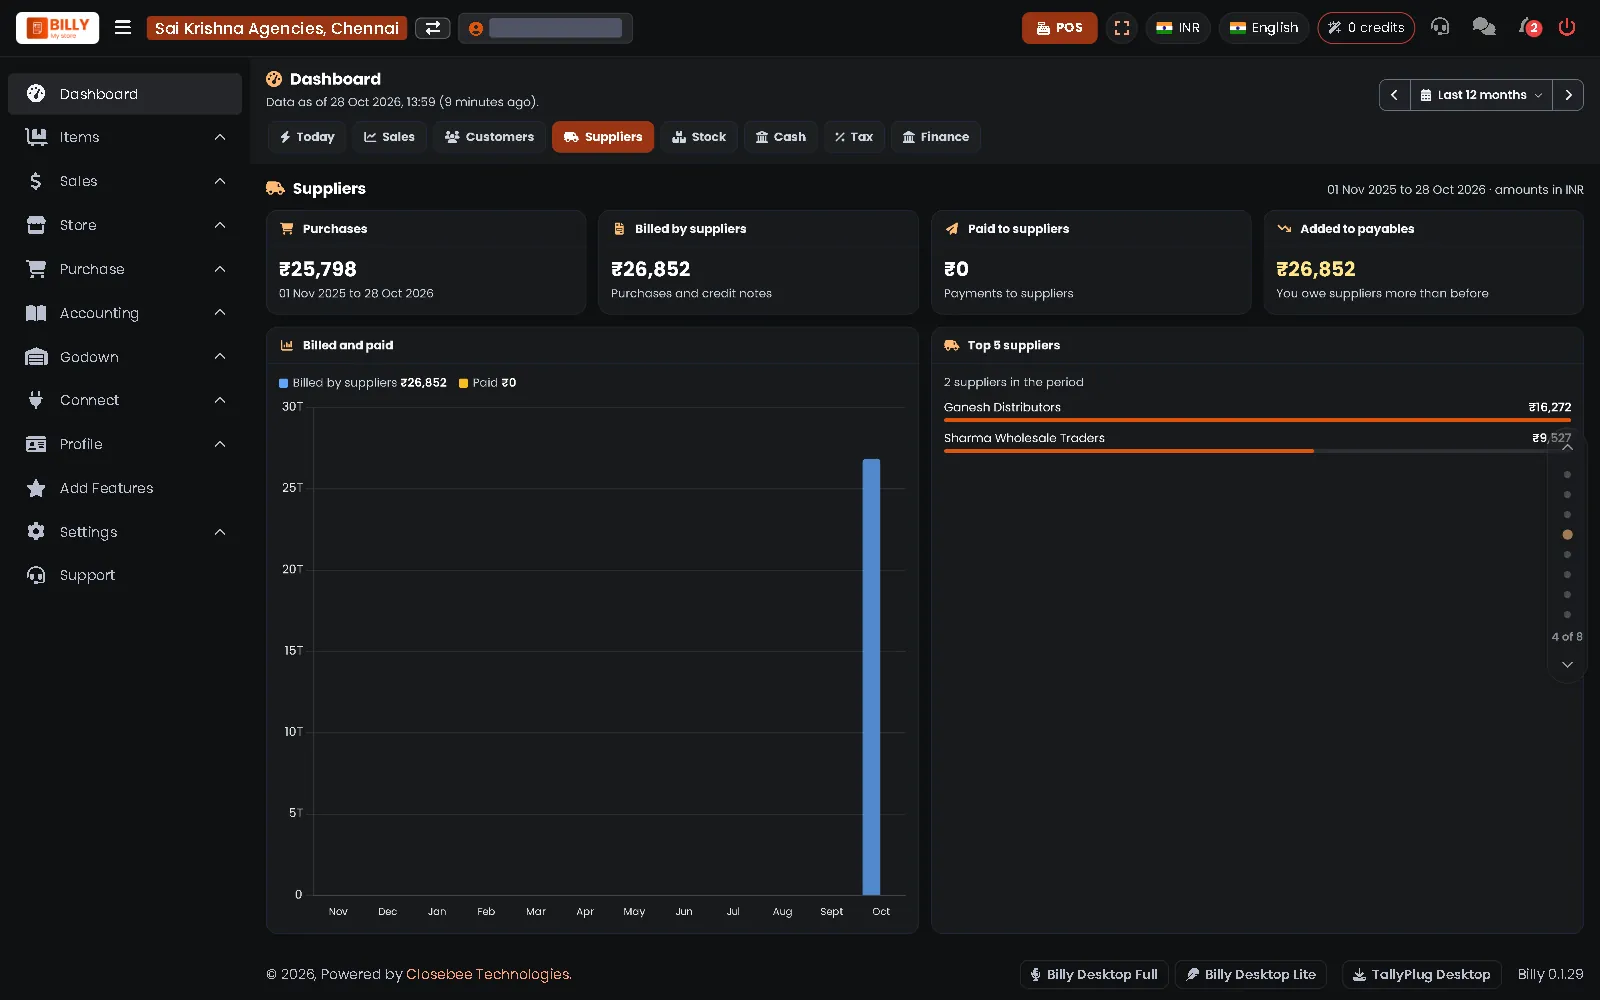
1Suppliers
The Suppliers tab shows what you bought, what you paid and what you still owe.
-
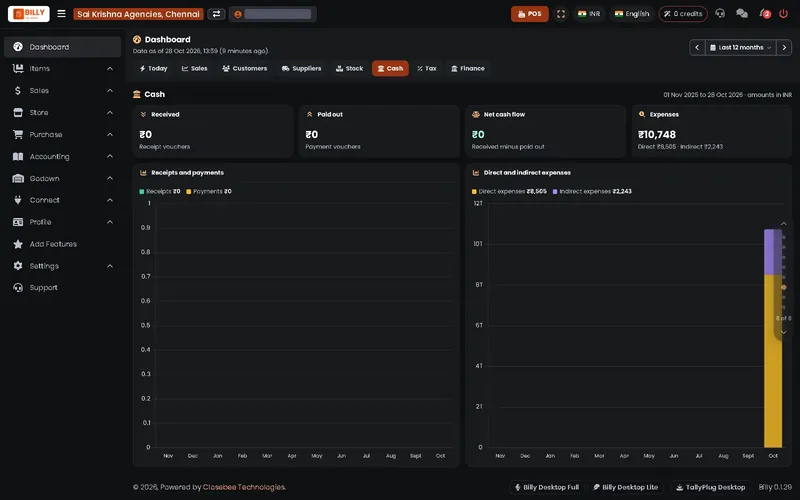
2Cash
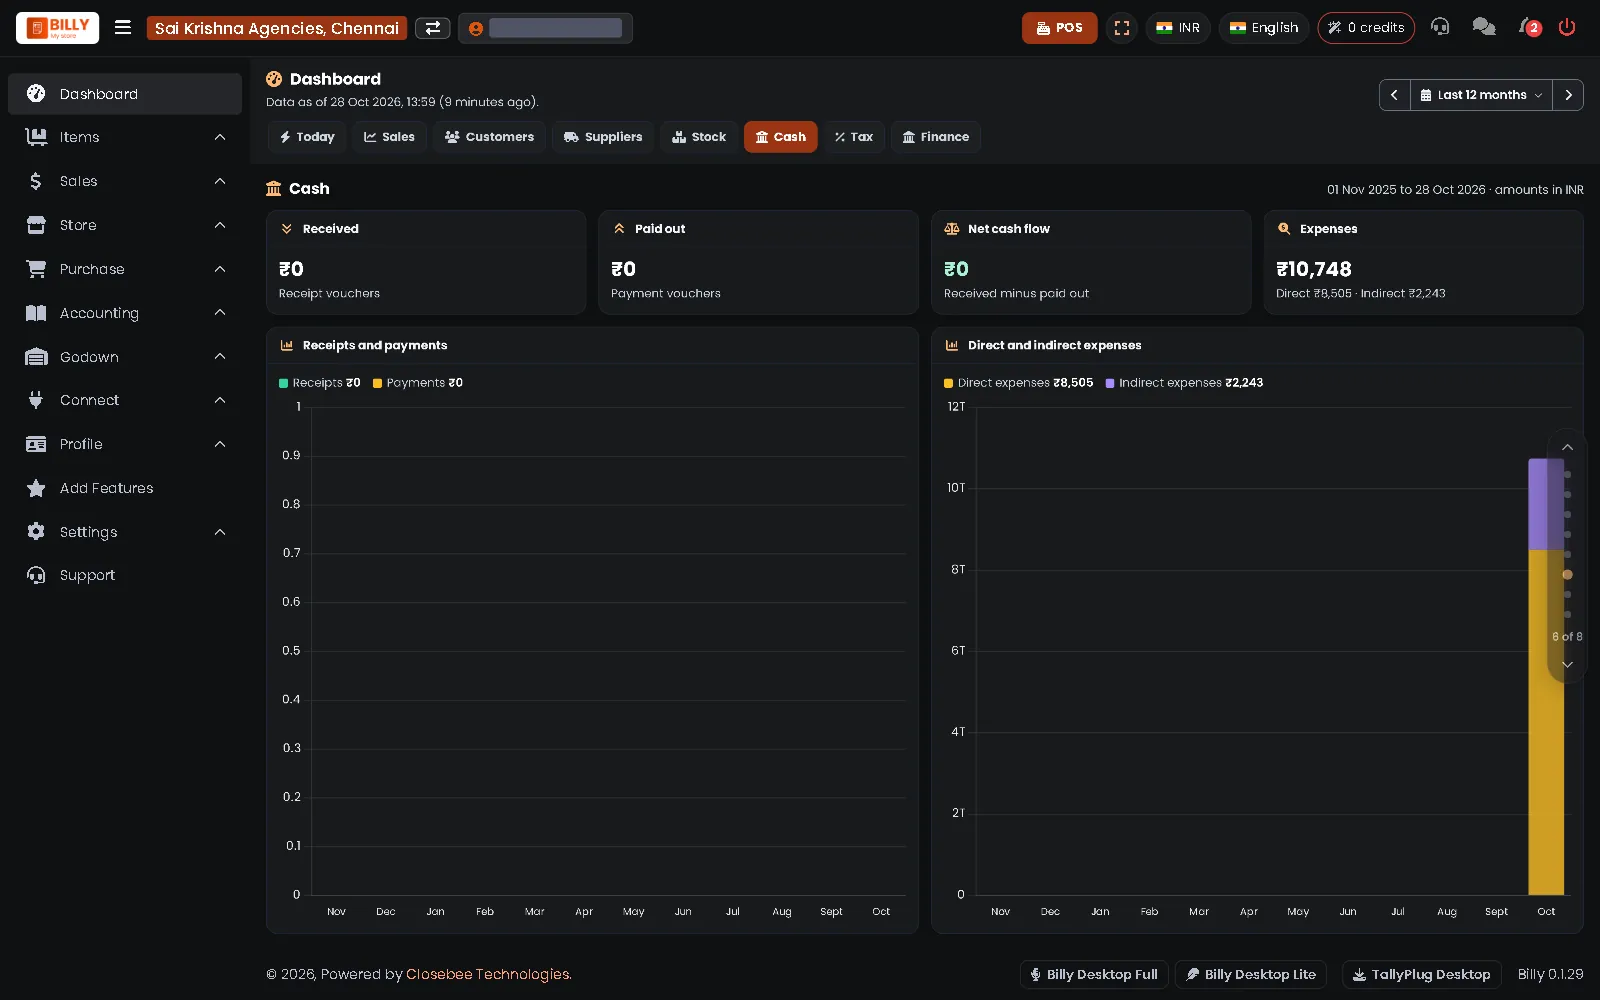
The Cash tab shows money received, money paid out and your direct and indirect expenses.
-
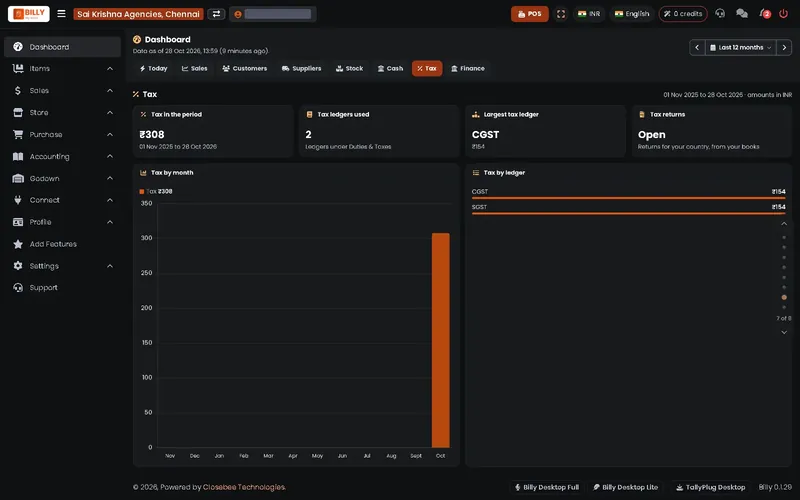
3Tax
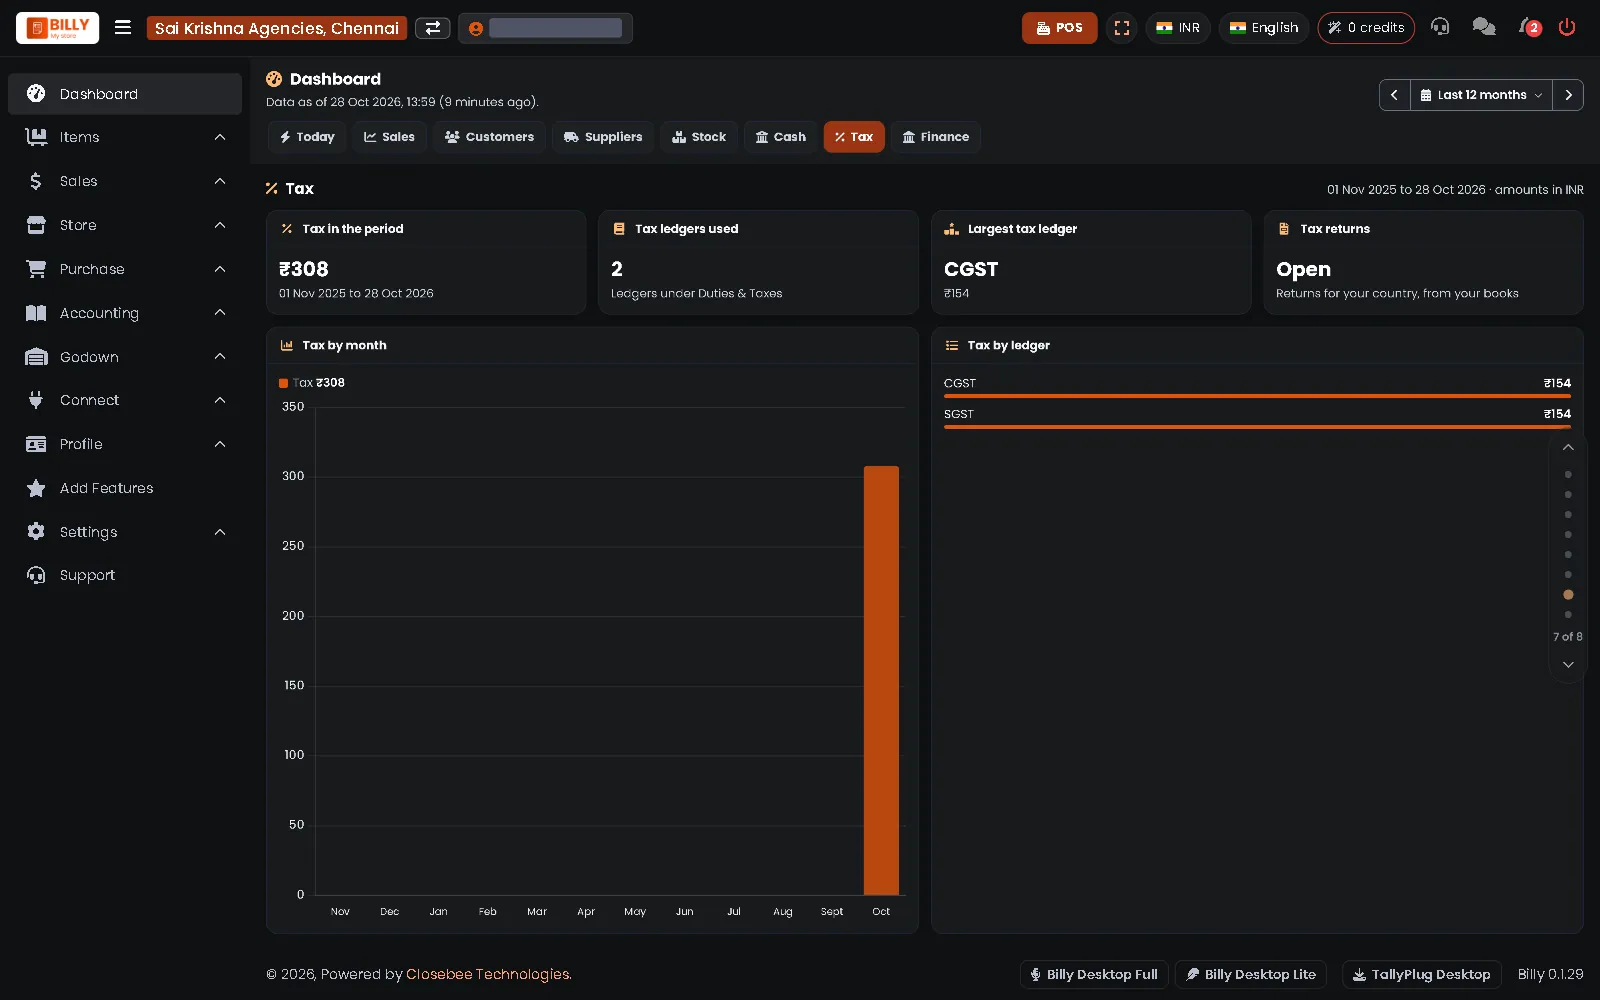
The Tax tab shows GST for the period, split by ledger (CGST, SGST) and by month.
-
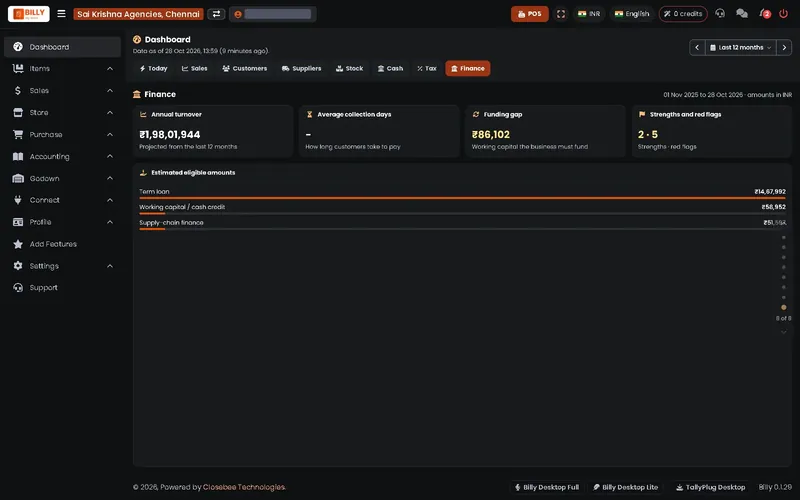
4Finance
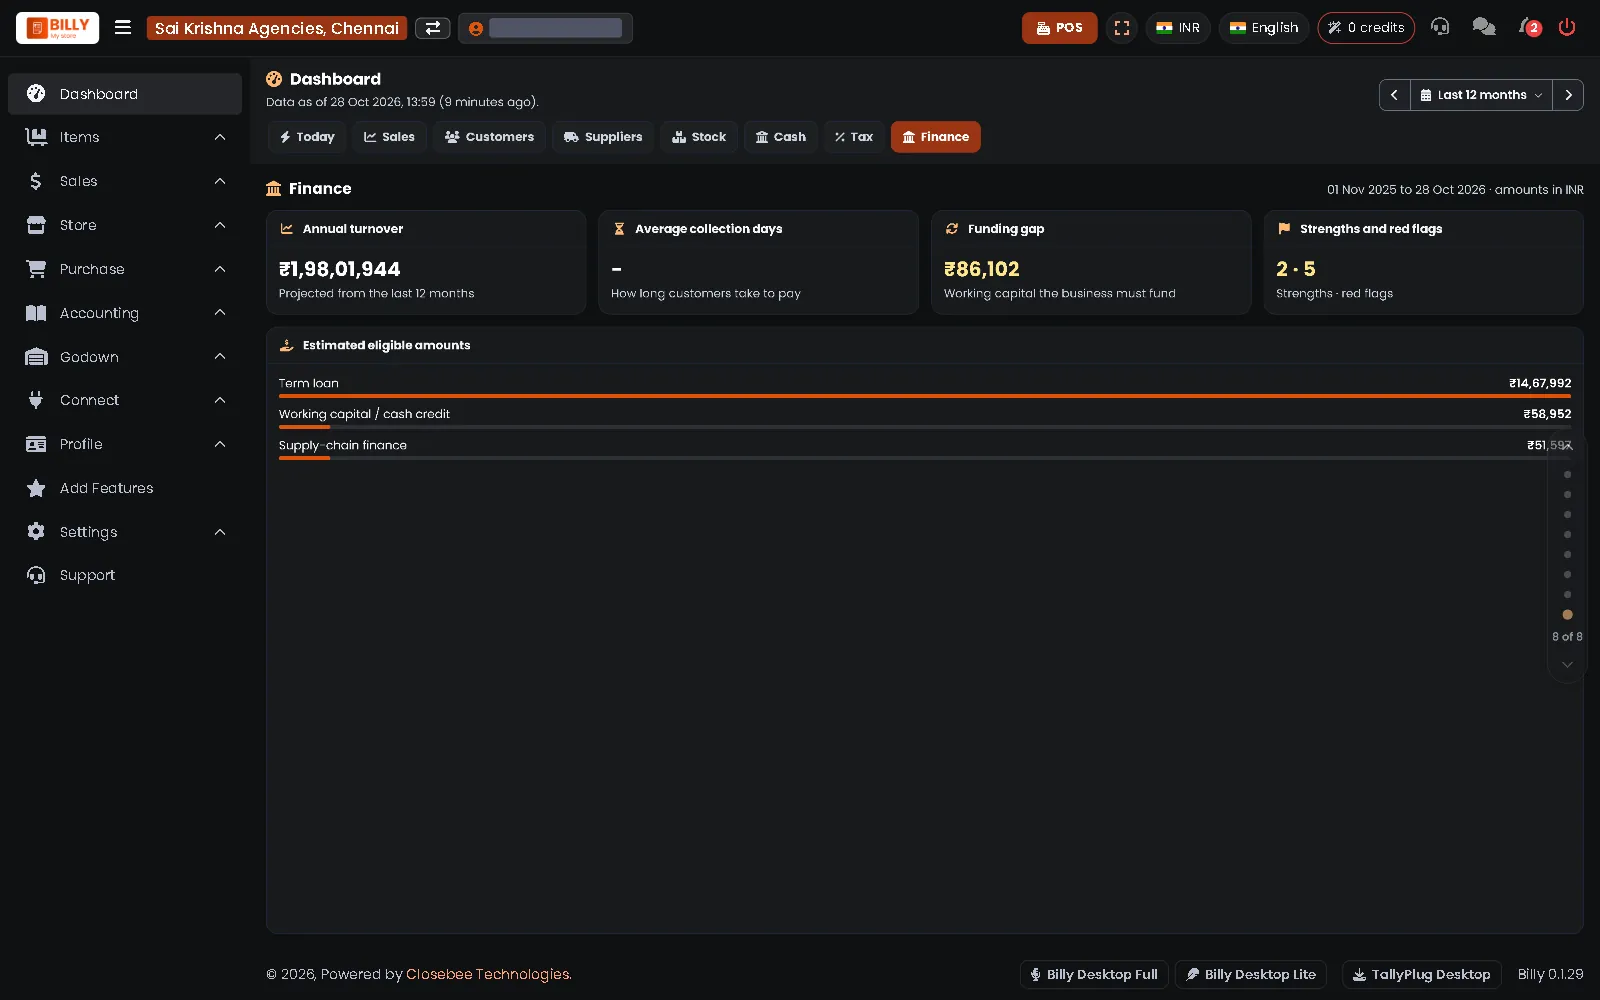
The Finance tab shows yearly turnover and the estimated term loan and working capital amounts based on your books.
-
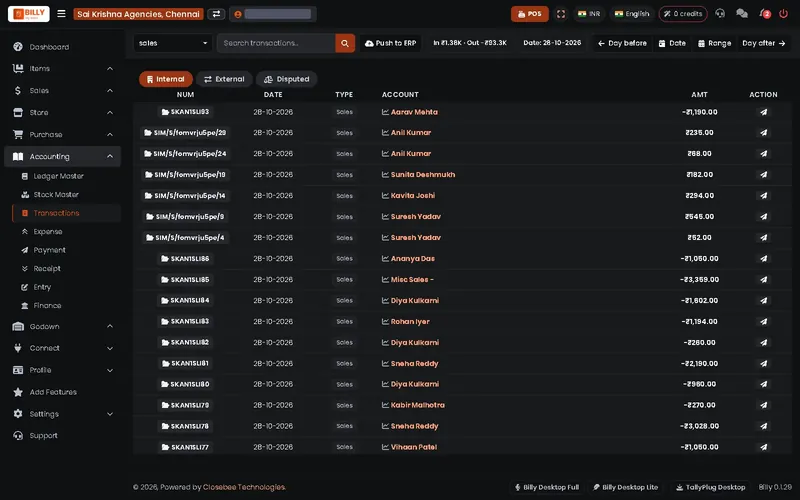
5All transactions
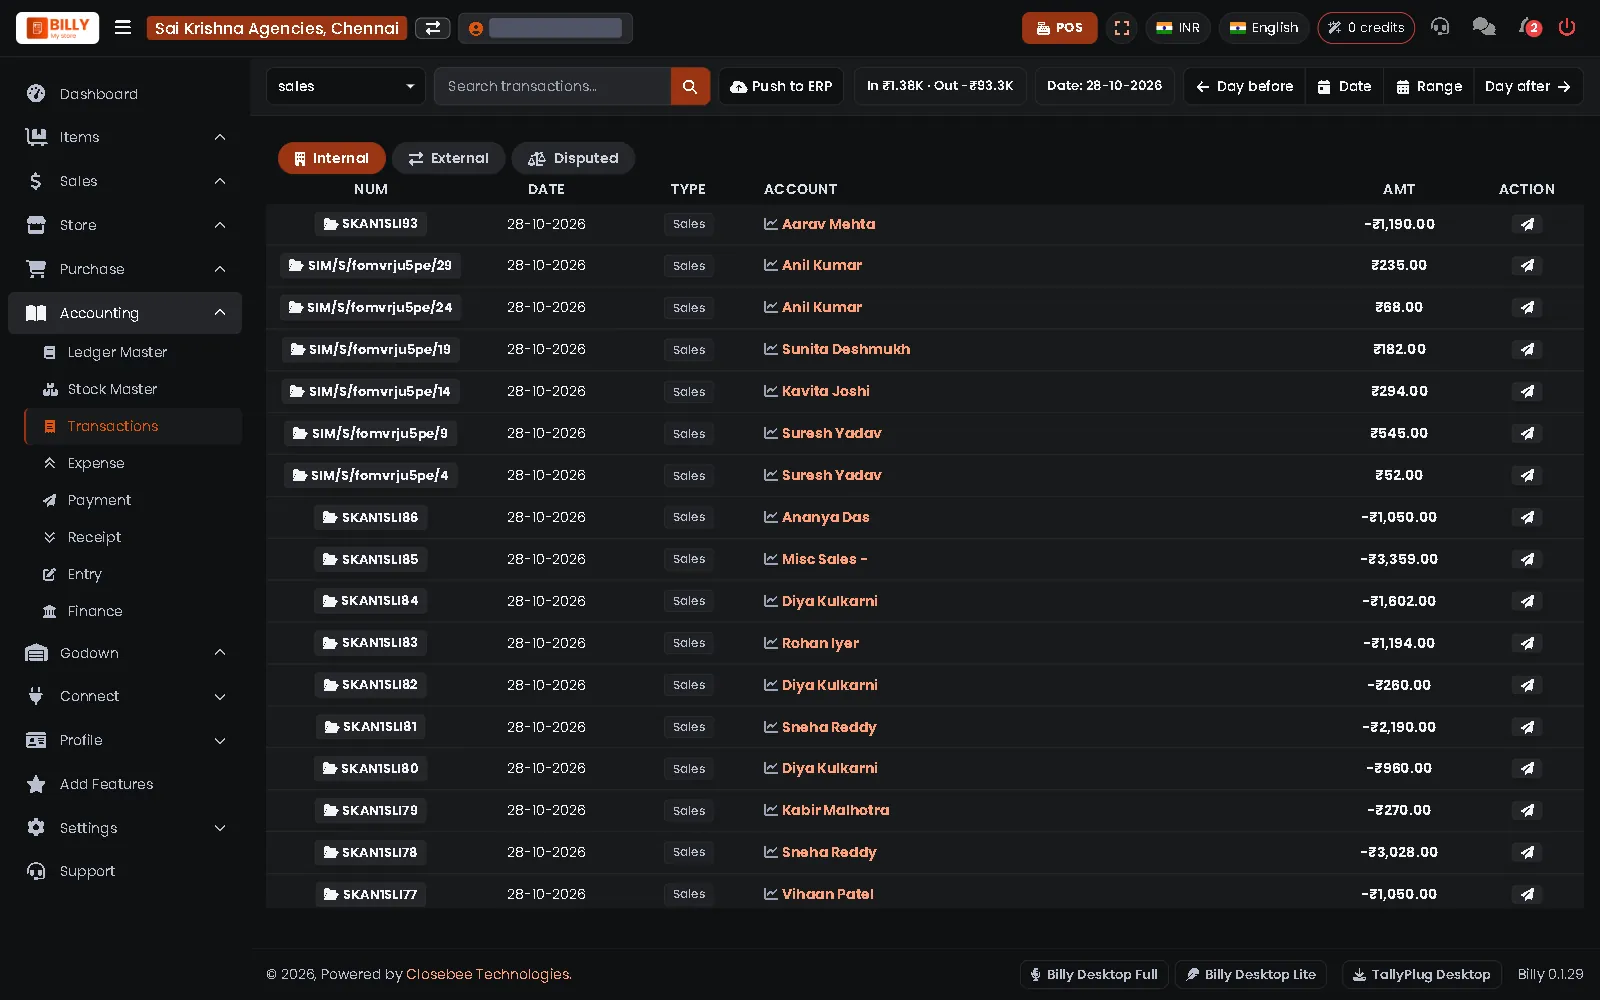
Accounting > Transactions lists every voucher of the day with its account and amount. Push to ERP sends them to your accounting software.
14Connect
Link Billy to Tally, partners and Billy Desktop.
-
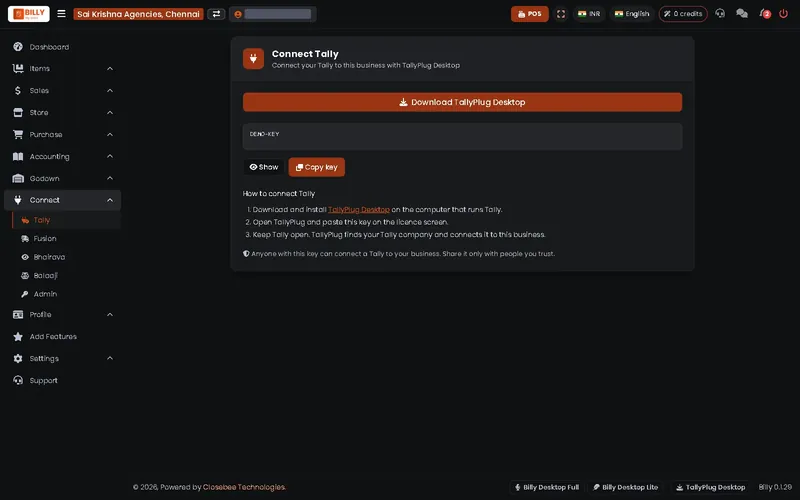
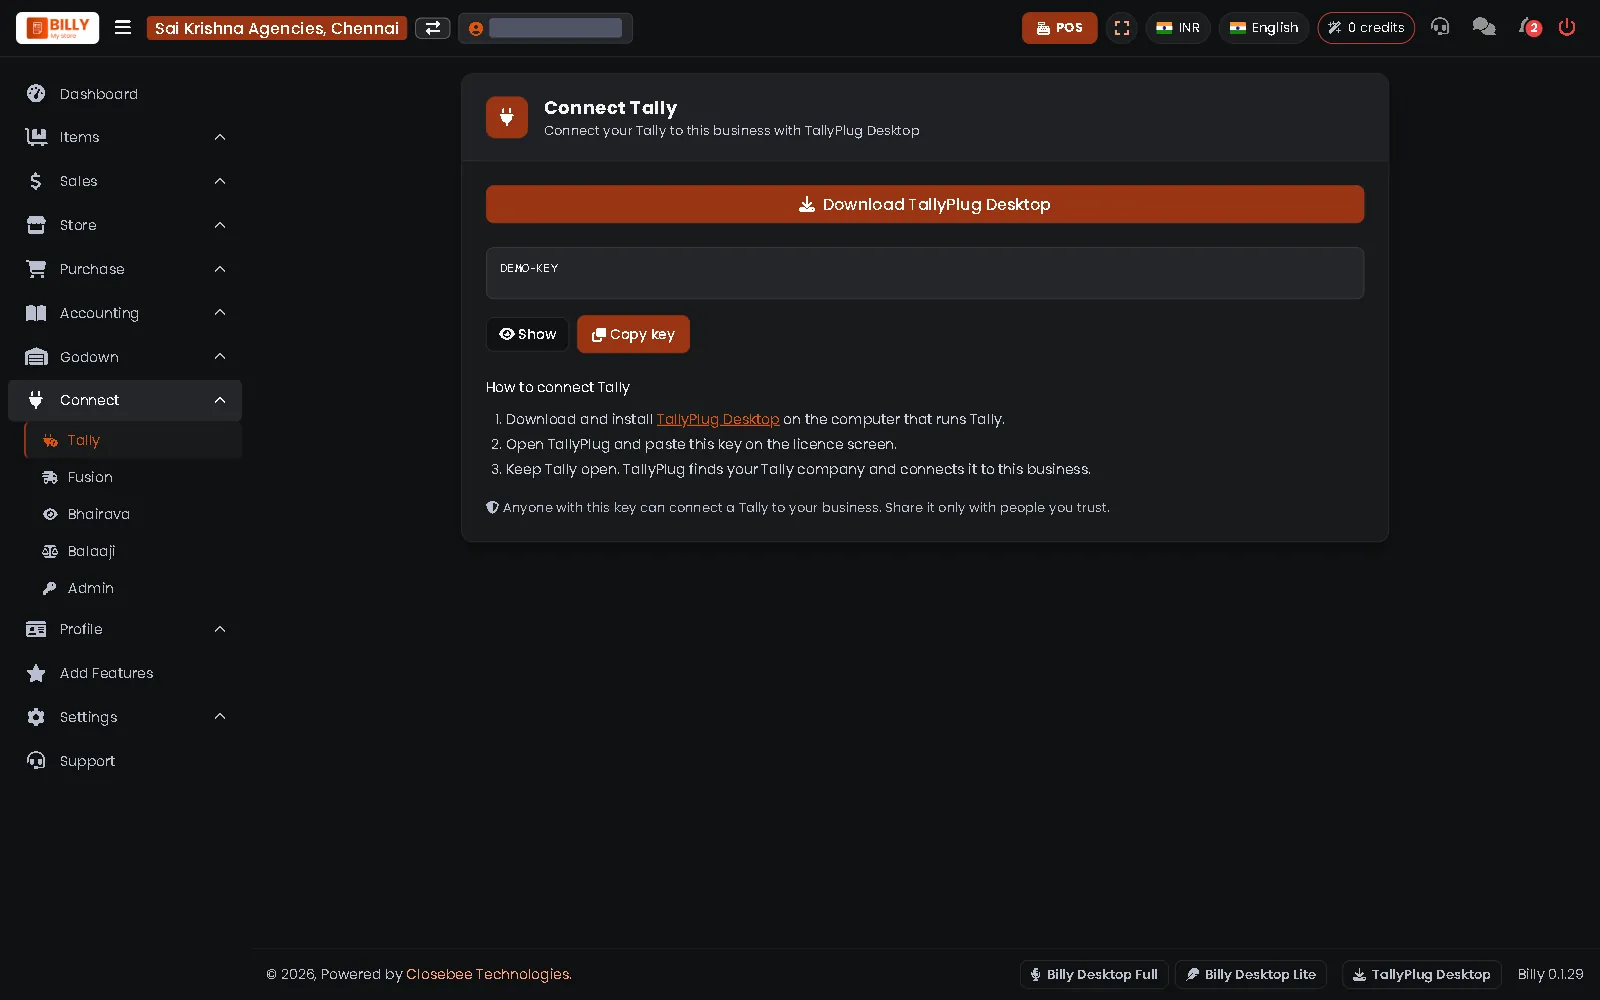
1Tally
Connect > Tally gives you the key for TallyPlug Desktop. Install TallyPlug on the Tally computer, paste the key there and keep Tally open.
-
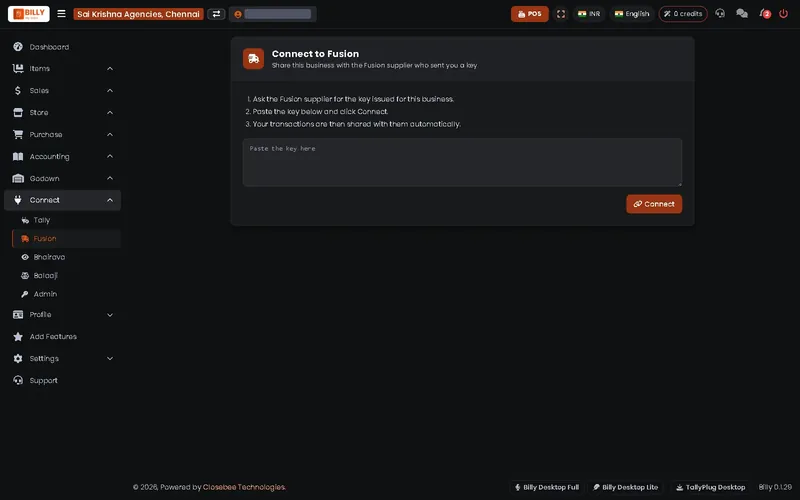
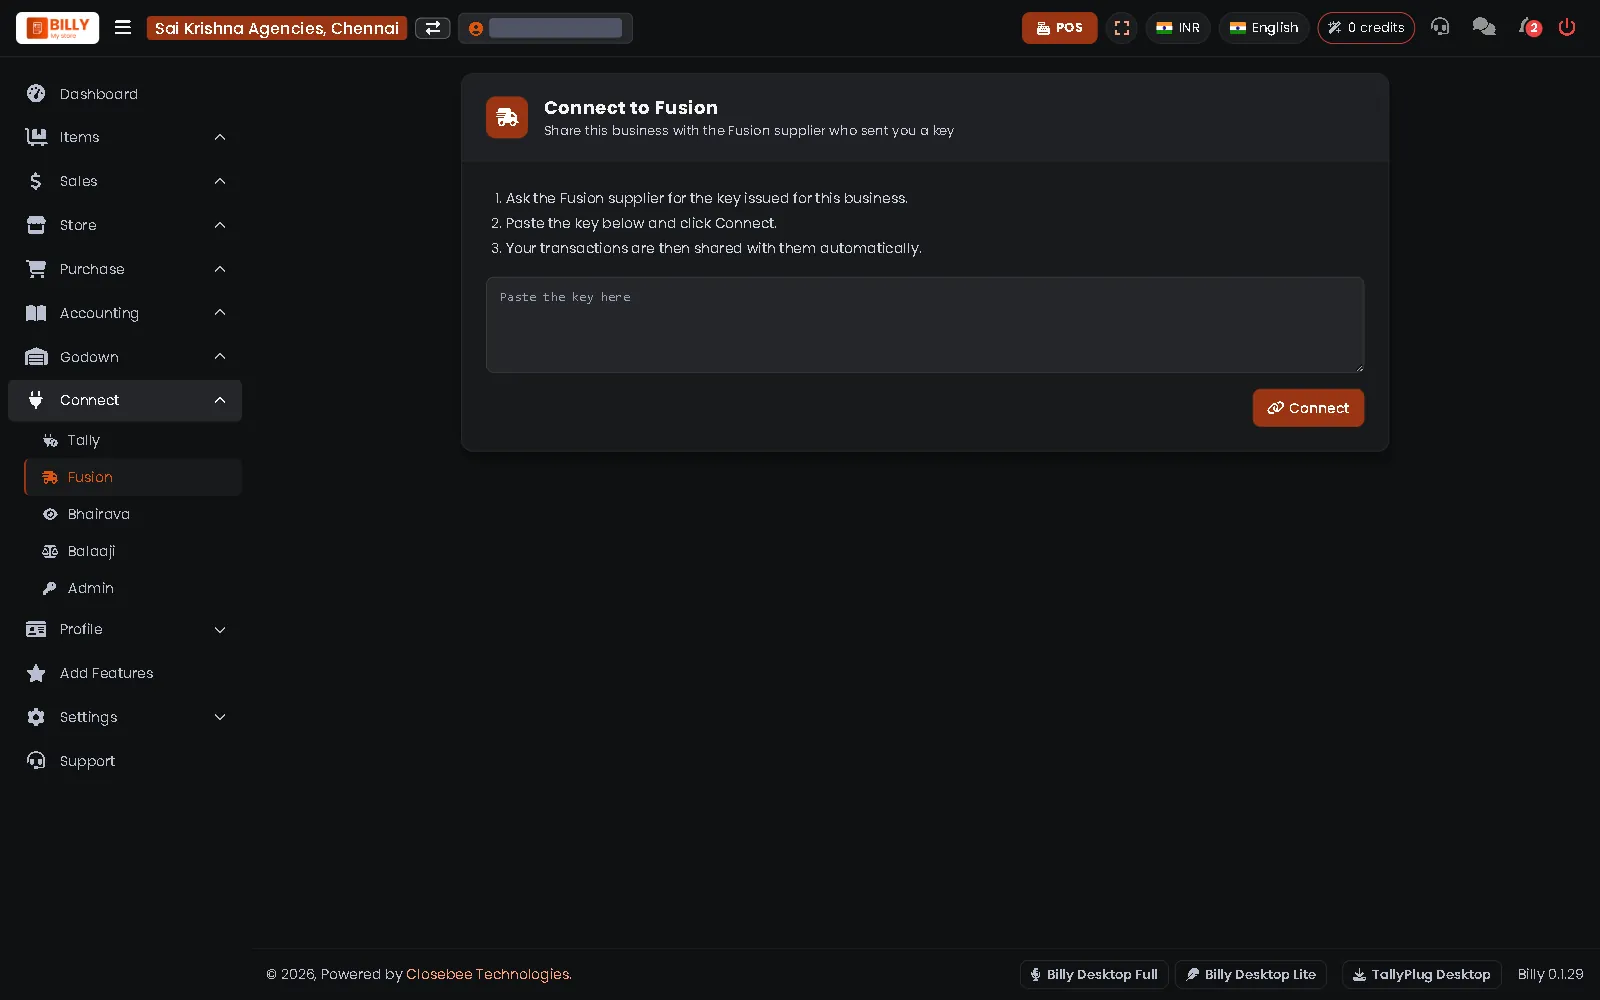
2Fusion
If your supplier uses Fusion, ask them for a key, paste it here and press Connect. Your transactions are then shared with them.
-
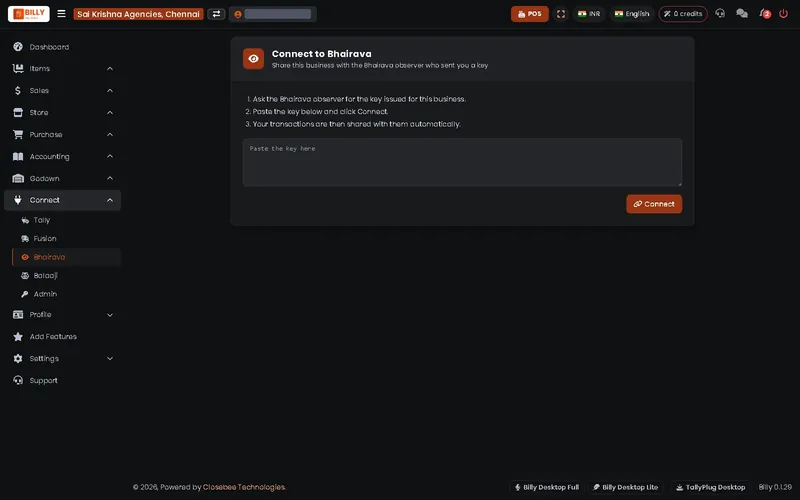
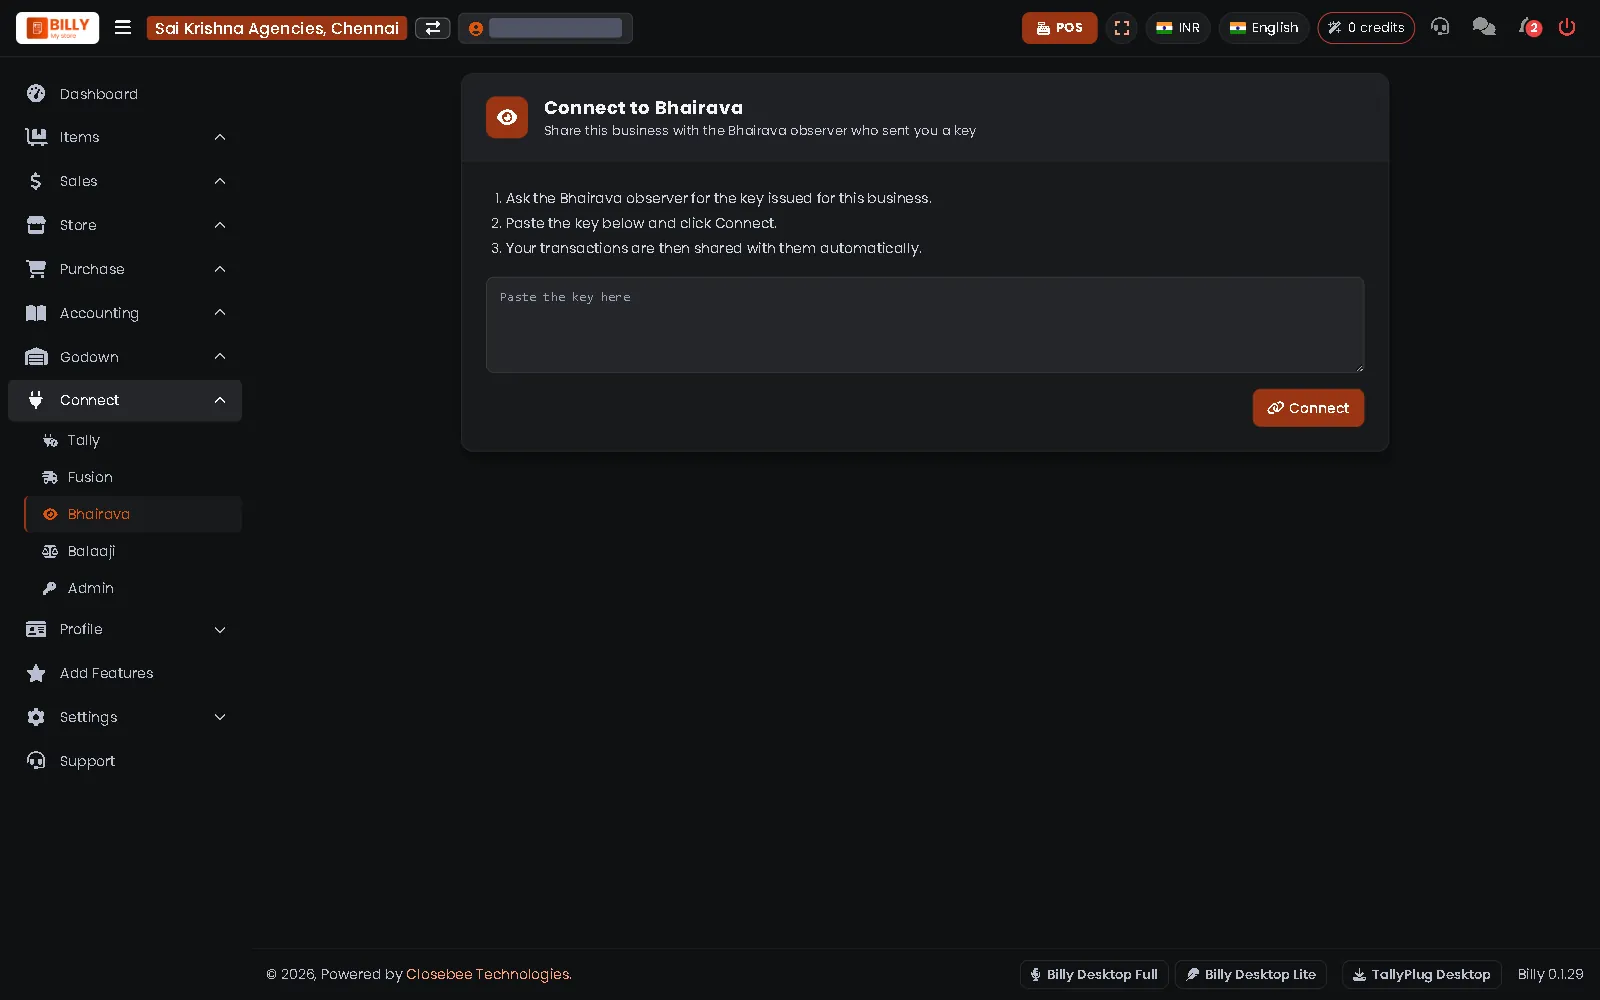
3Bhairava
Paste the key your Bhairava observer sent you and press Connect.
-
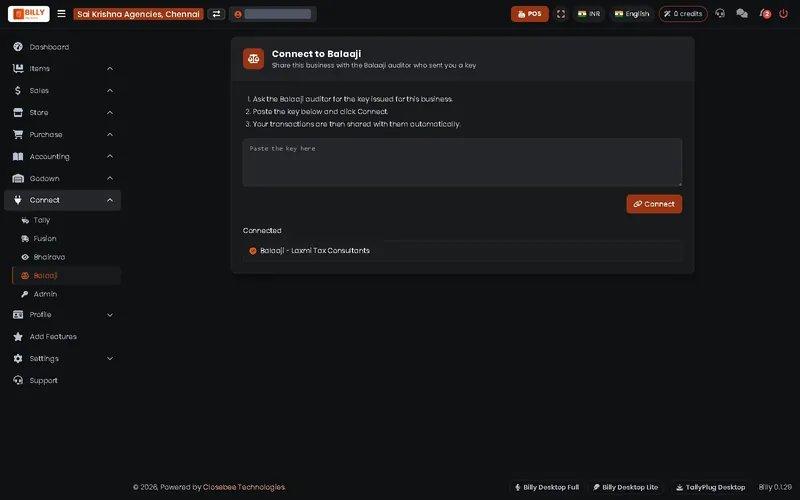
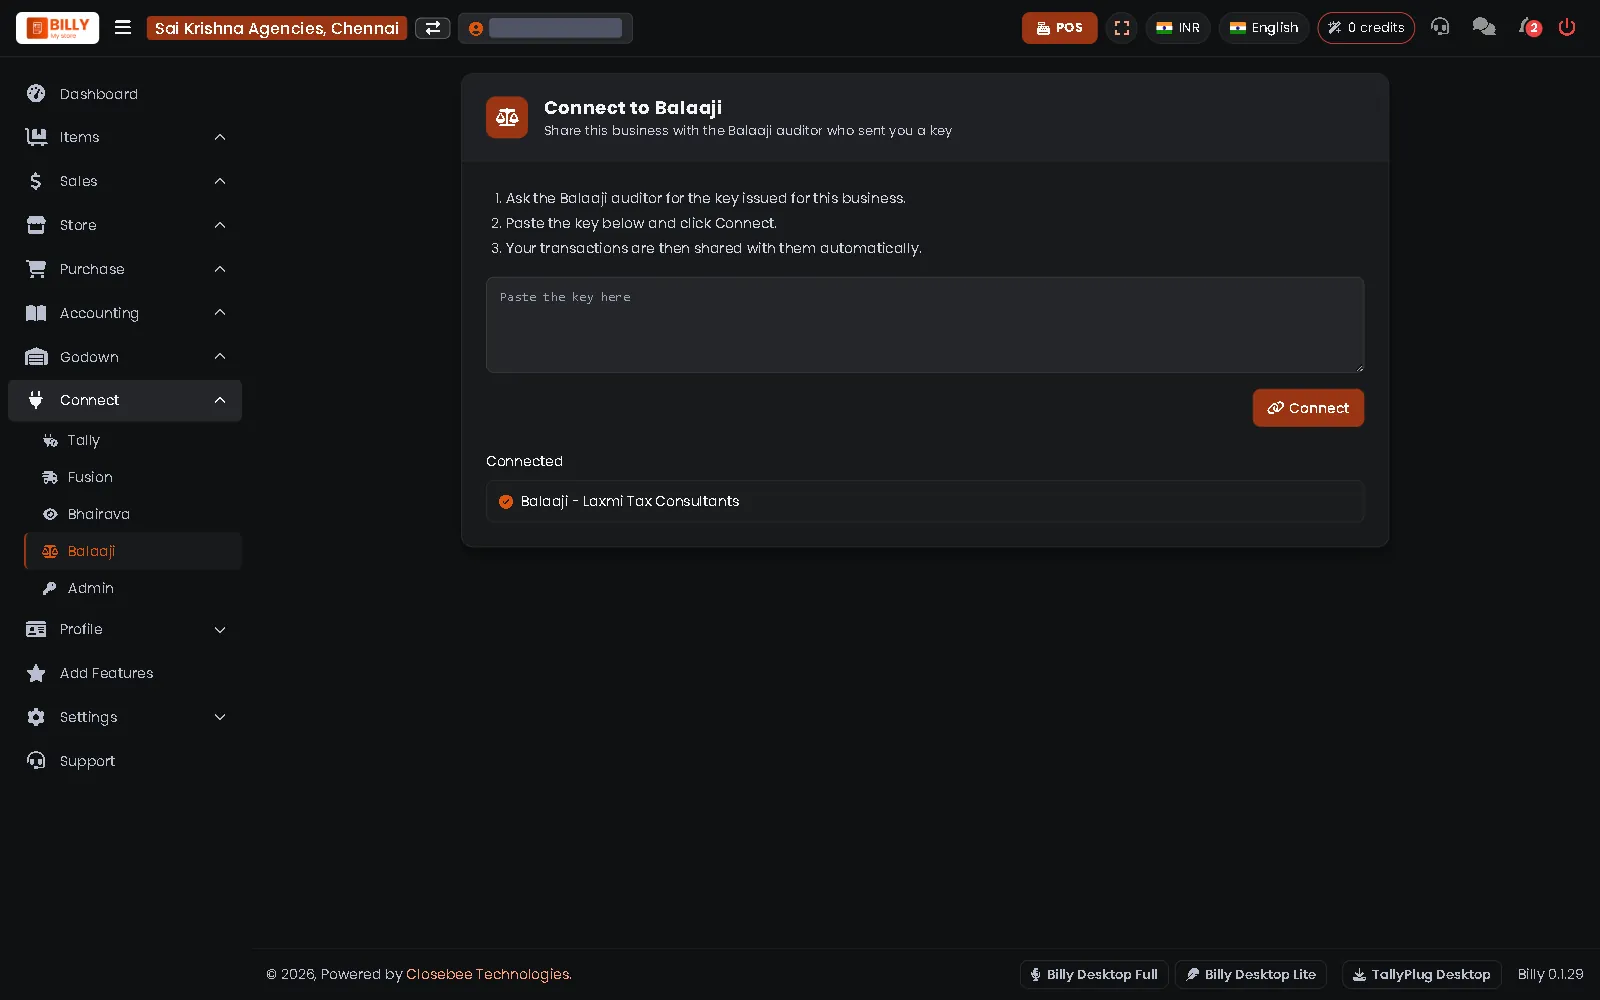
4Balaaji
Paste the key from your Balaaji auditor and press Connect. Connected auditors are listed below the box.
-
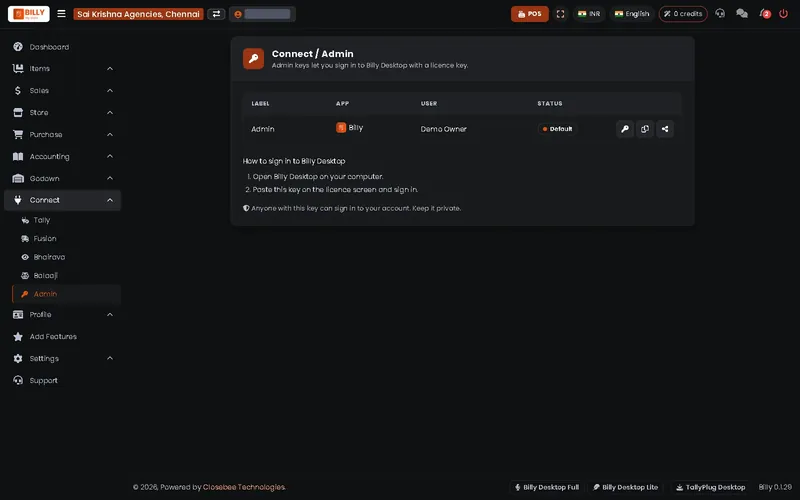
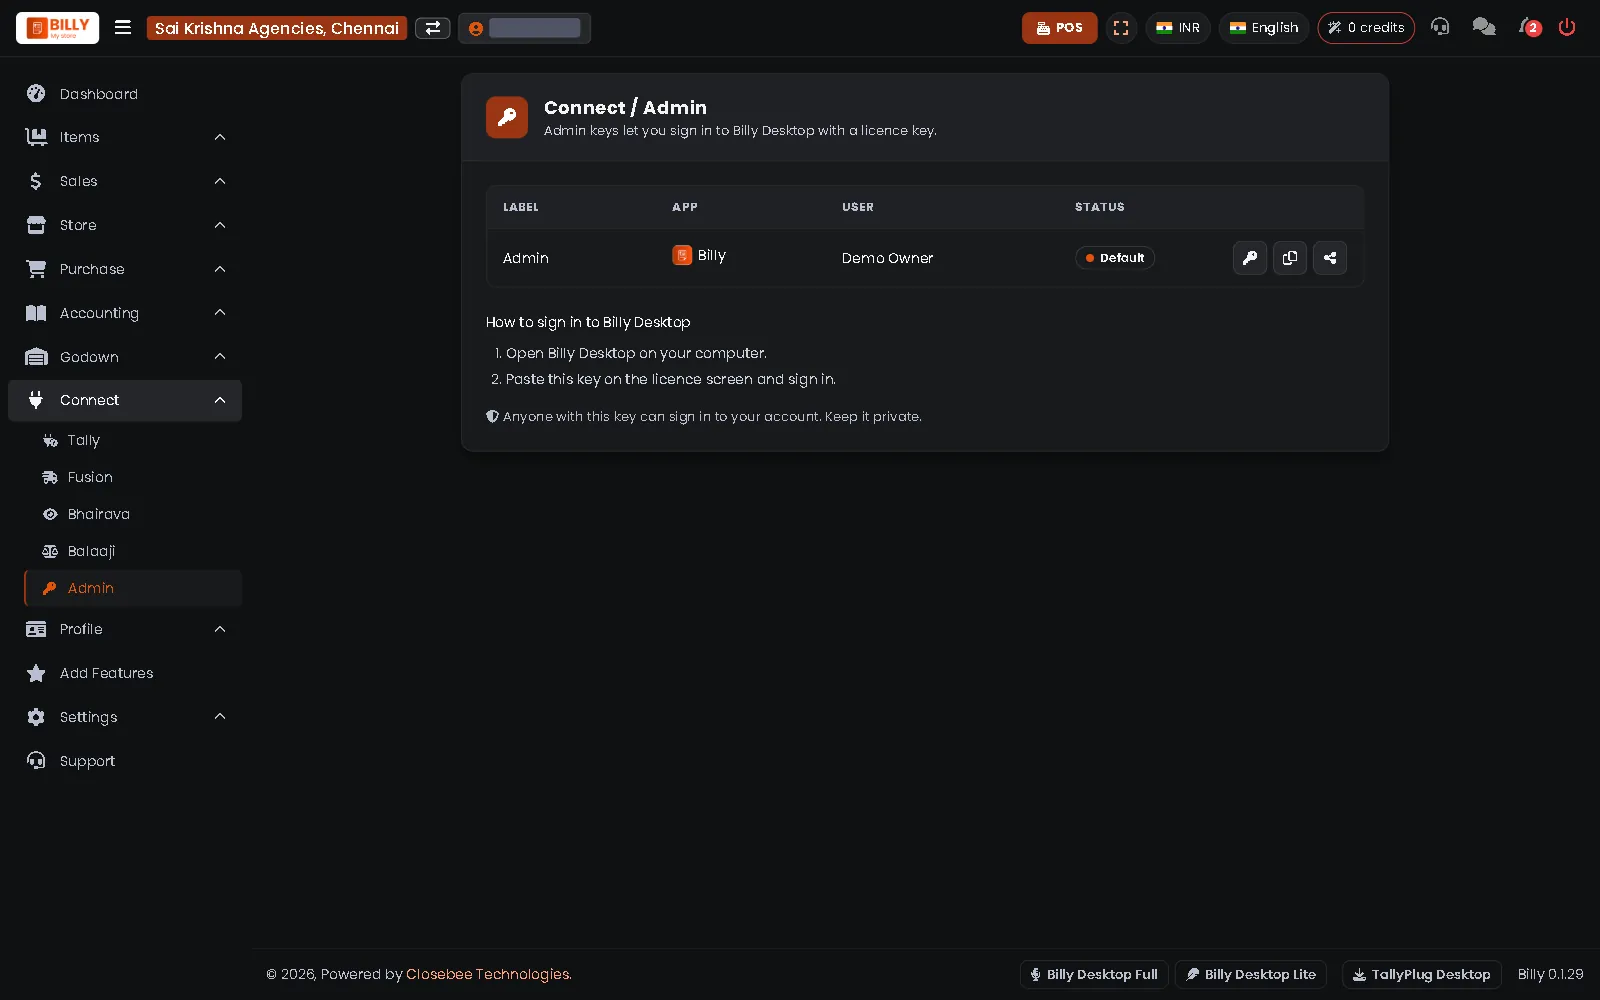
5Admin key for Billy Desktop
Connect > Admin holds the key that signs you in to Billy Desktop. Press Copy on the Admin row. Keep it private.
15Profile and settings
Your shop's details and setup.
-
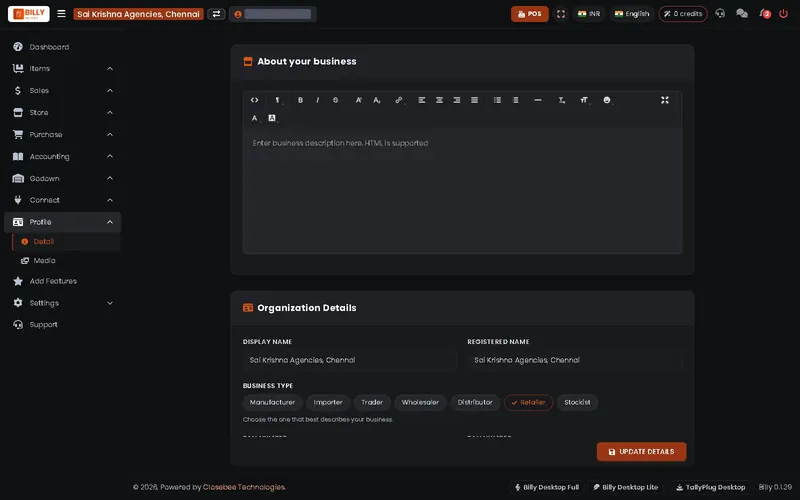
1Business details
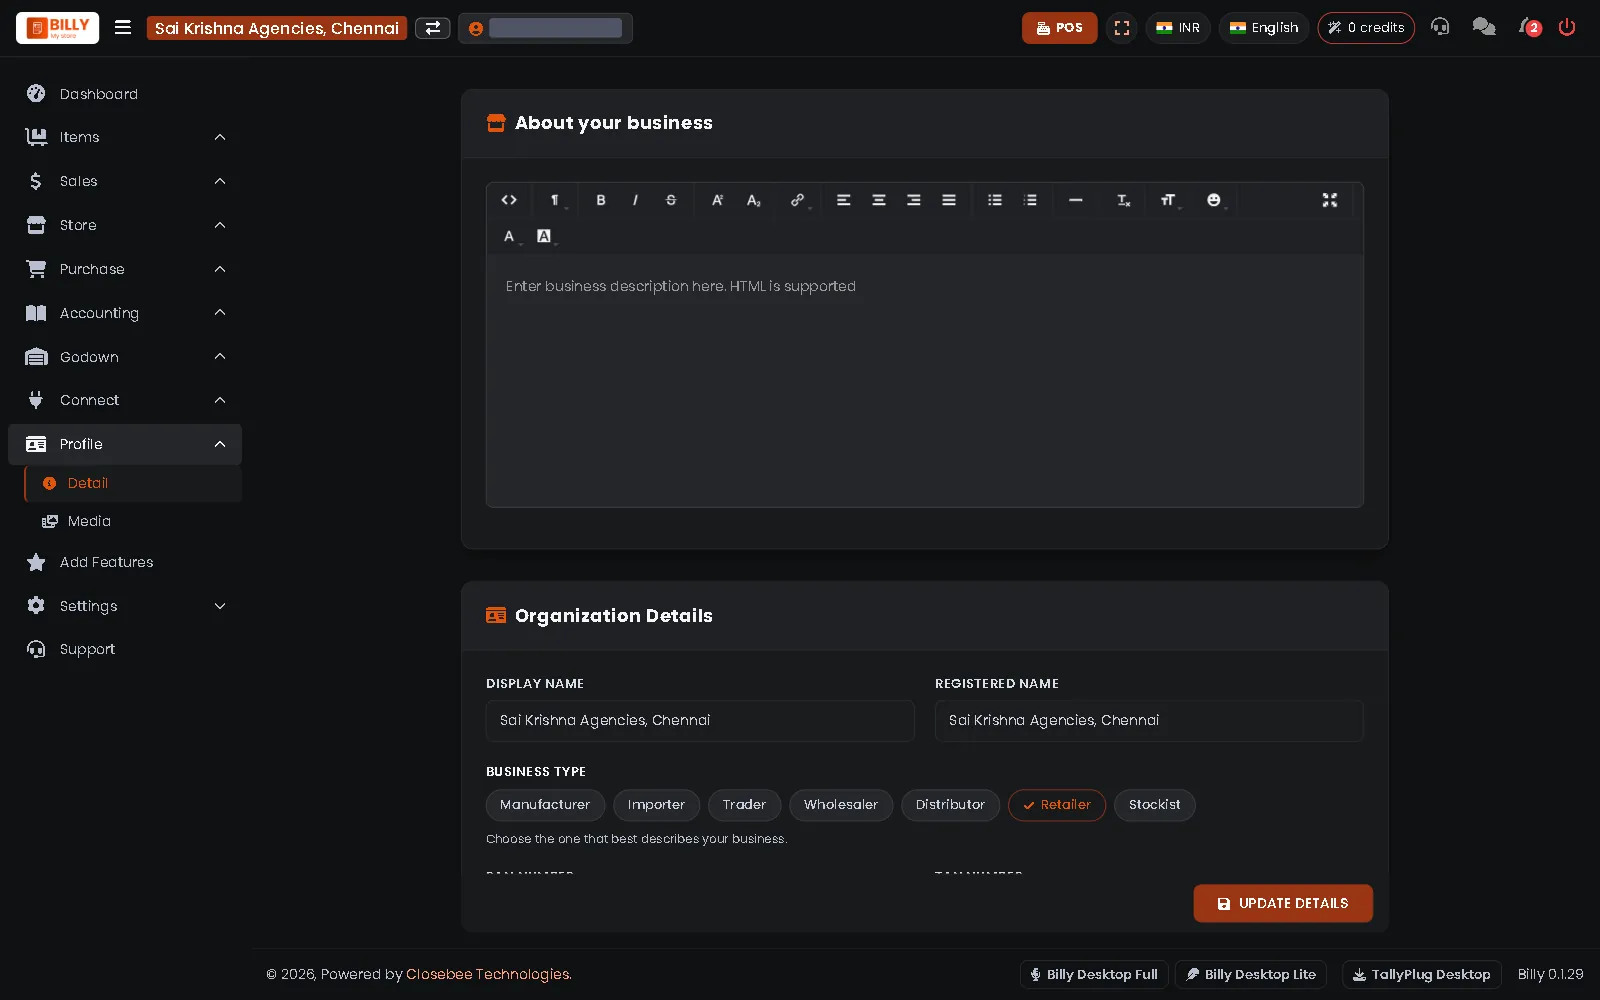
Profile > Detail holds your shop description, display name, registered name and business type. Press Update Details to save.
-
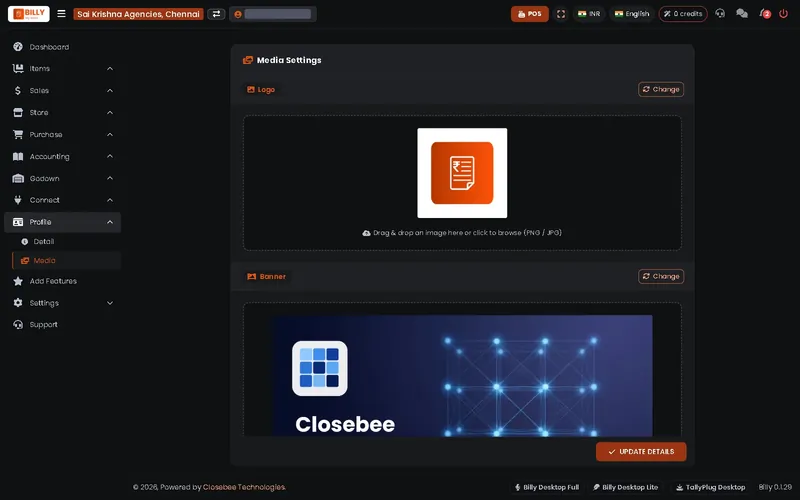
2Logo and banner
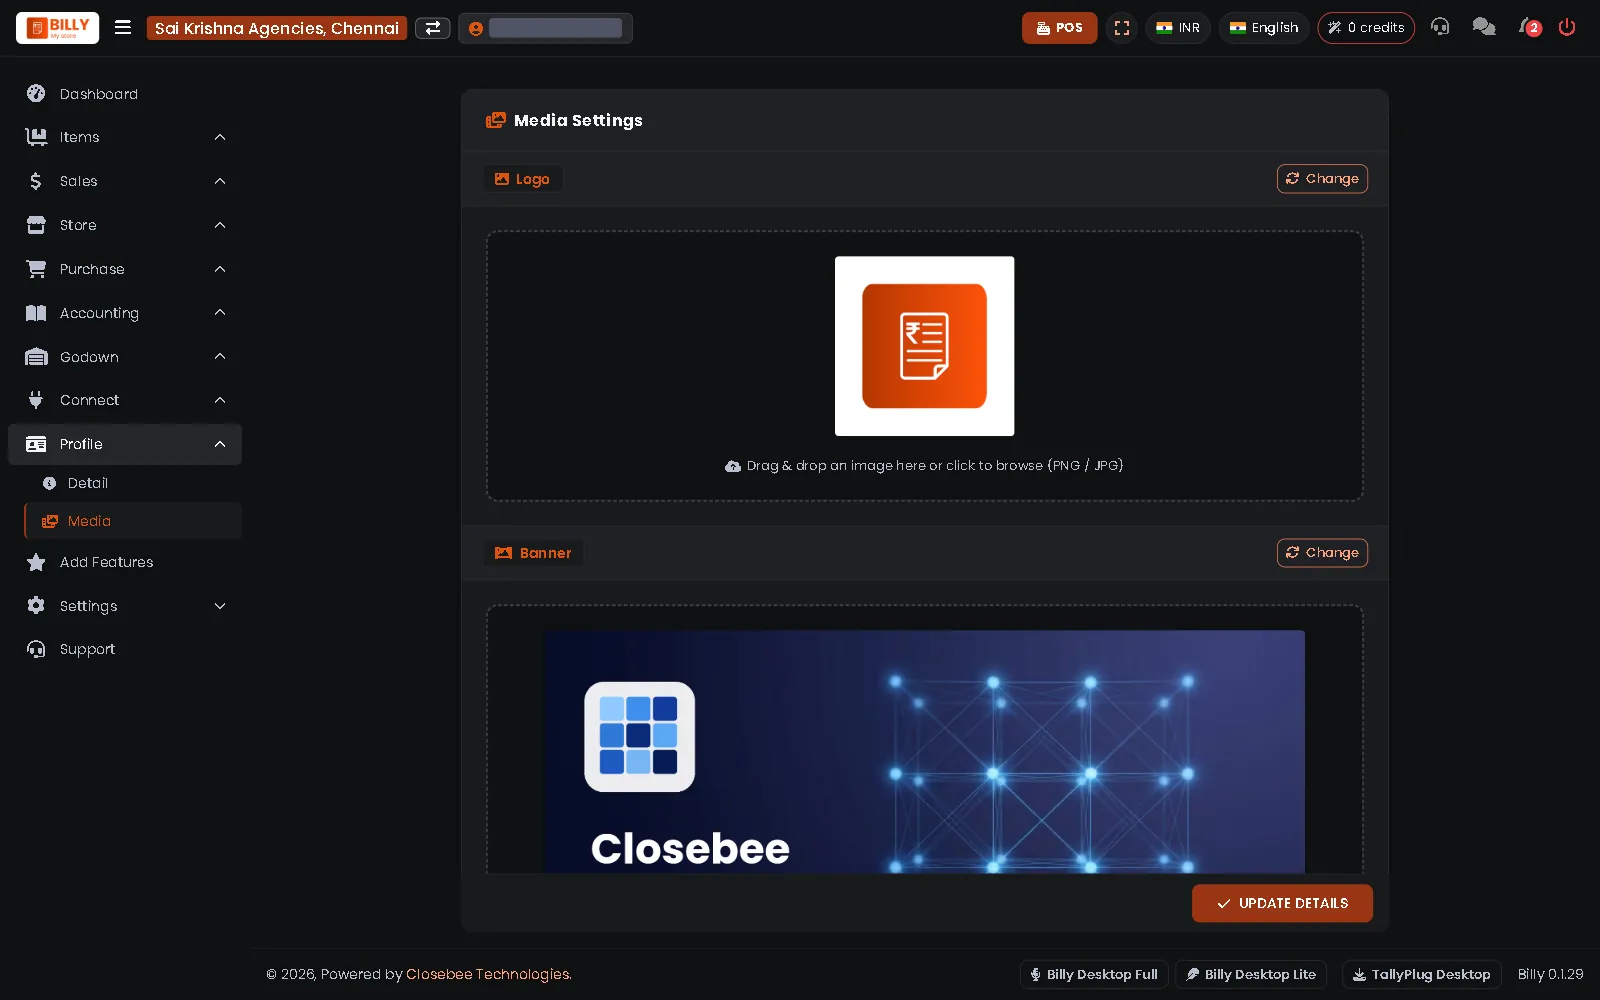
Profile > Media sets the logo and banner. Drag a picture in or press Change.
-
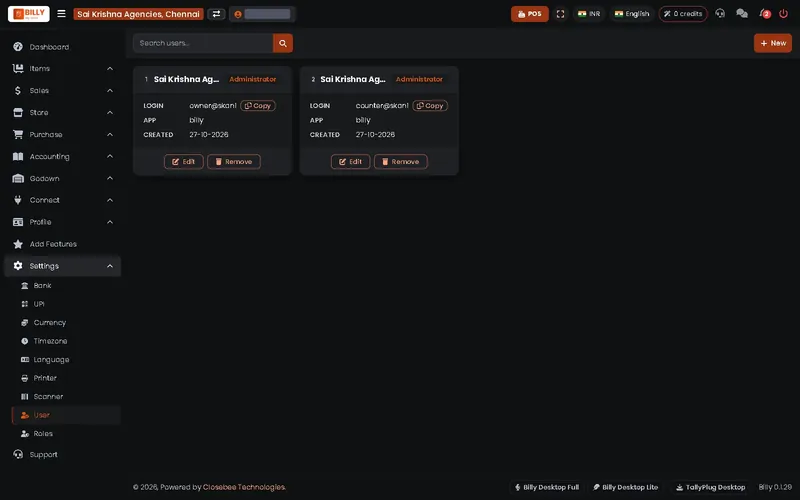
3Users
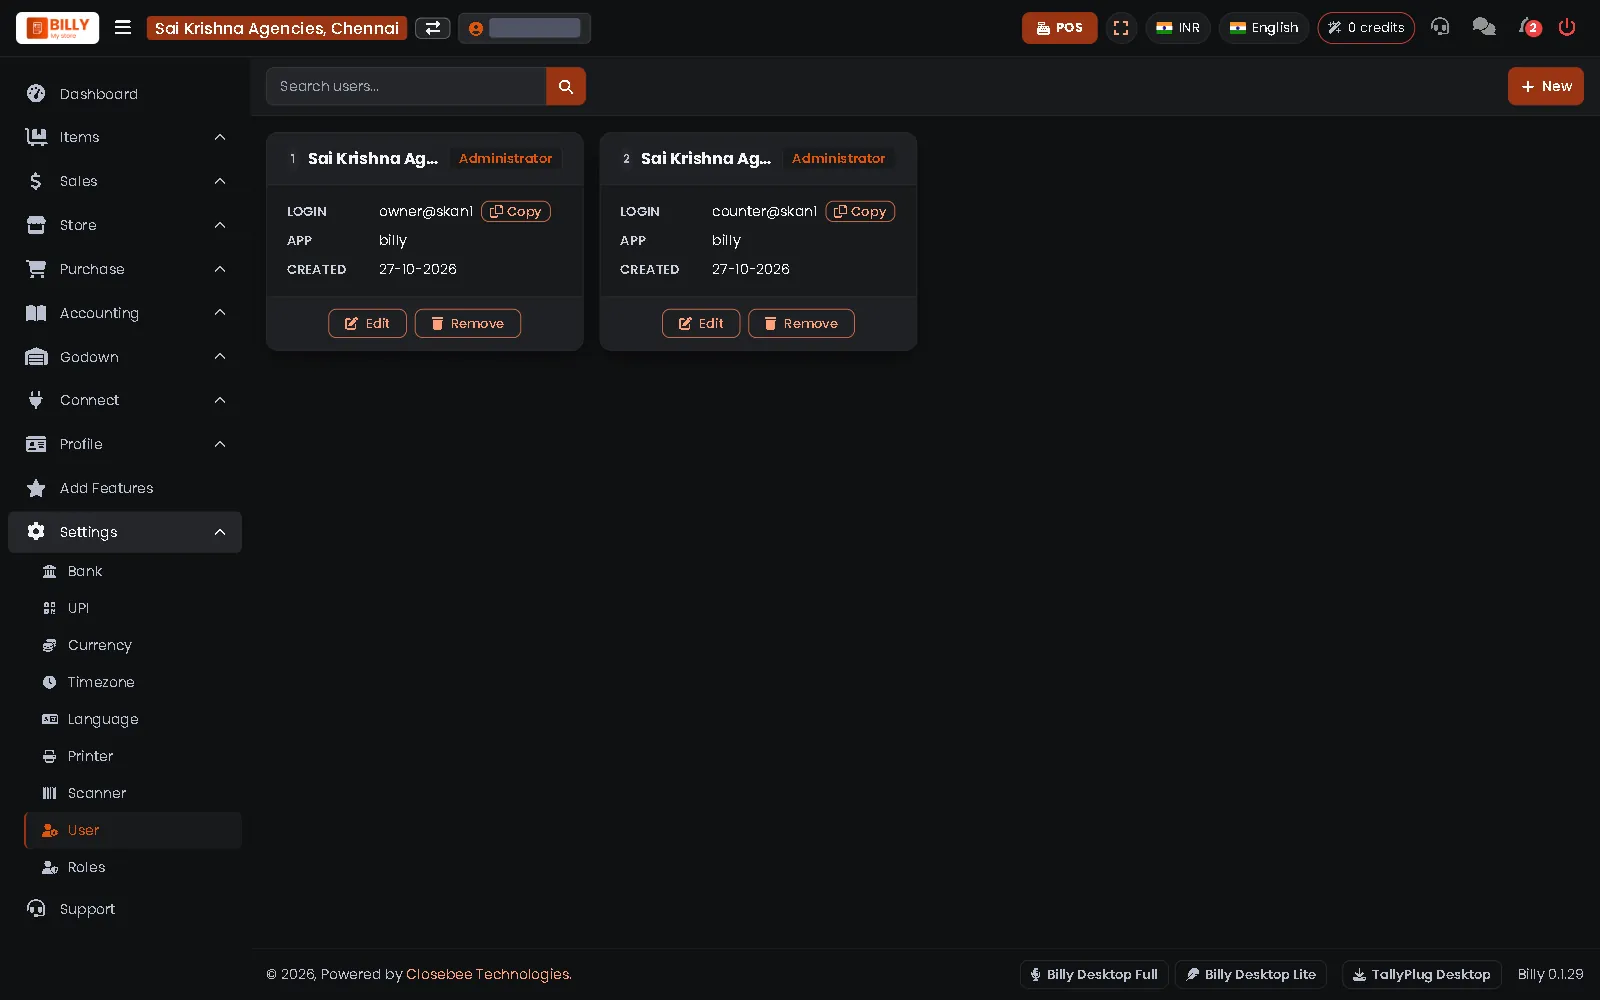
Settings > User lists everyone who can sign in and their role. Press New to add a staff login.
-
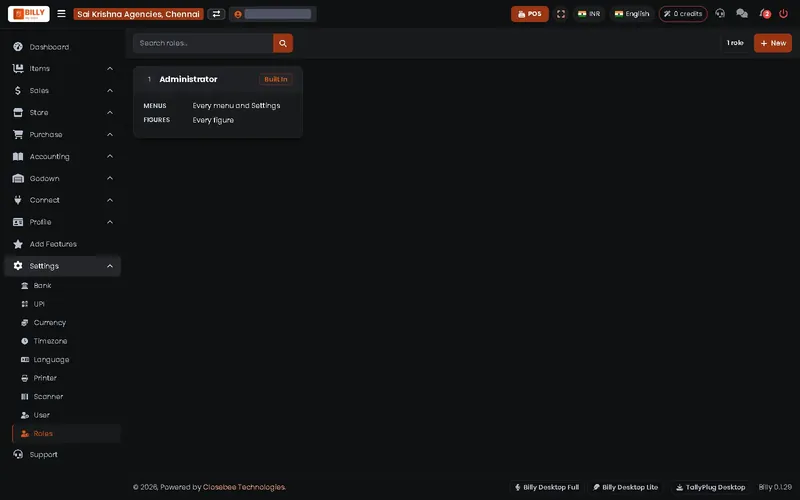
4Roles
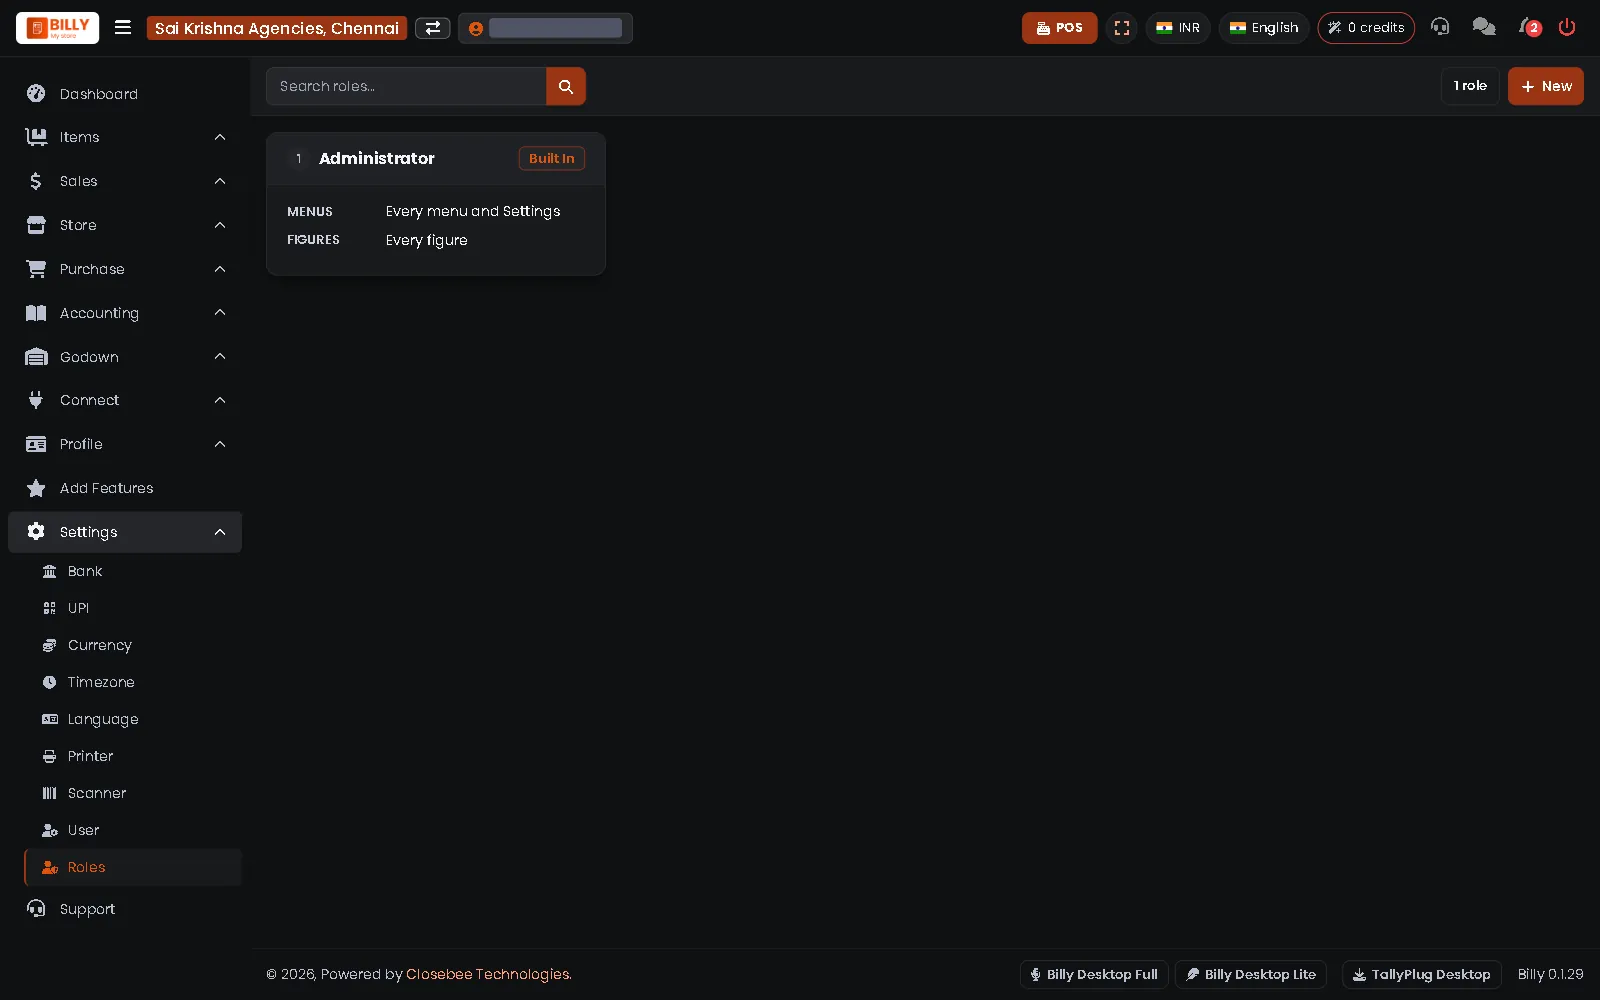
Settings > Roles decides which menus and figures each role can see. Press New to make a role, for example for counter staff.
-
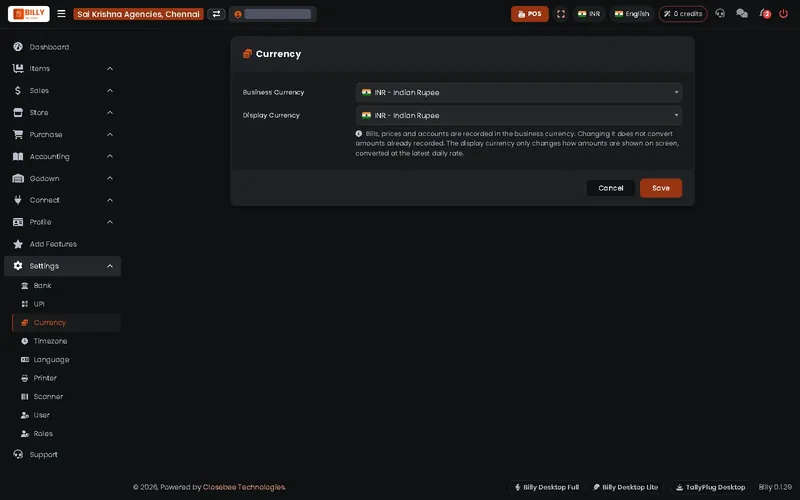
5Currency
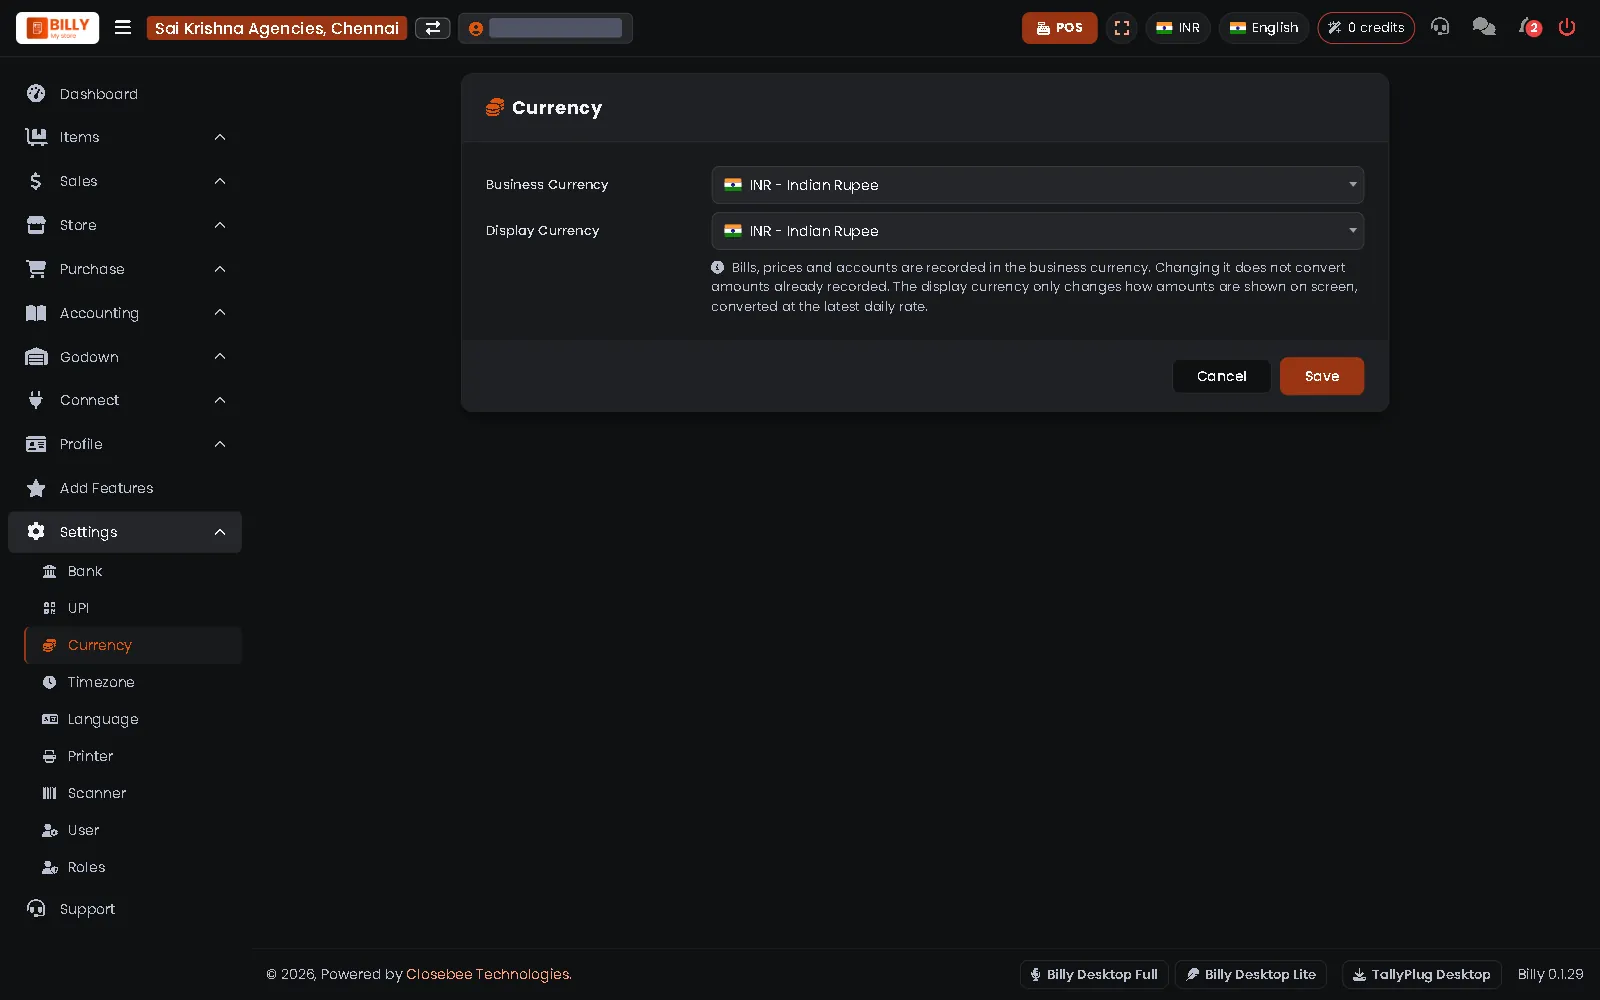
Settings > Currency sets the currency your books are kept in and the one shown on screen.
-
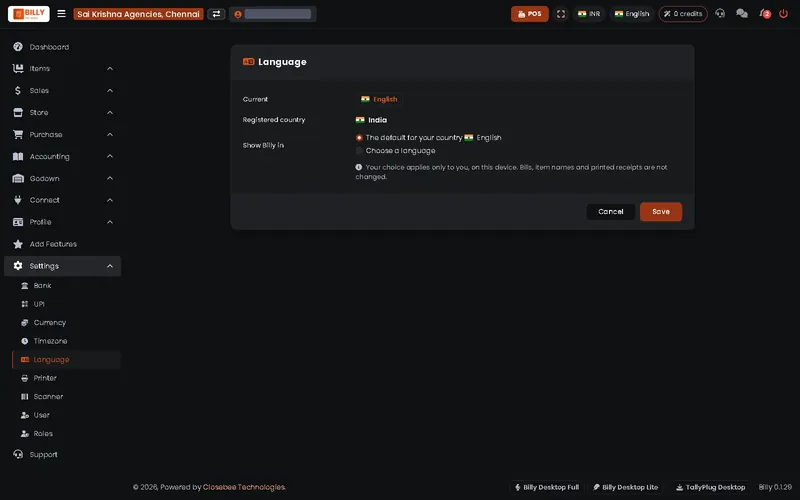
6Language
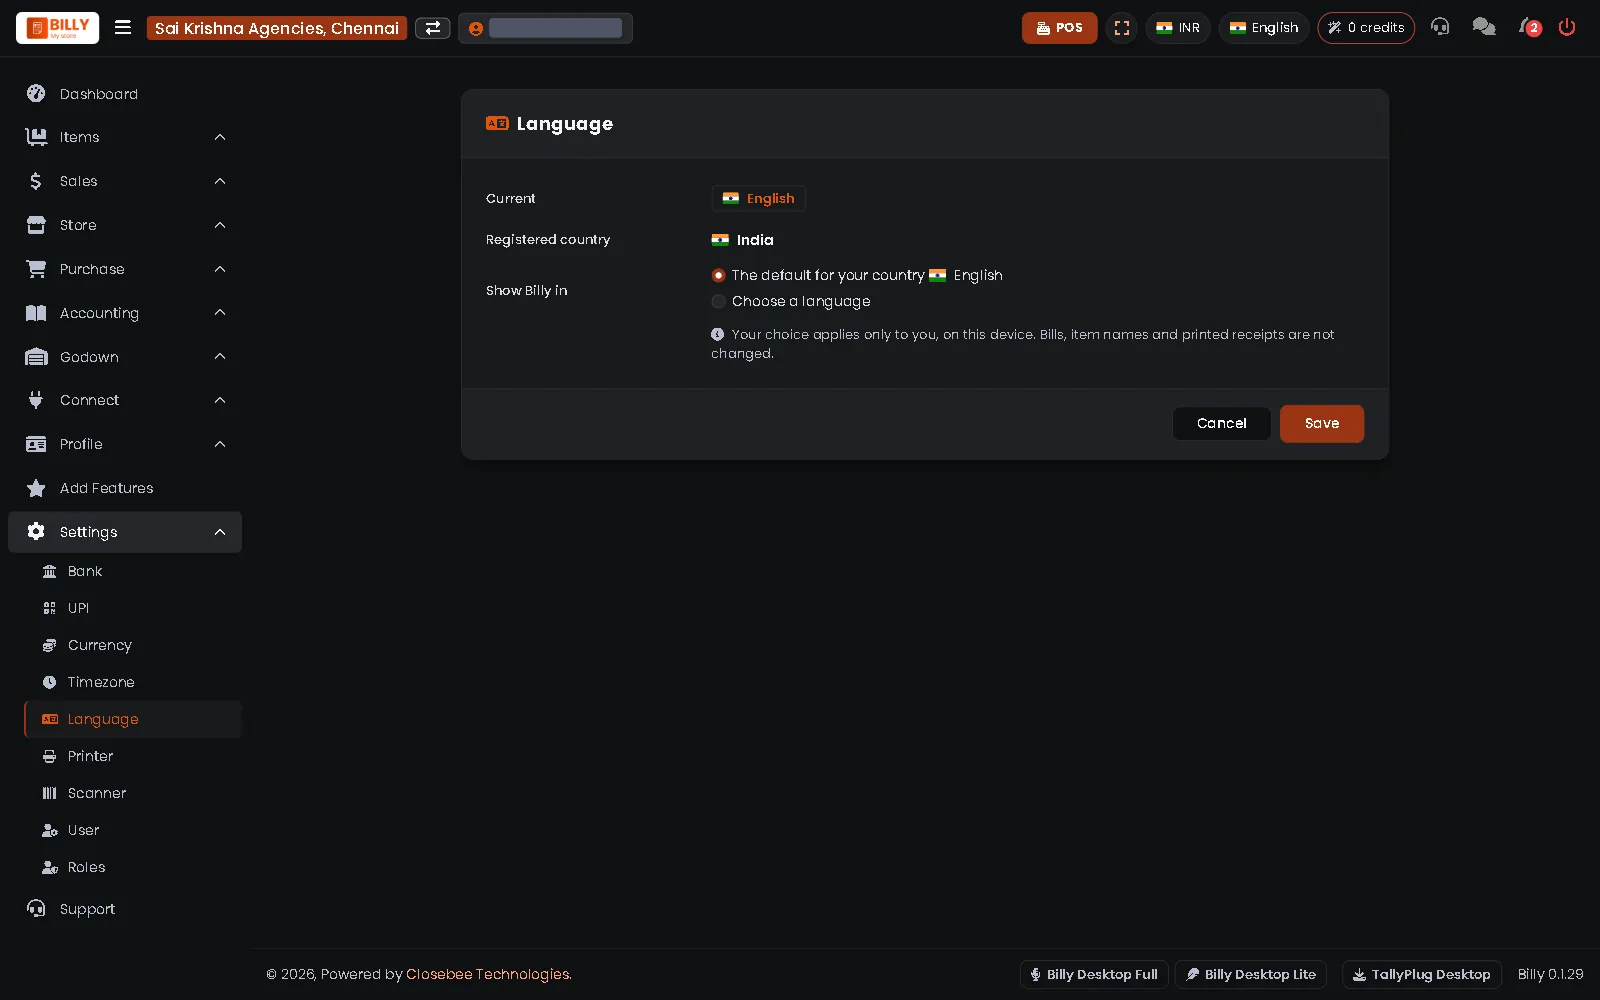
Settings > Language picks the language Billy shows you. It applies only to you on this device.
-
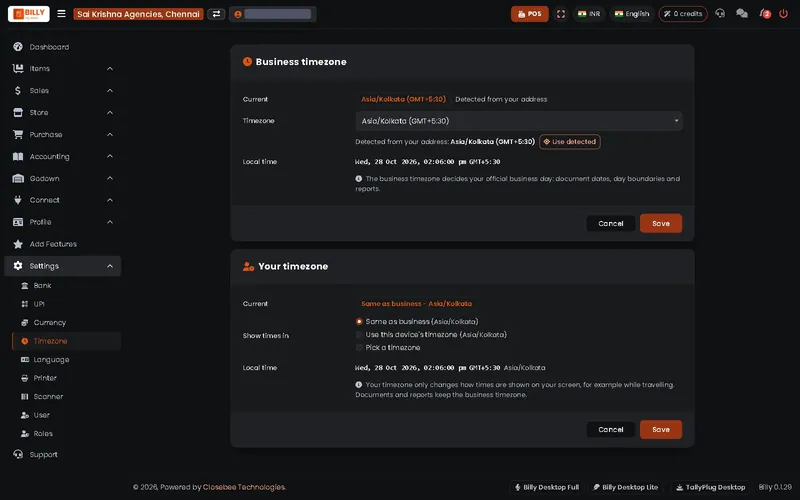
7Timezone
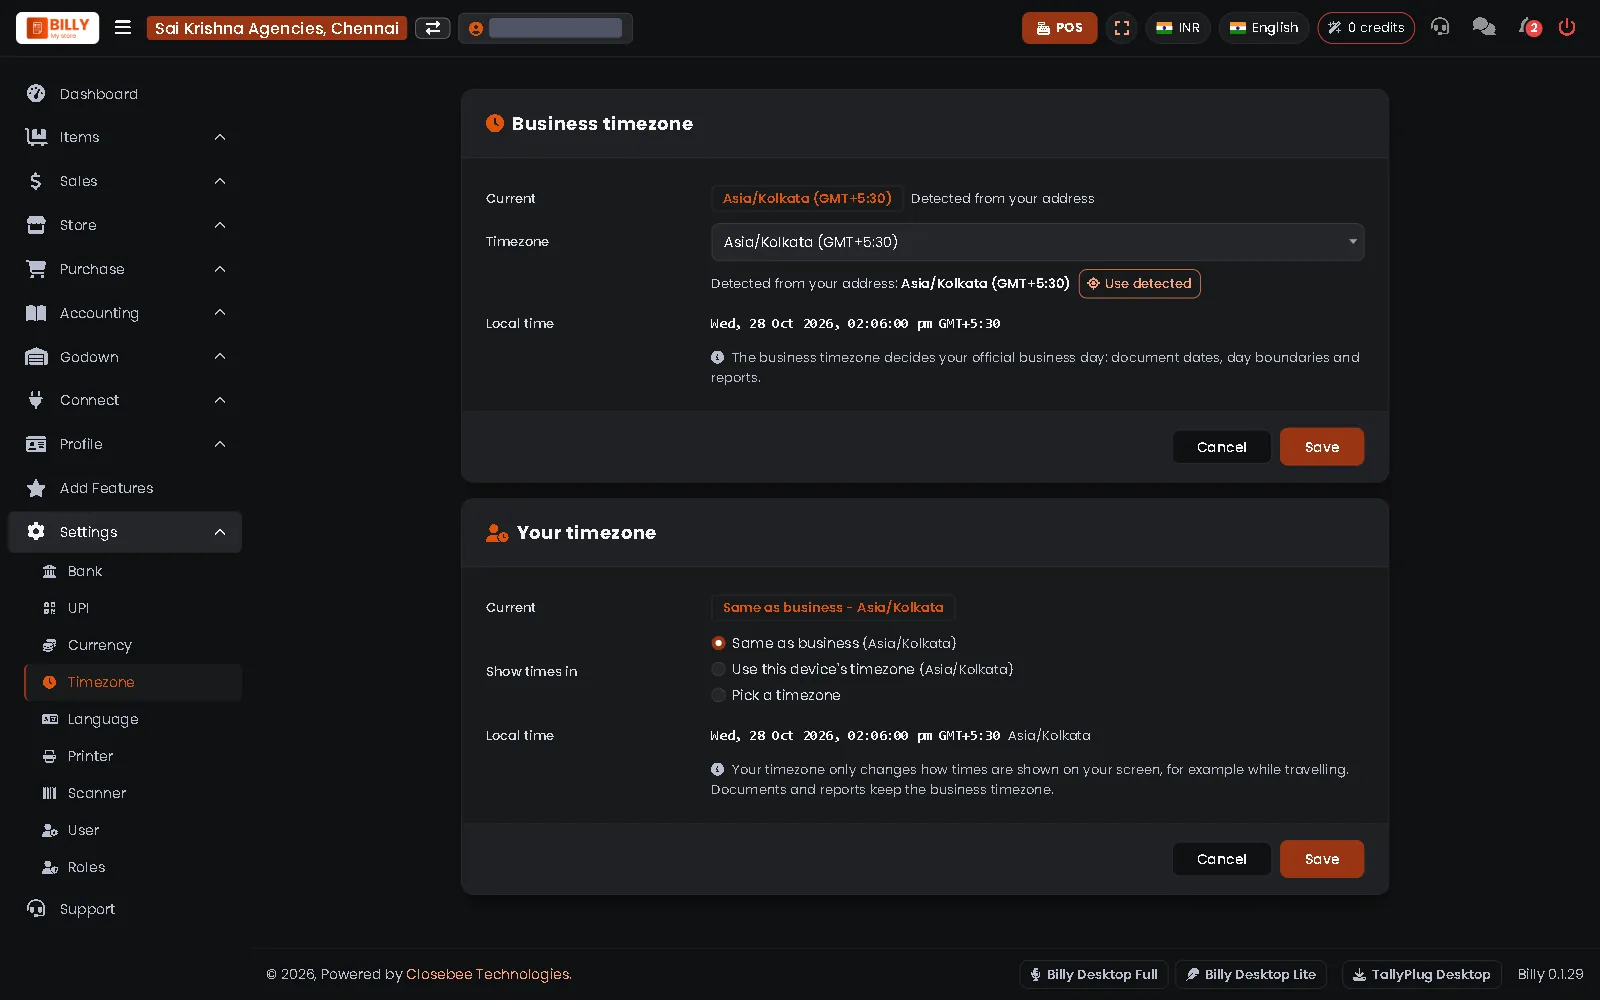
Settings > Timezone sets the business day used for bill dates and reports.
-
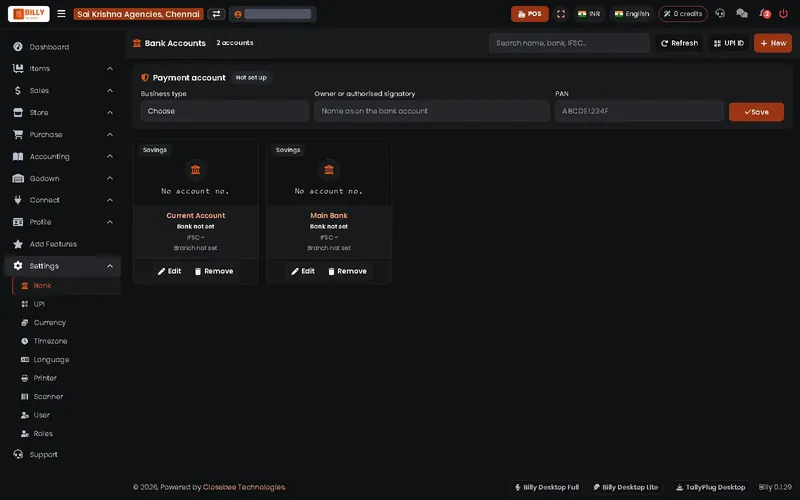
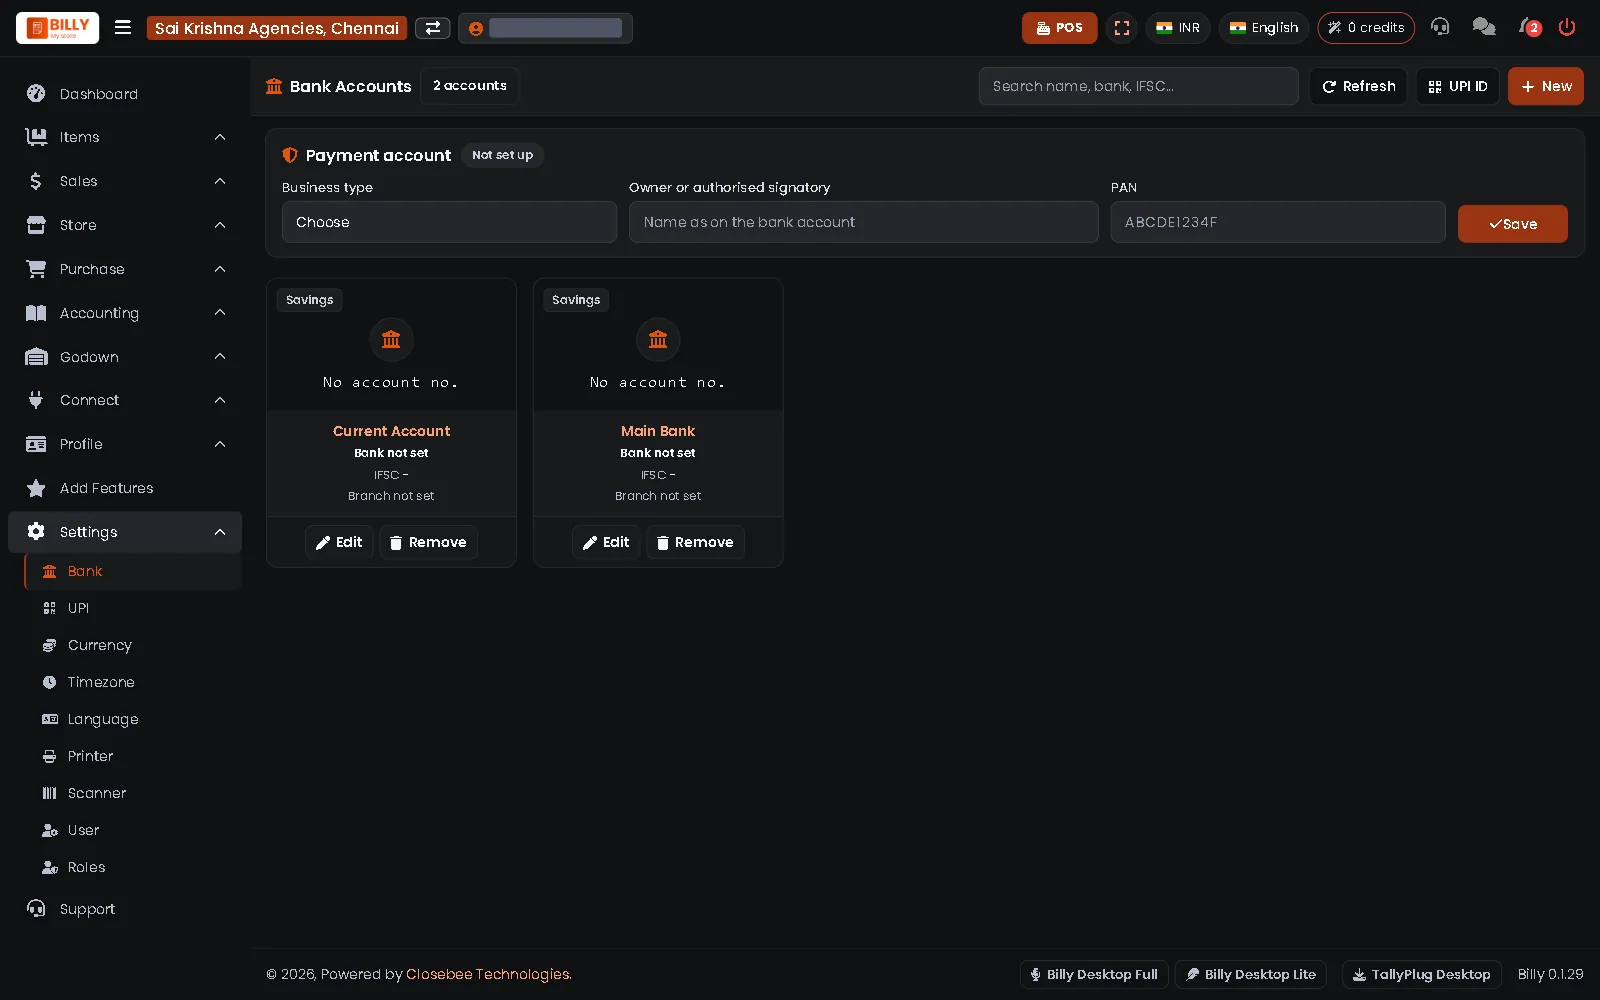
8Bank accounts
Settings > Bank keeps your bank and payment account details.
-
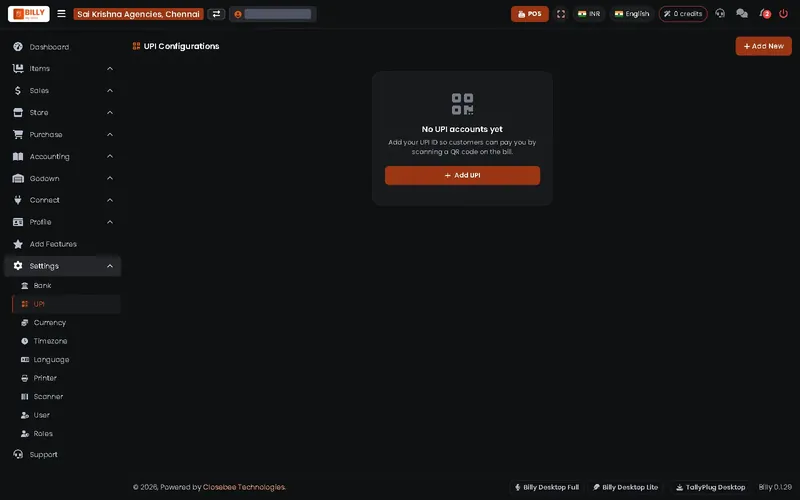
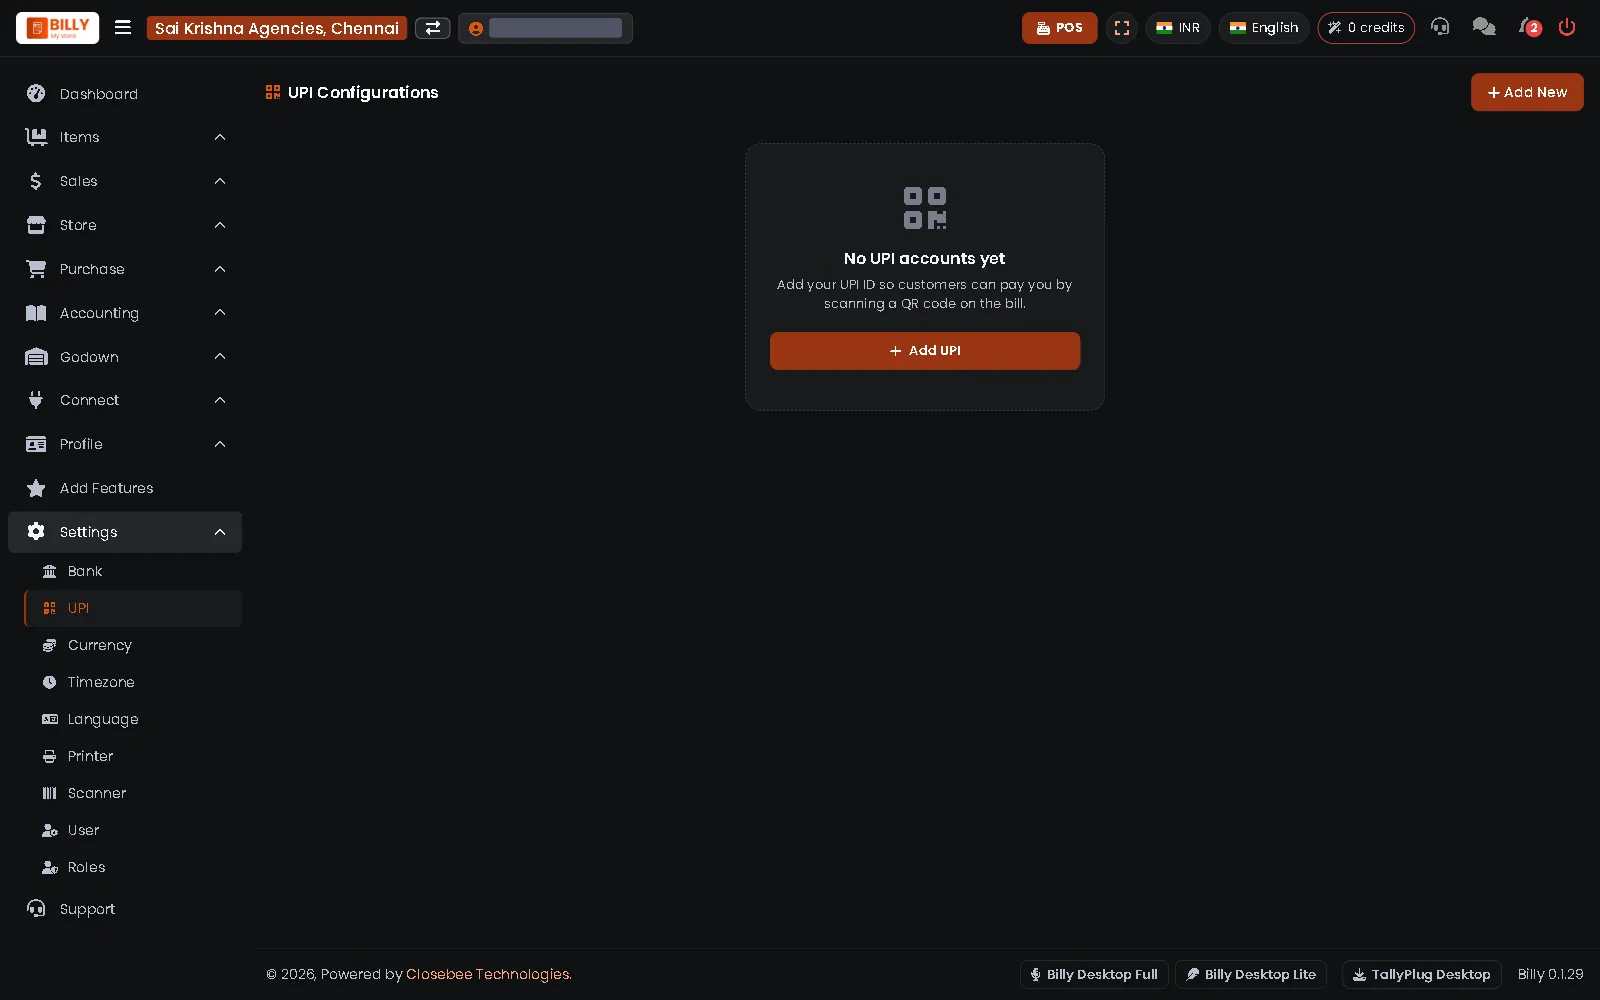
9UPI
Settings > UPI adds your UPI ID, so customers can pay by scanning a QR code on the bill.
-
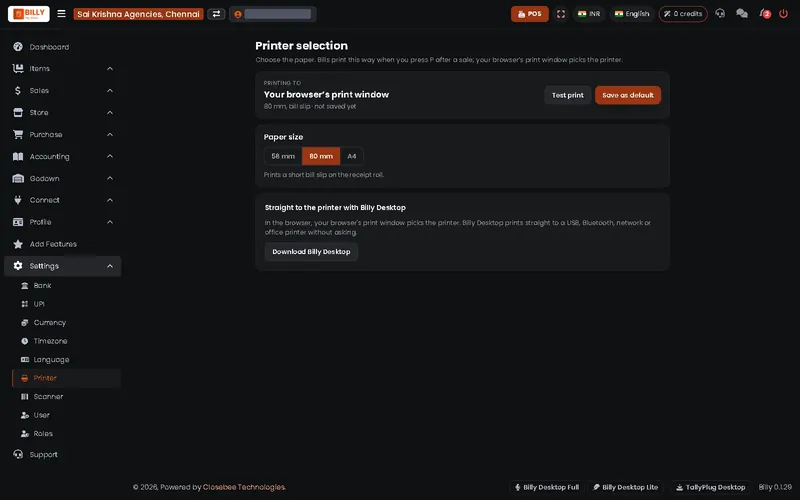
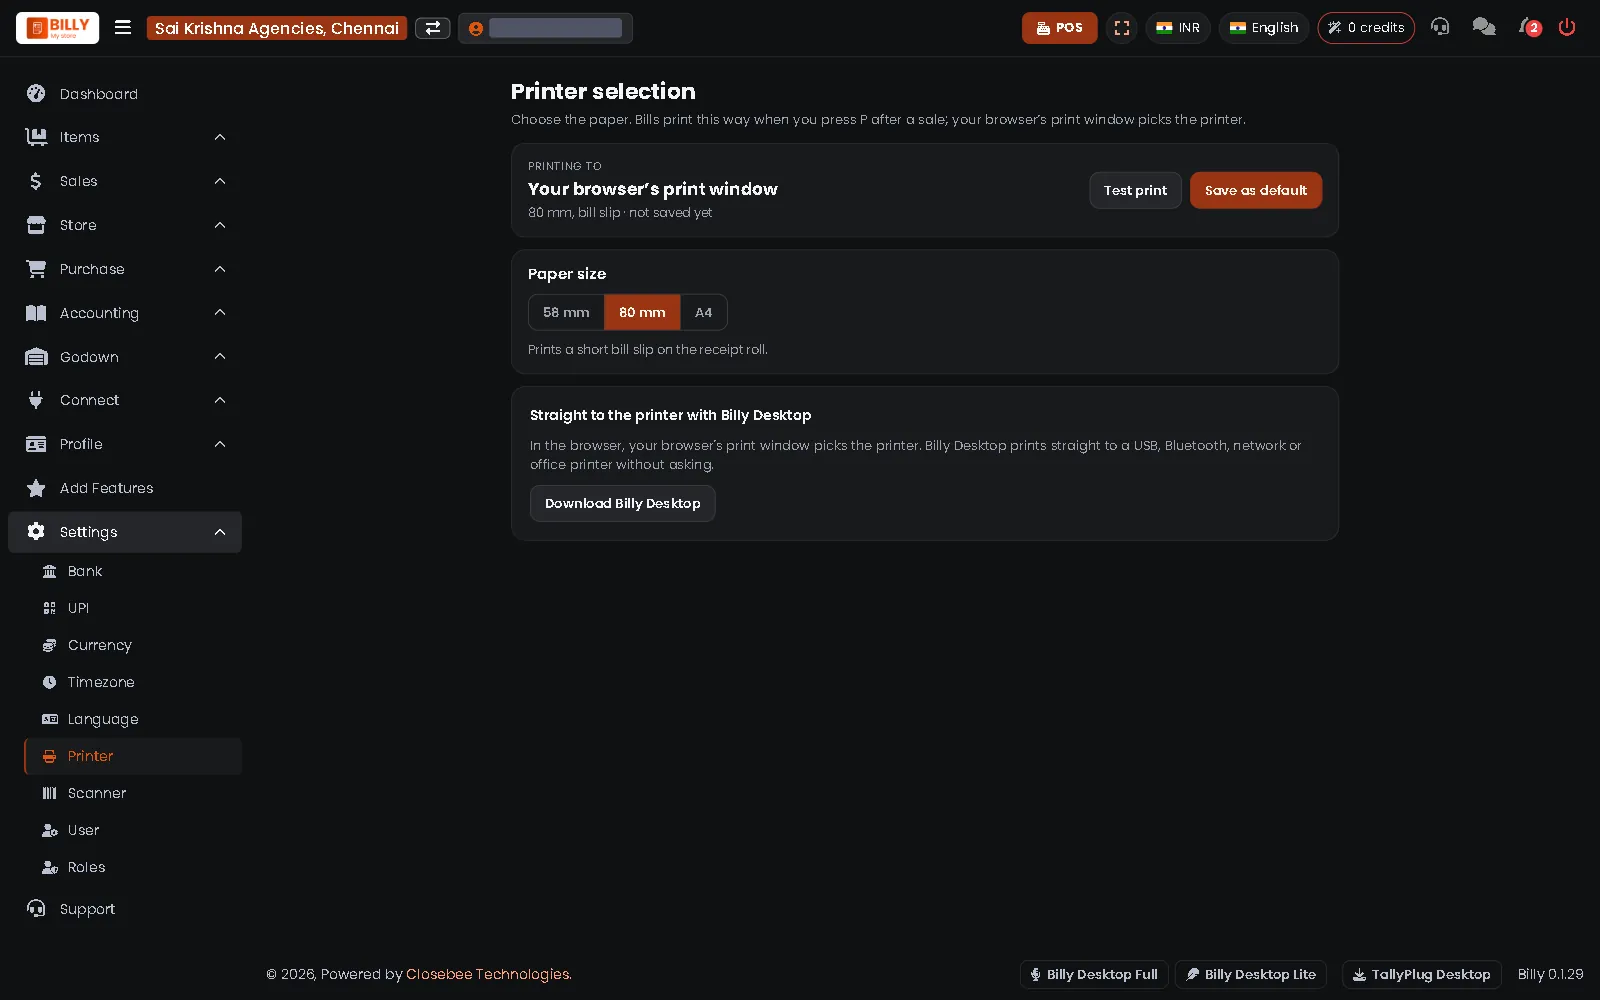
10Printer
Settings > Printer picks the paper size (58 mm, 80 mm or A4). Press Test print to check it.
-
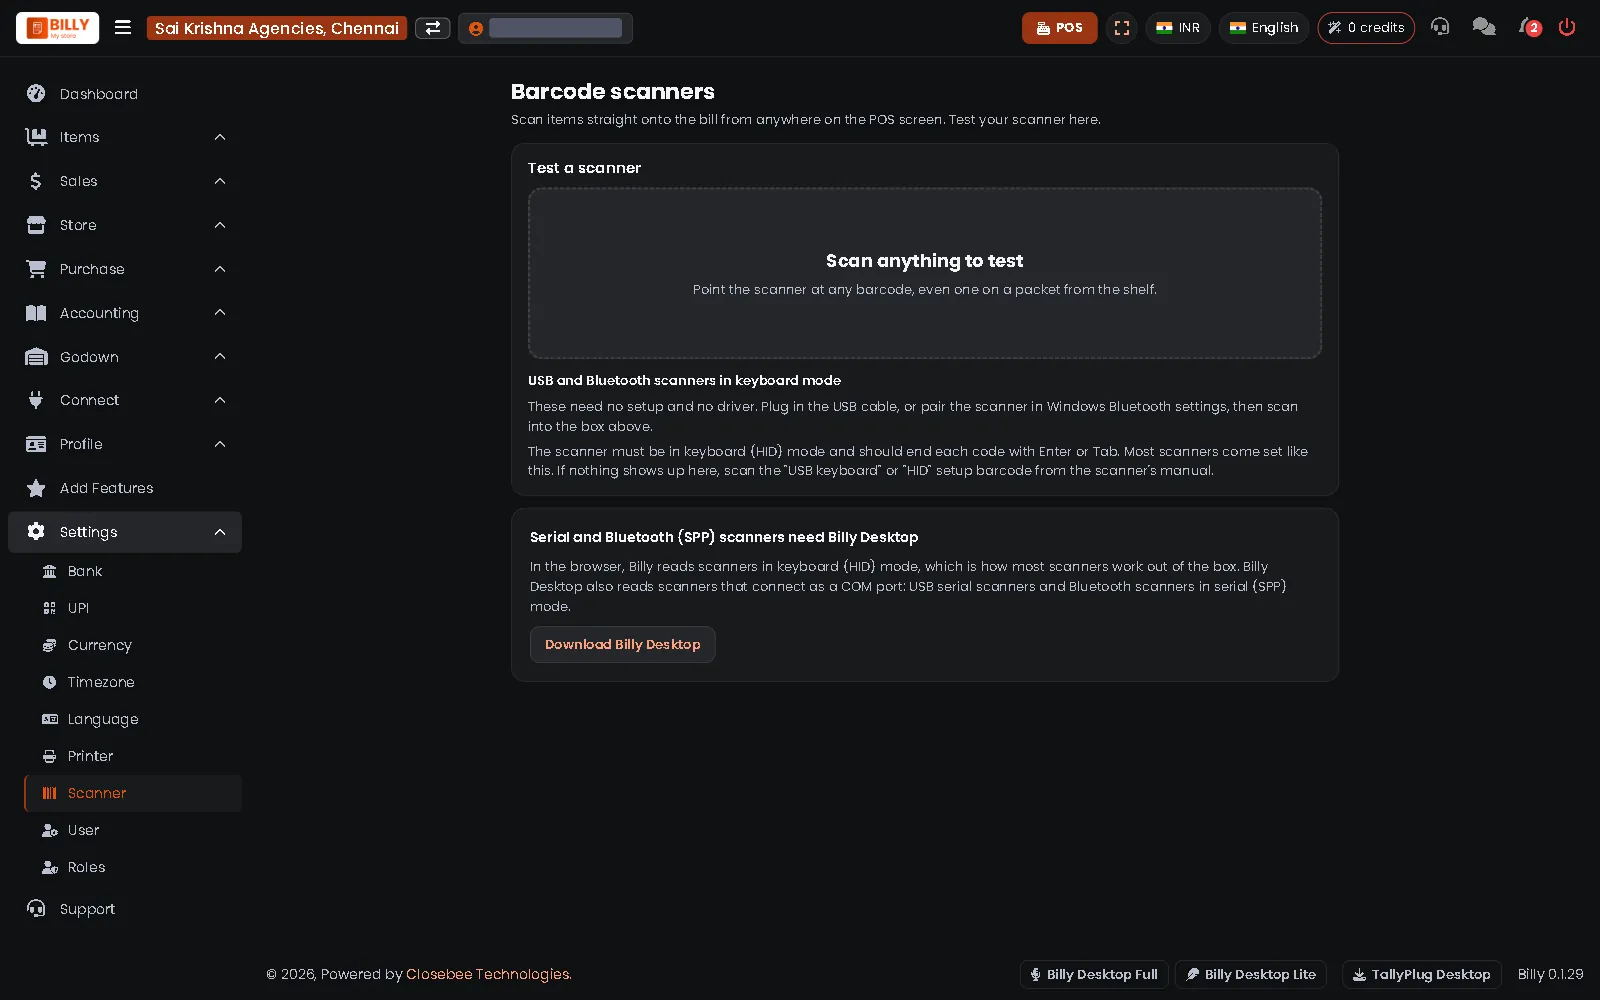
11Barcode scanner
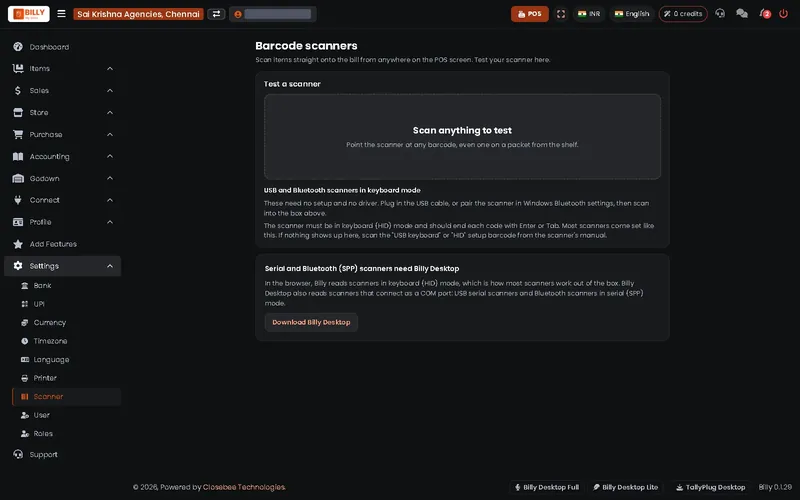
Settings > Scanner tests a USB or Bluetooth scanner. Scan any barcode into the box.
16Add Features
Optional add-ons for your shop.
-
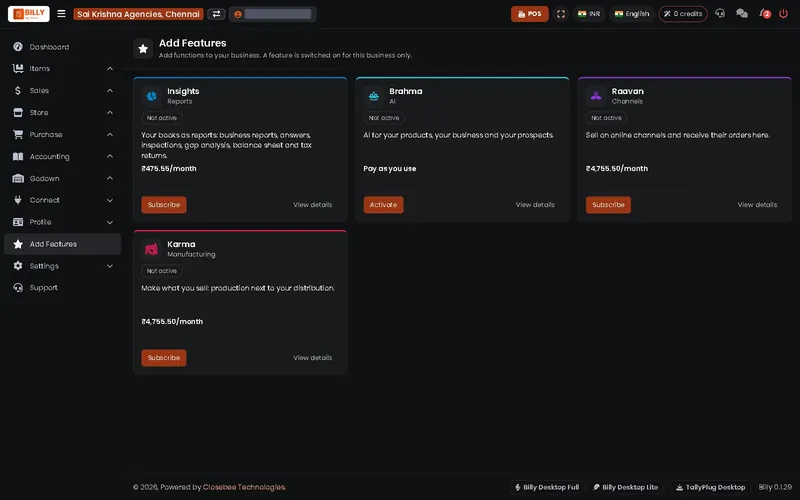
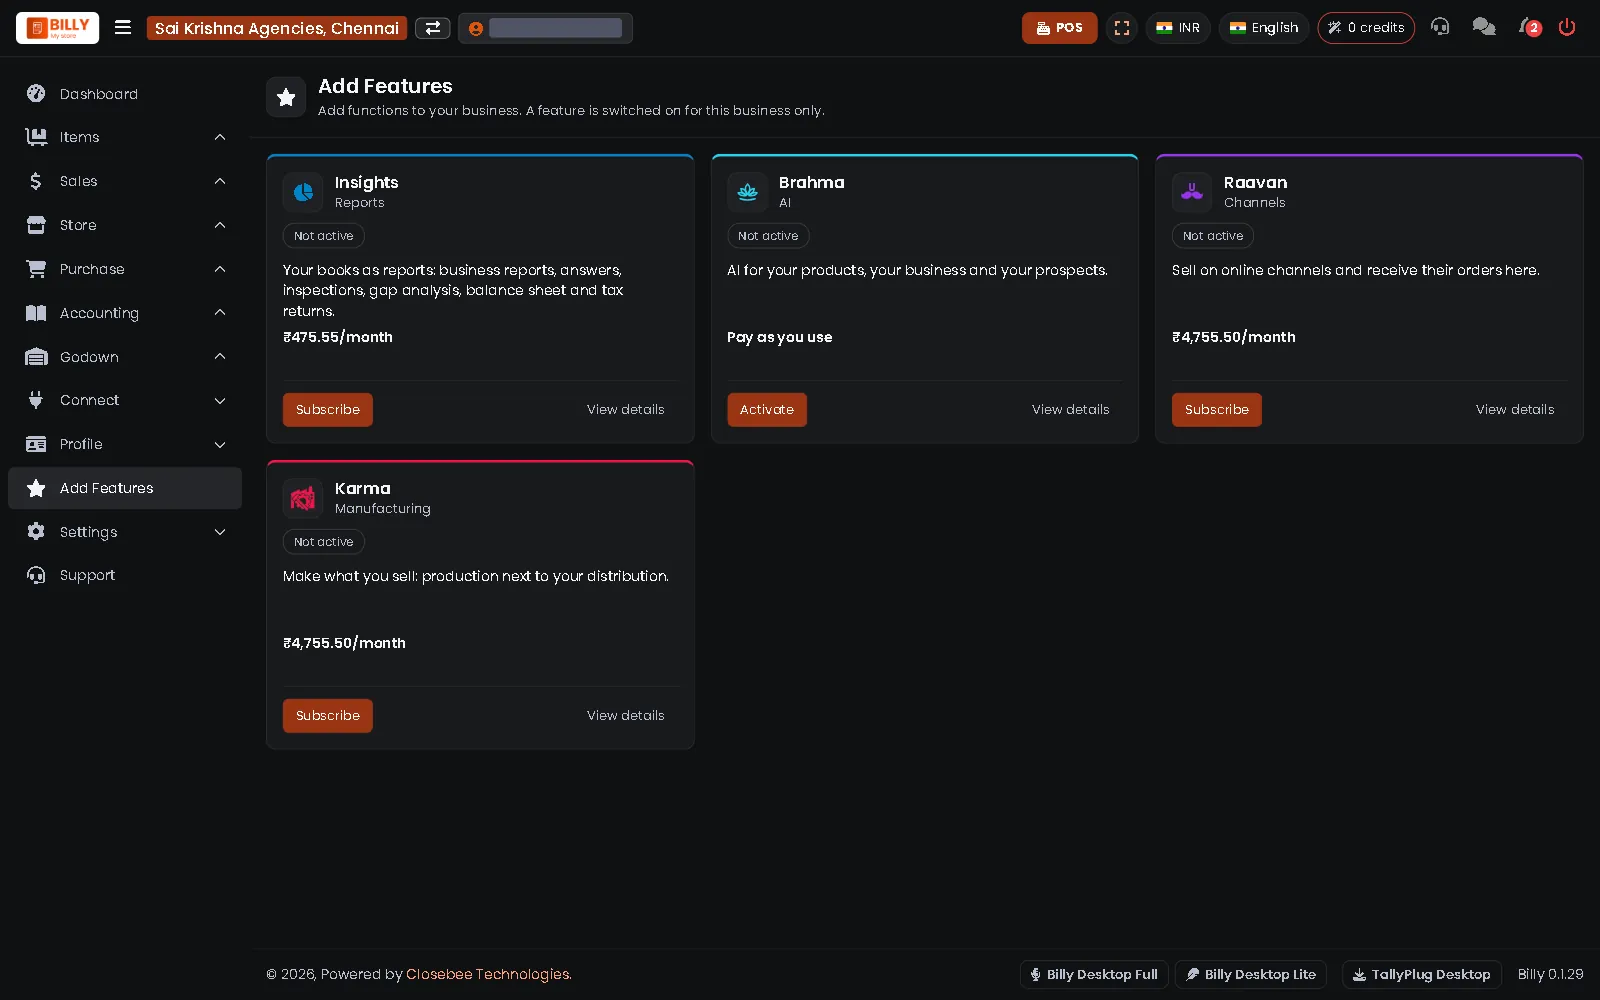
1Add Features
Add Features lists the optional add-ons you can subscribe to for this shop, each with its price. Press View details to read more first.
17Support
Ask the Billy team for help.
-
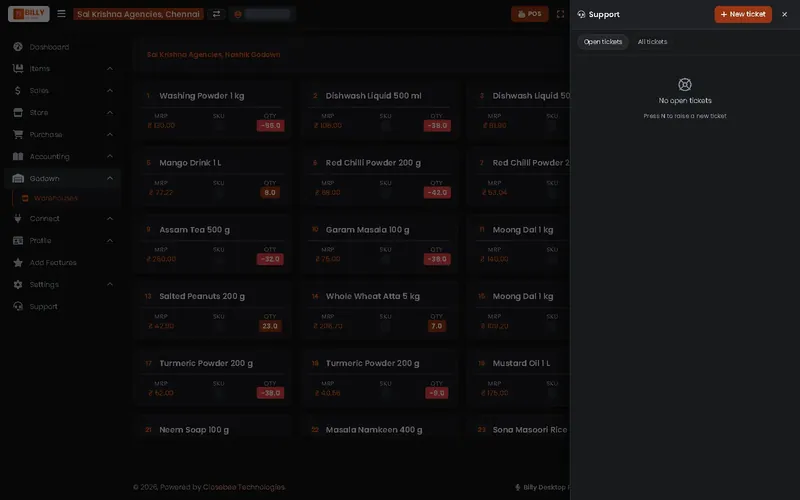
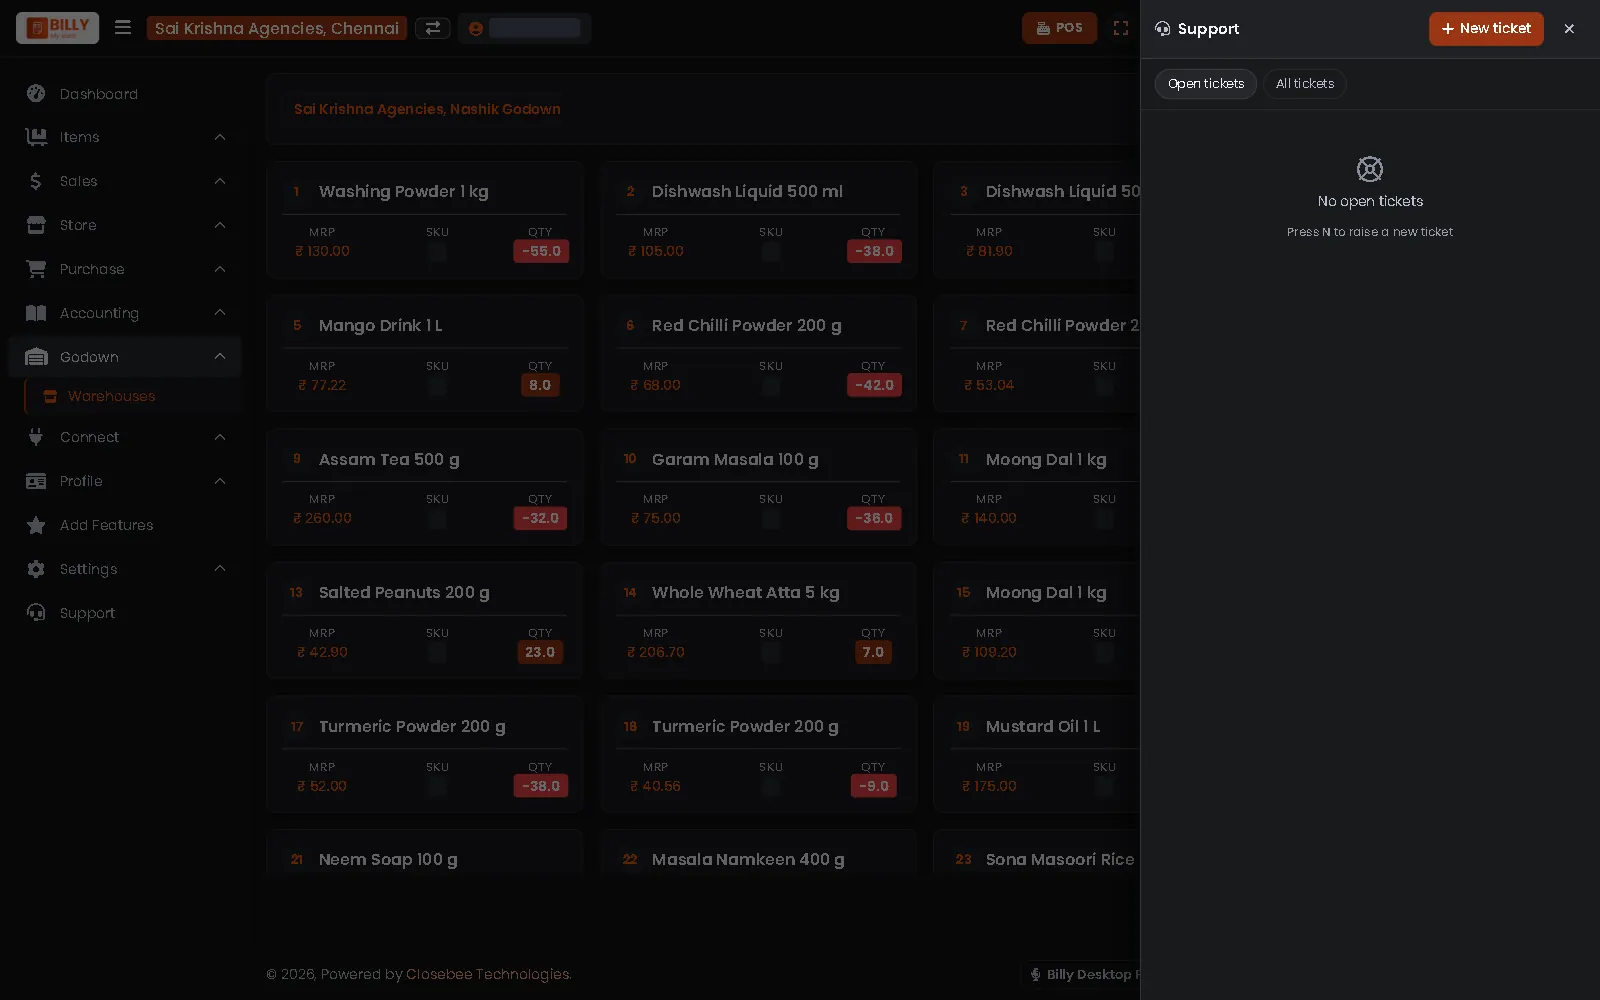
1Your tickets
Press the support icon at the top to see your tickets.
-
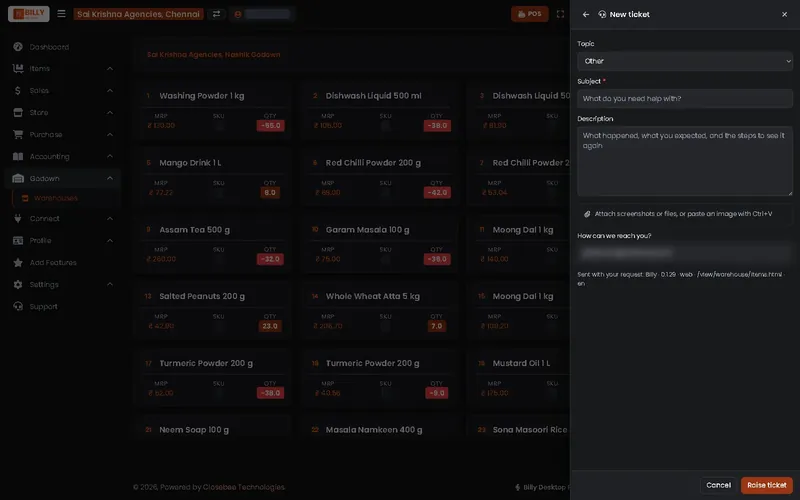
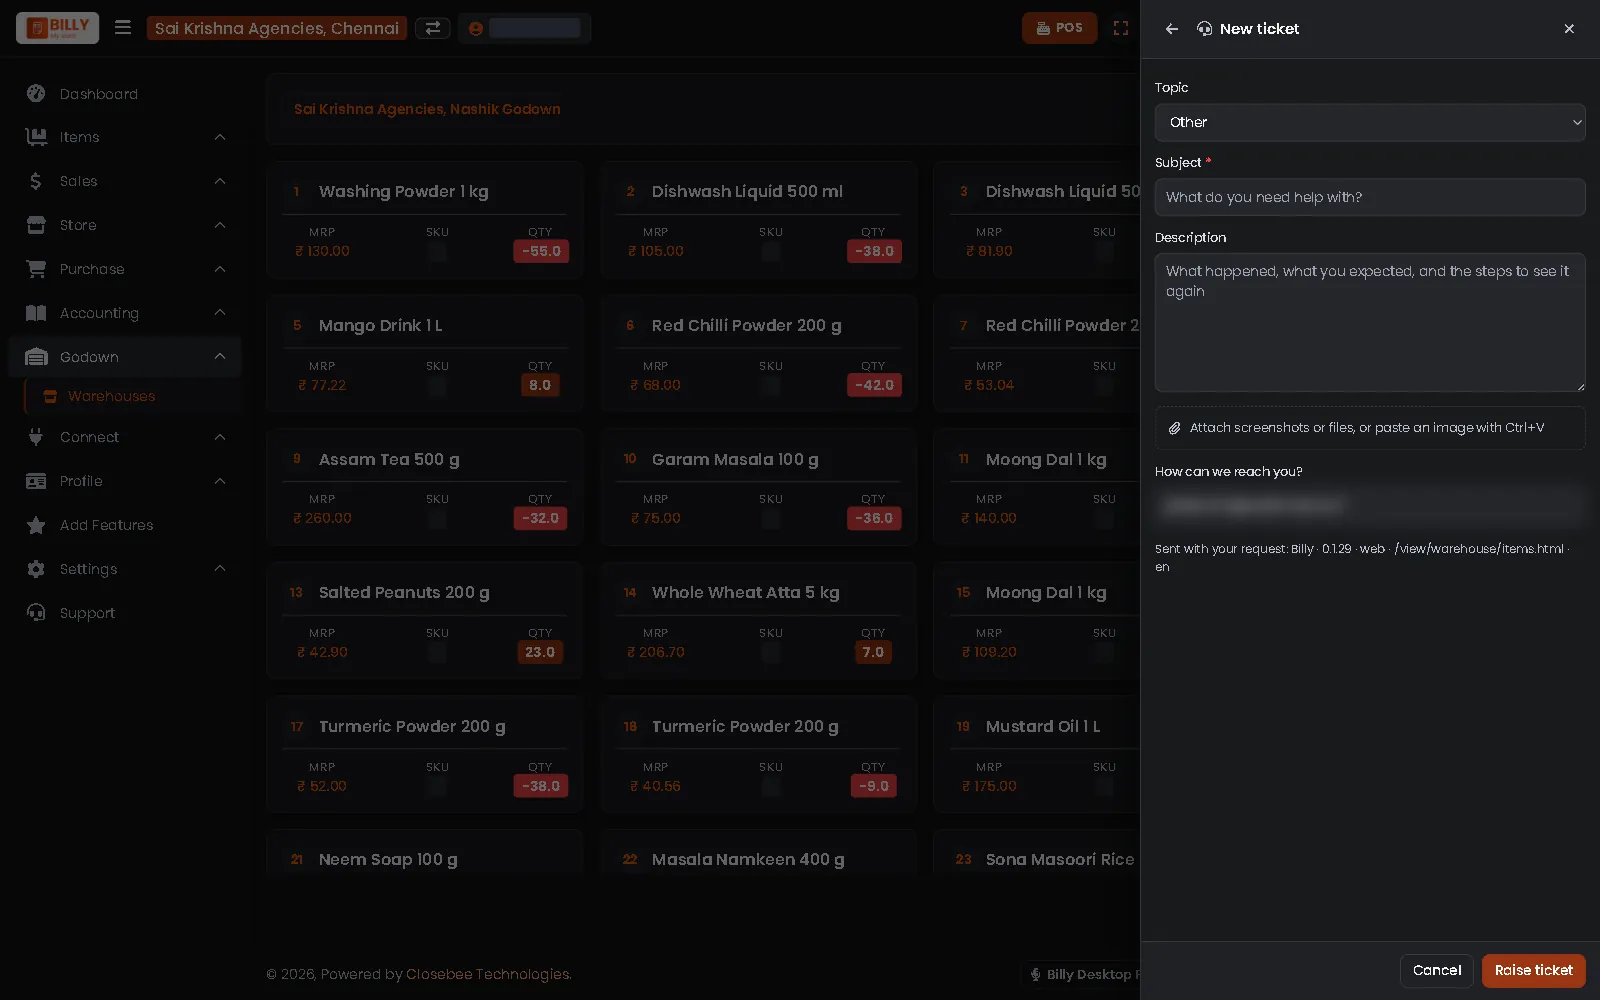
2Raise a ticket
Press New ticket, pick a topic, write a subject and what happened, attach a screenshot if you can, and press Raise ticket.
18Billy on a phone
The same Billy, sized for your phone.
-
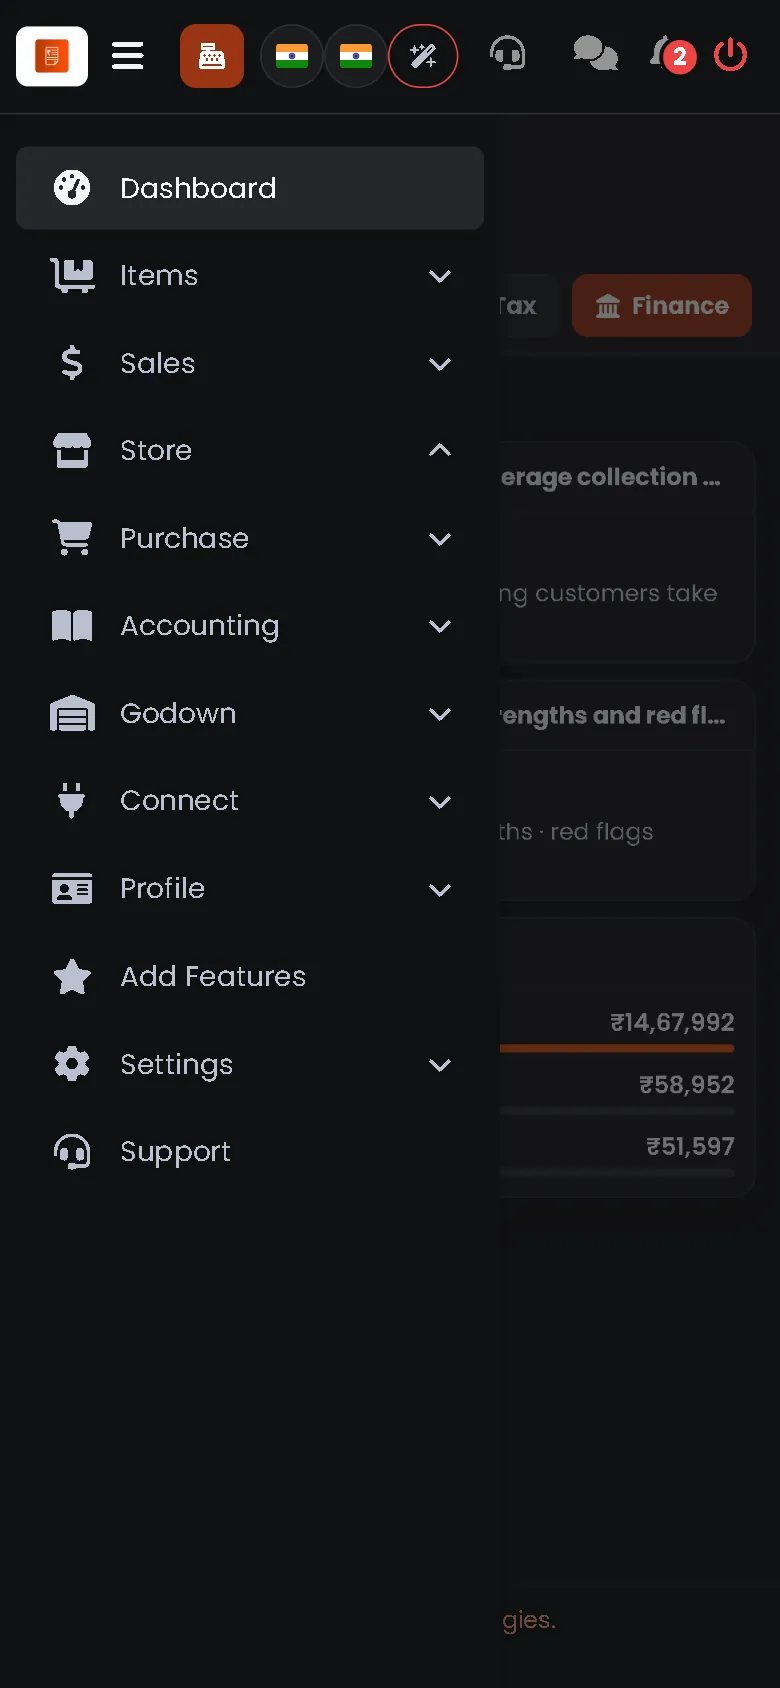
1Menu
The menu opens from the button at the top left.
-
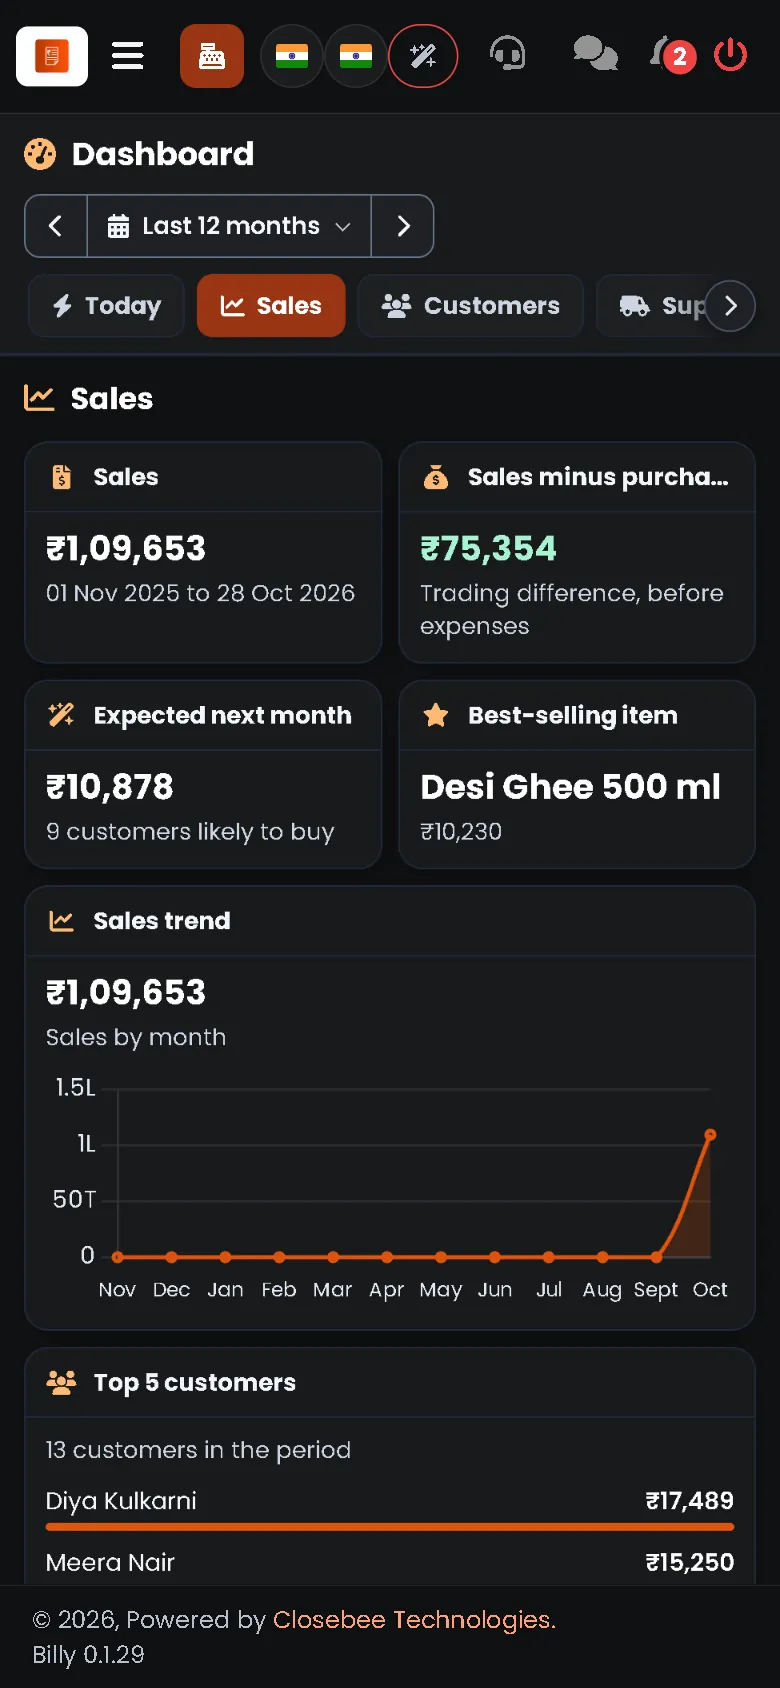
2Dashboard
Swipe the tabs to see Sales, Customers and more.
-
3POS
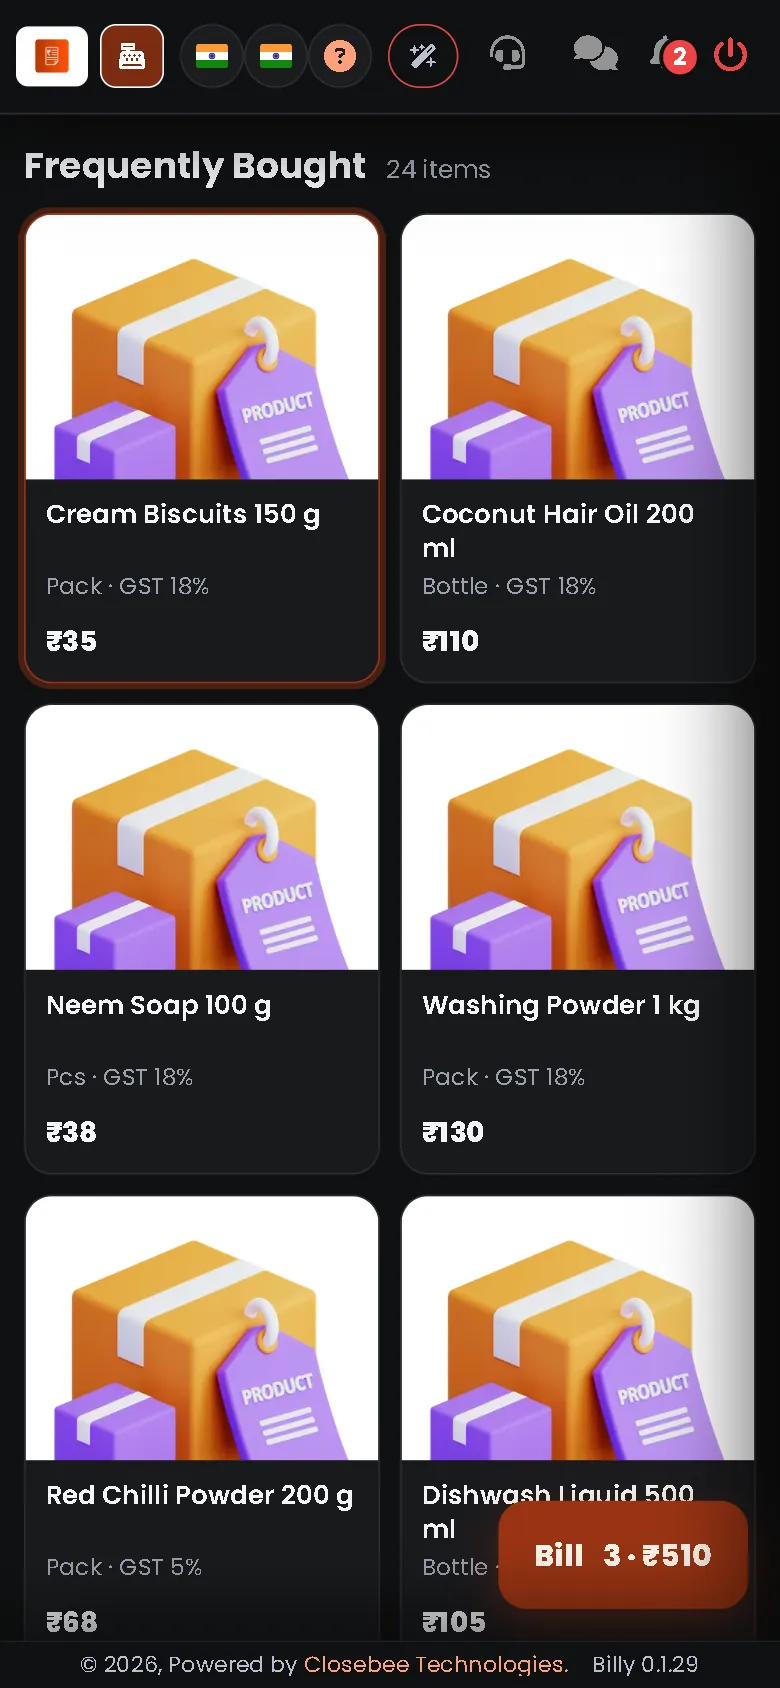
Tap item tiles to bill. The Bill button shows the item count and total.
-
4The bill
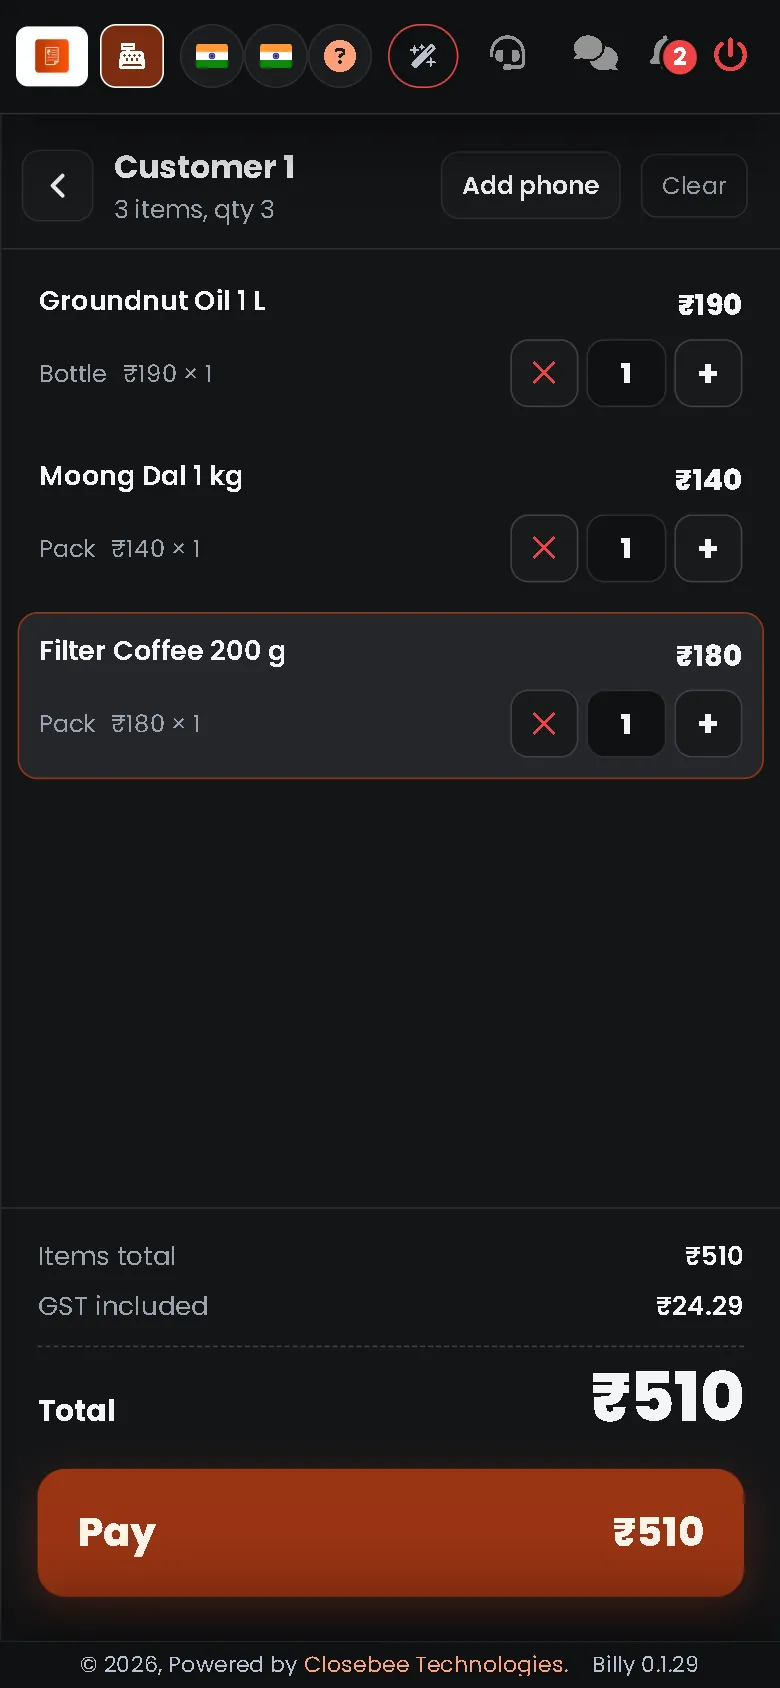
Tap Bill to see the lines, change quantities and press Pay.
Billy Desktop
Billy for your Windows counter PC: keyboard billing, voice, receipt printers and scanners.
D1Download Billy Desktop
Billy for your Windows counter PC.
-
1Create your store first
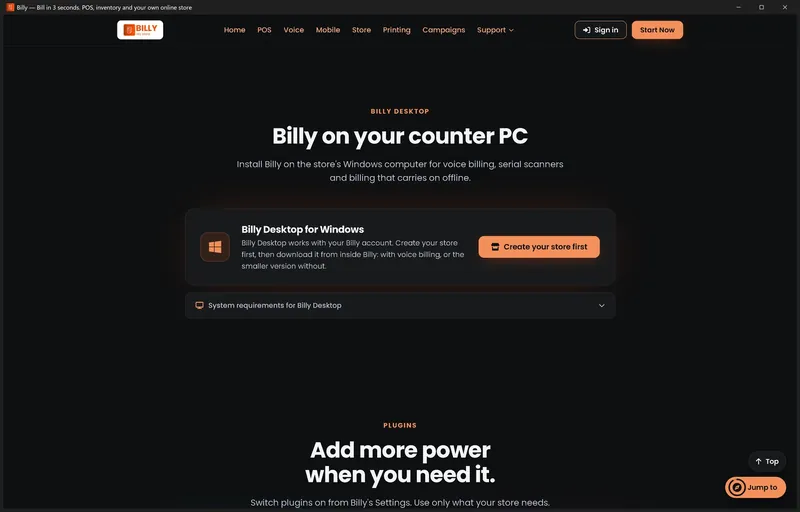
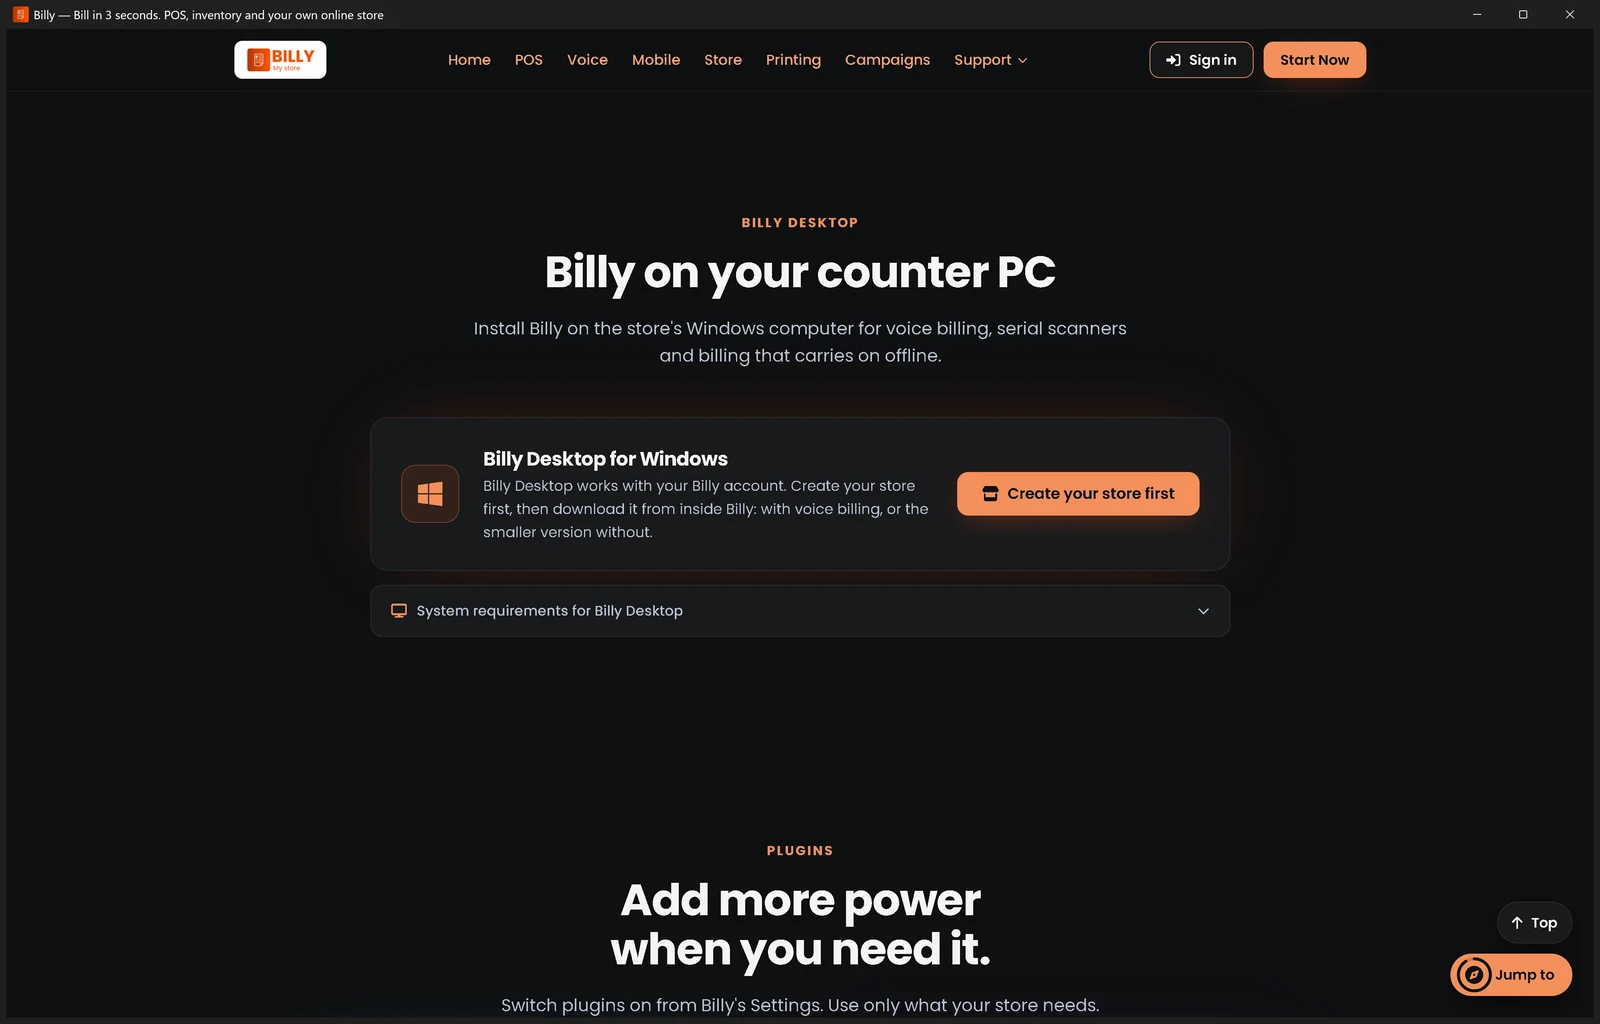
Create your Billy store on mybilly.store, then sign in to Billy on the web. The links at the bottom of every Billy screen download Billy Desktop Full (with voice billing) or Billy Desktop Lite (smaller, without voice). Open System requirements to check your PC.
D2Licence key
One-time sign-in on each PC. The key comes from Connect › Admin in Billy on the web.
-
1Copy the Admin key
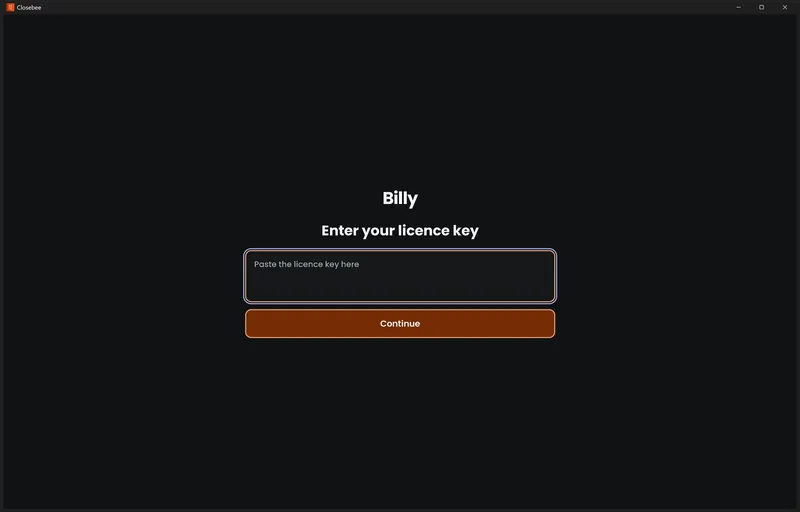
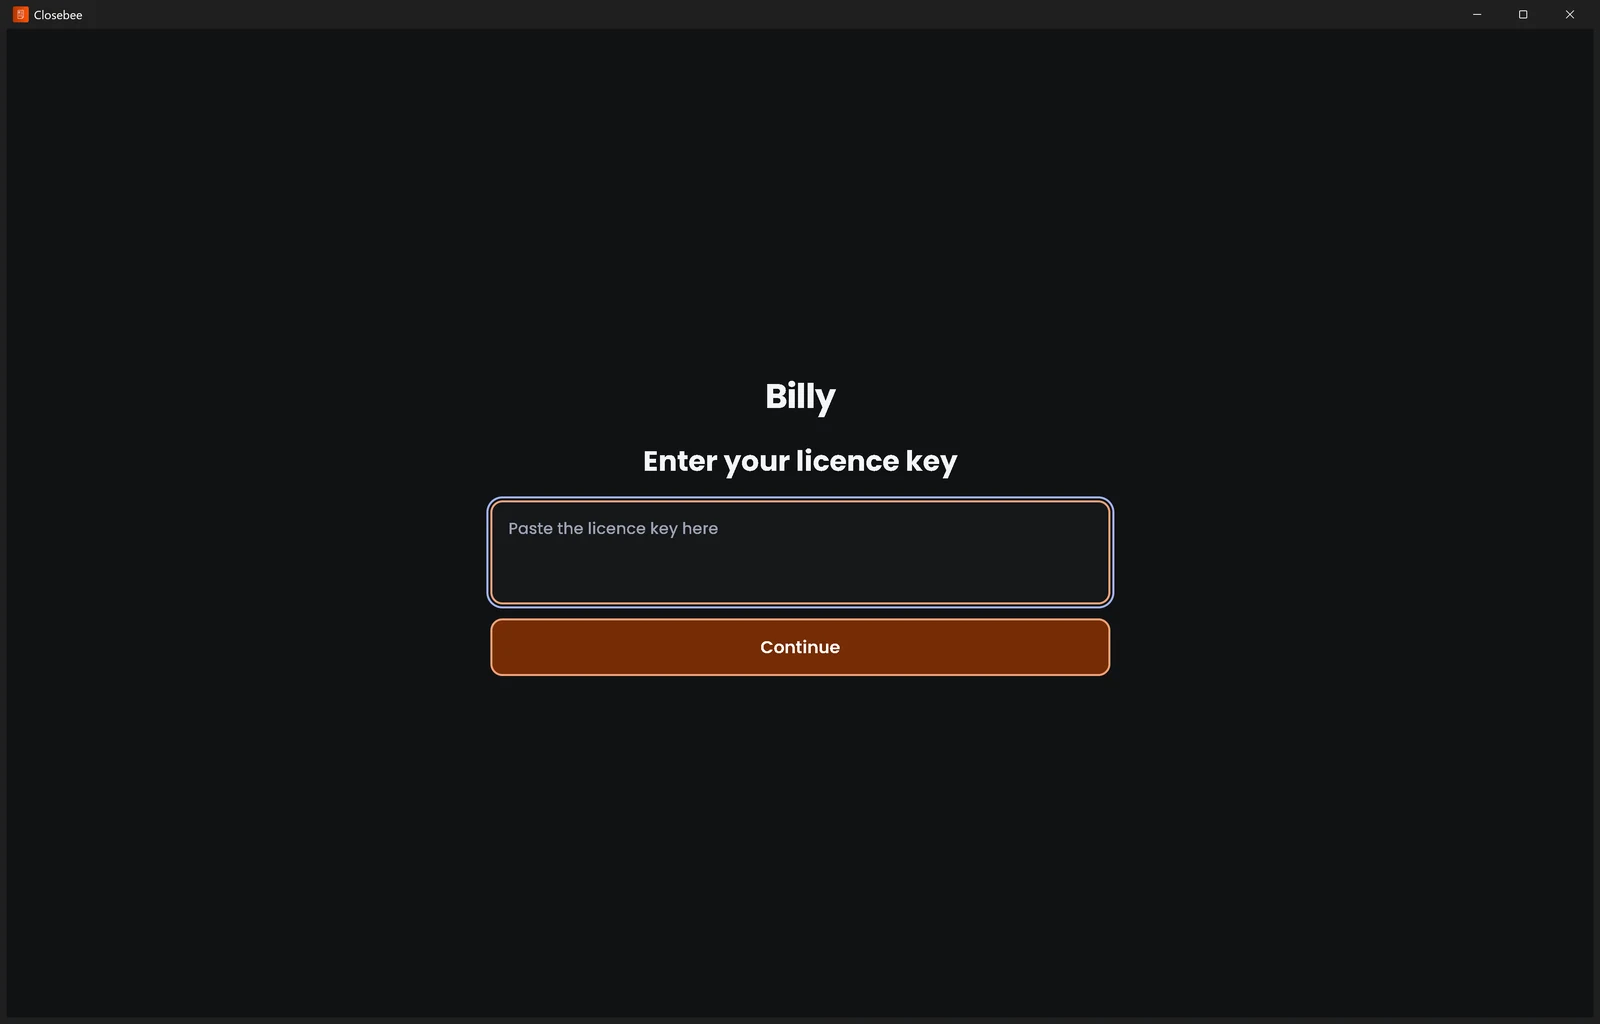
The first time Billy Desktop opens, it asks for a licence key. In Billy on the web, open Connect › Admin and press Copy on the Admin row.
-
2Paste and continue
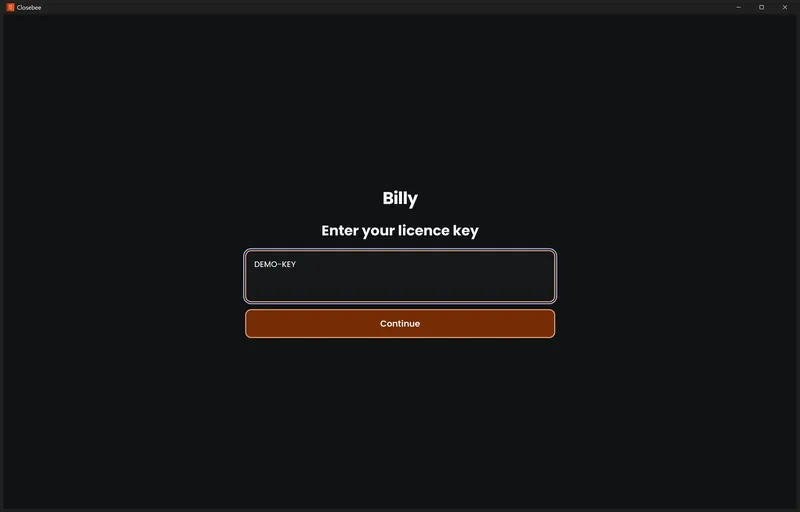
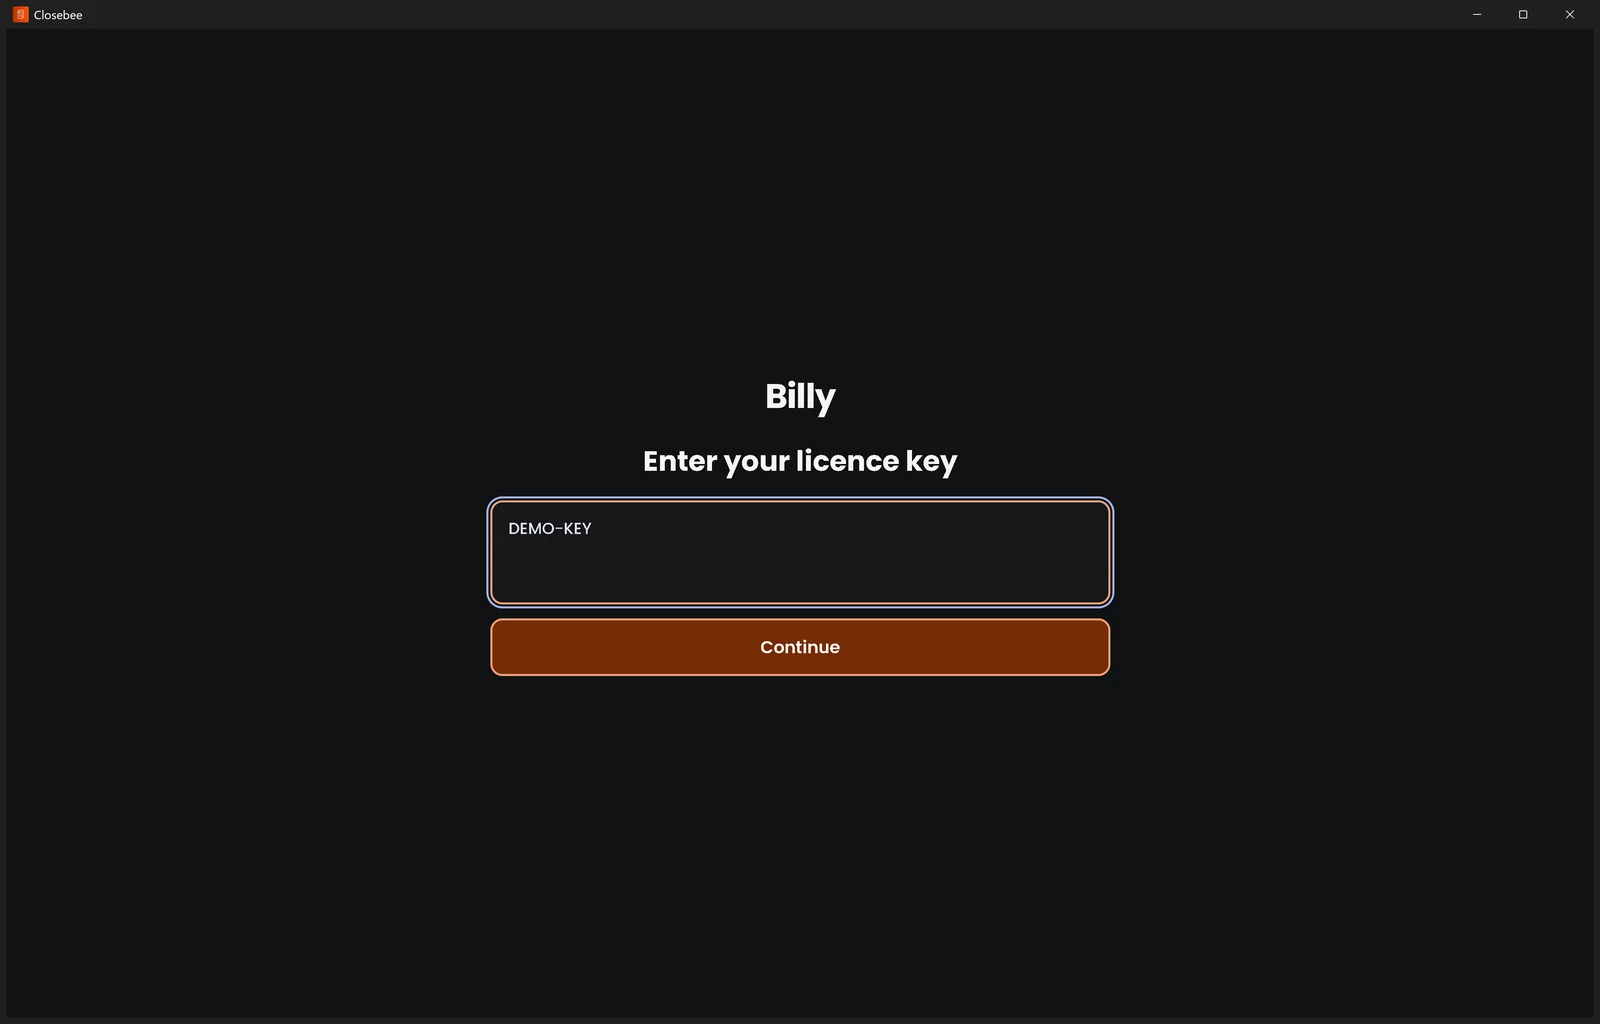
Paste the key with Ctrl+V and press Continue. If Billy says the key is wrong, copy it again from Connect › Admin.
D3Desktop POS and shortcuts
Fast billing from the keyboard.
-
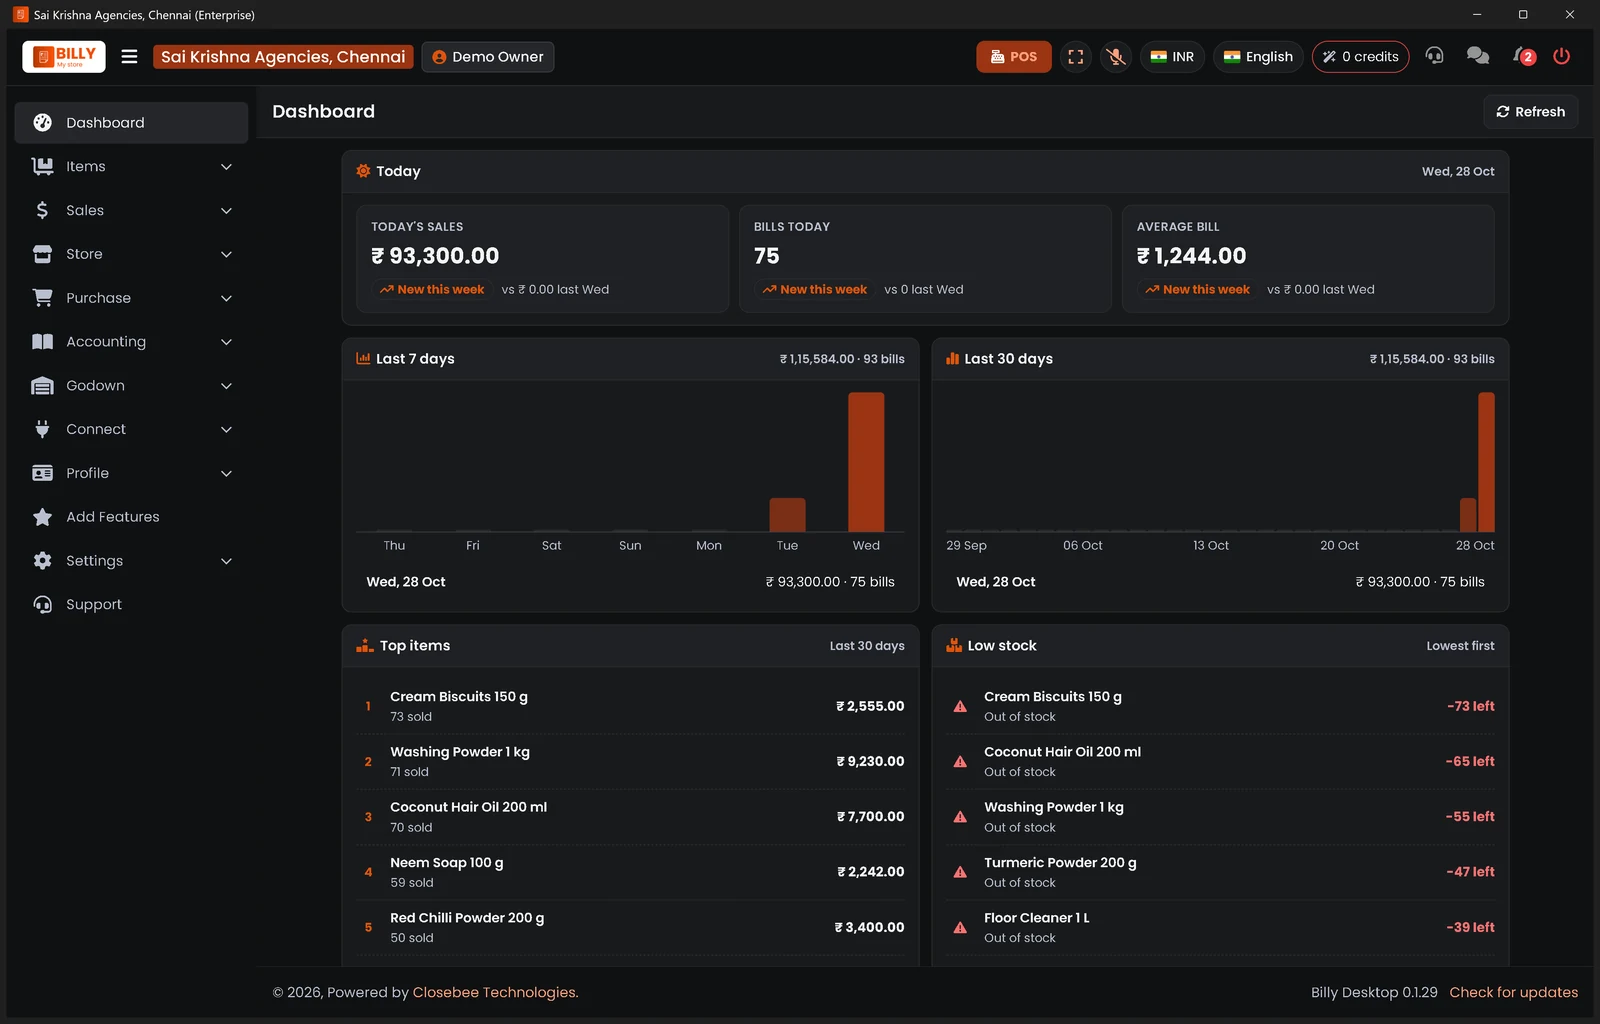
1Your shop in its own window
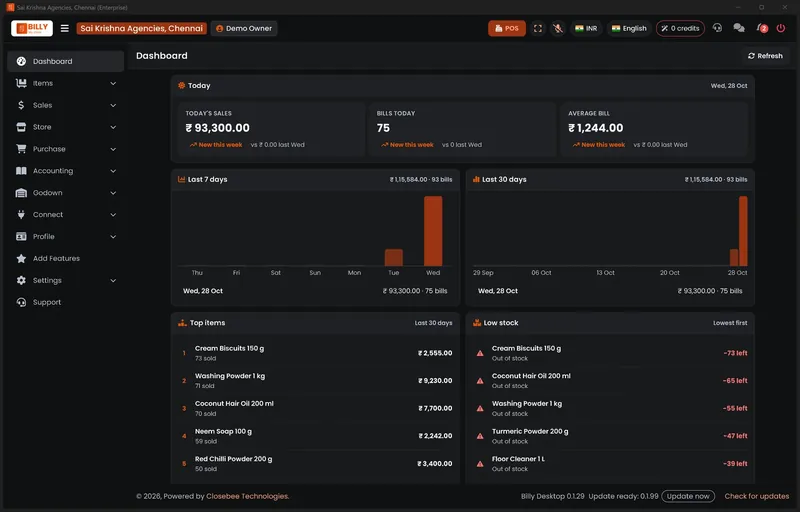
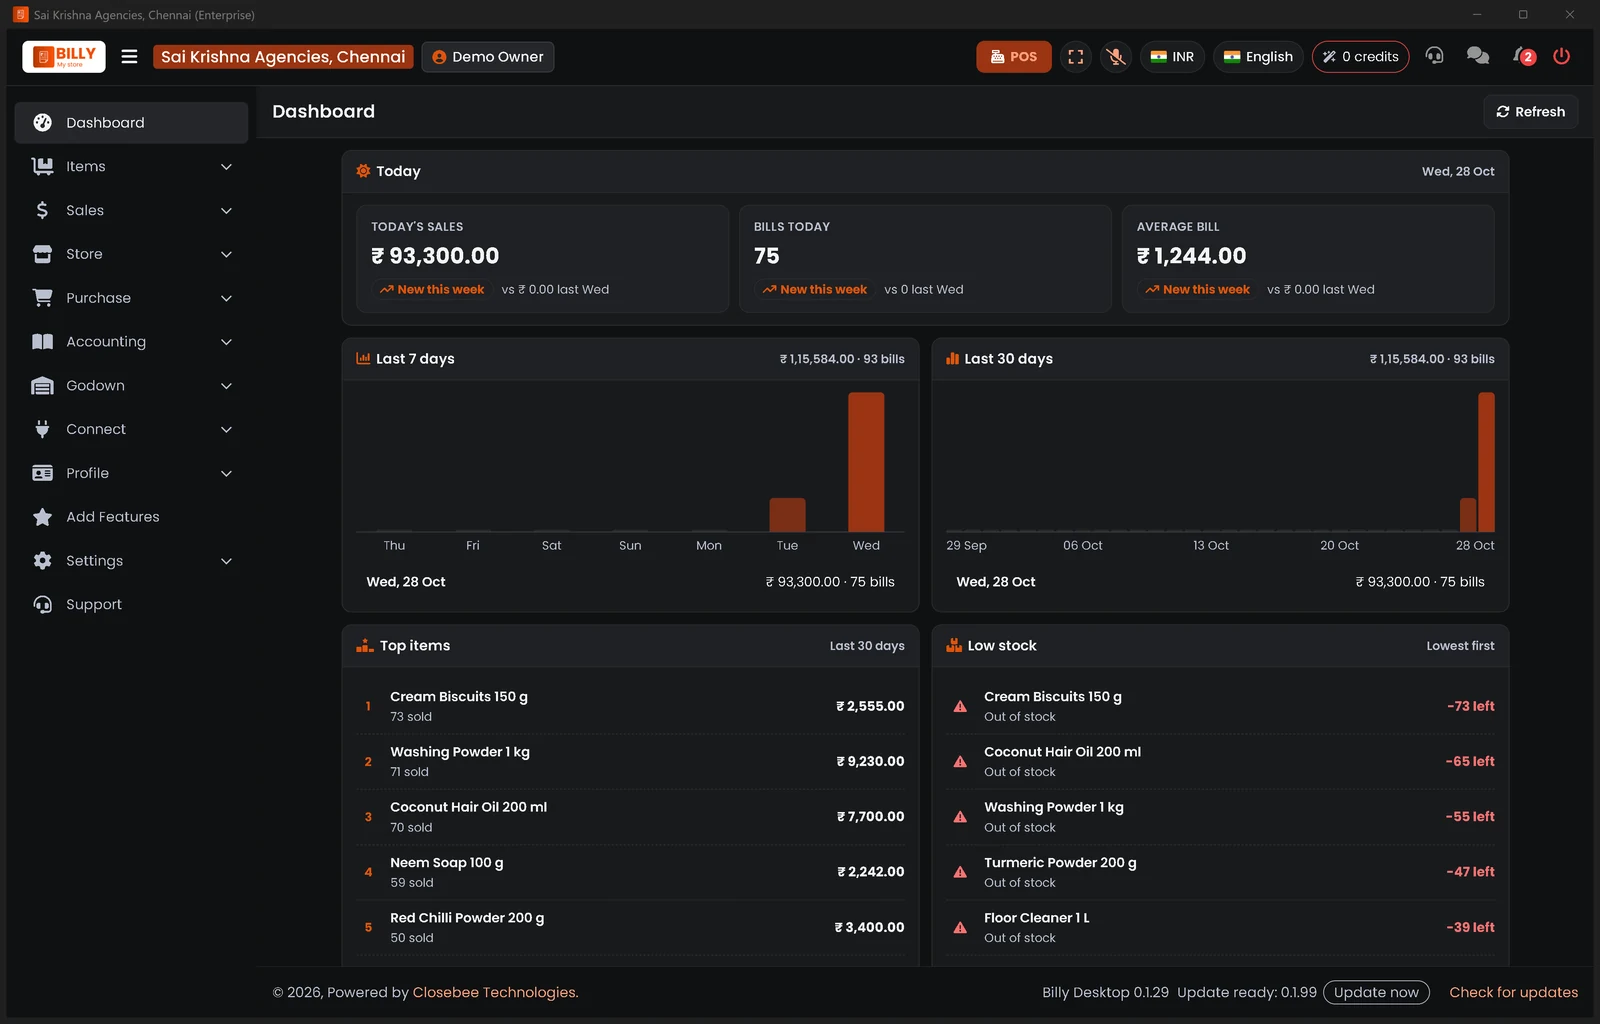
Billy opens on the Dashboard with today's sales, bills and average bill. Press the orange POS button at the top to start billing.
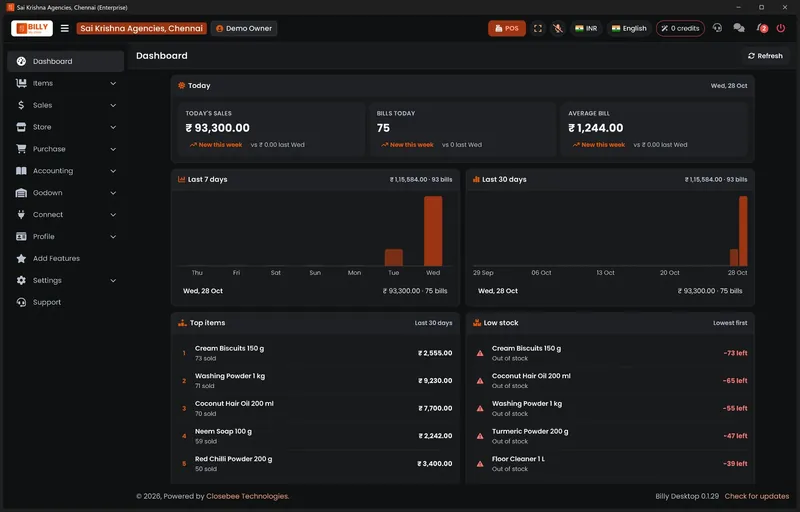
-
2The header buttons
Along the top: POS, Full screen, voice, currency, language, credits, support, messages, notifications and the red Log out button.

-
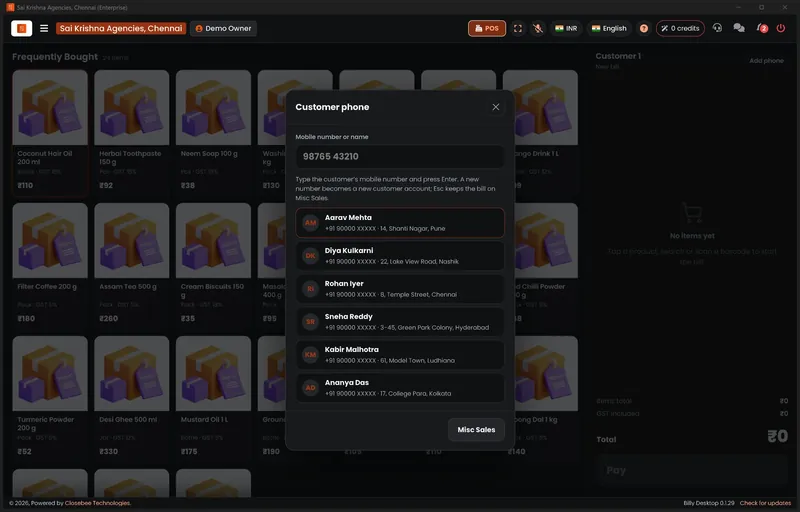
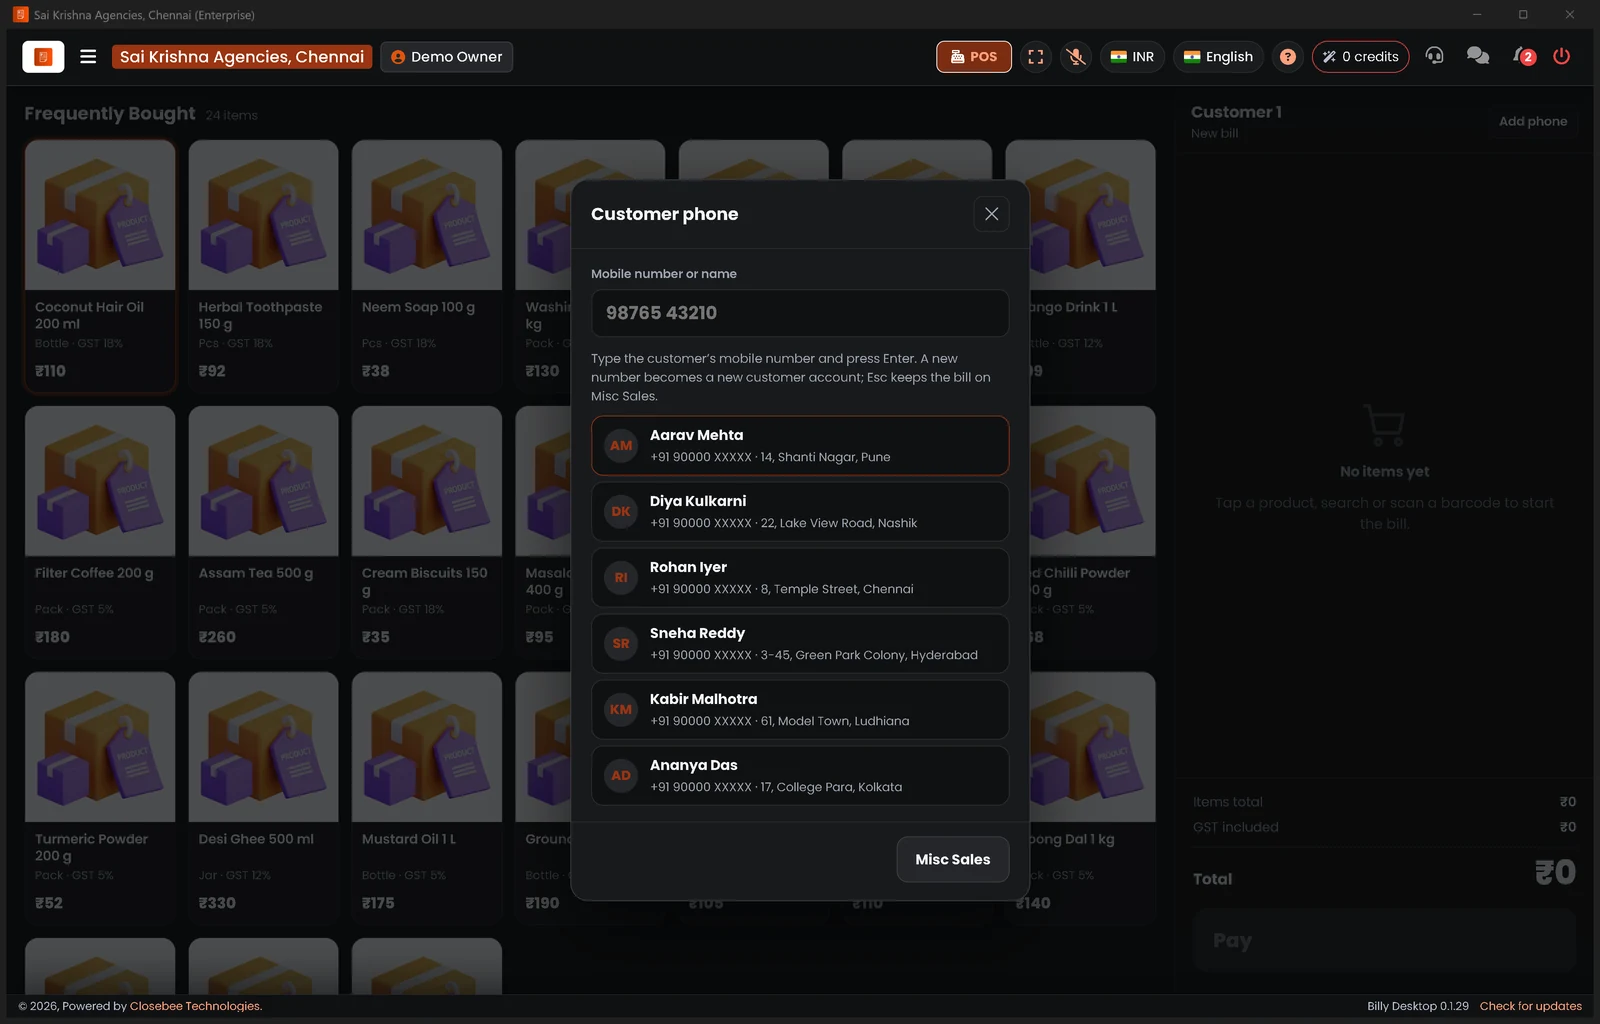
3Start with the customer
Type the customer's mobile number or name and press Enter, or pick a saved customer. A new number makes a new customer. Press Esc or Misc Sales to bill without one.
-
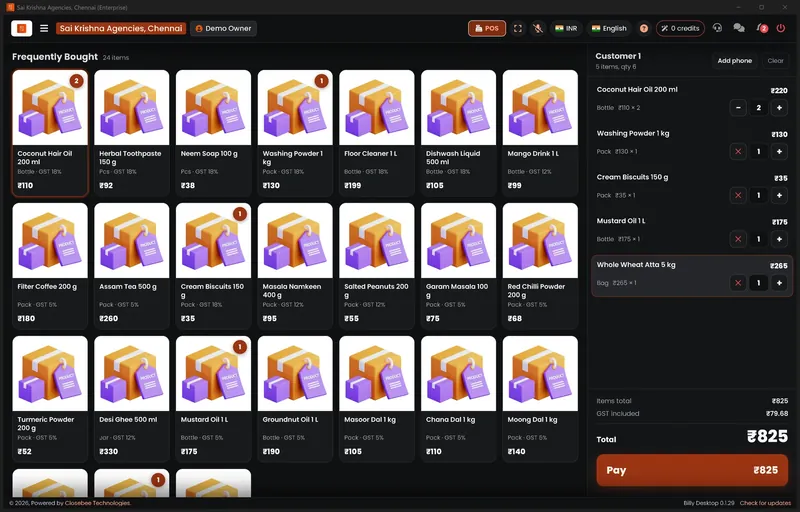
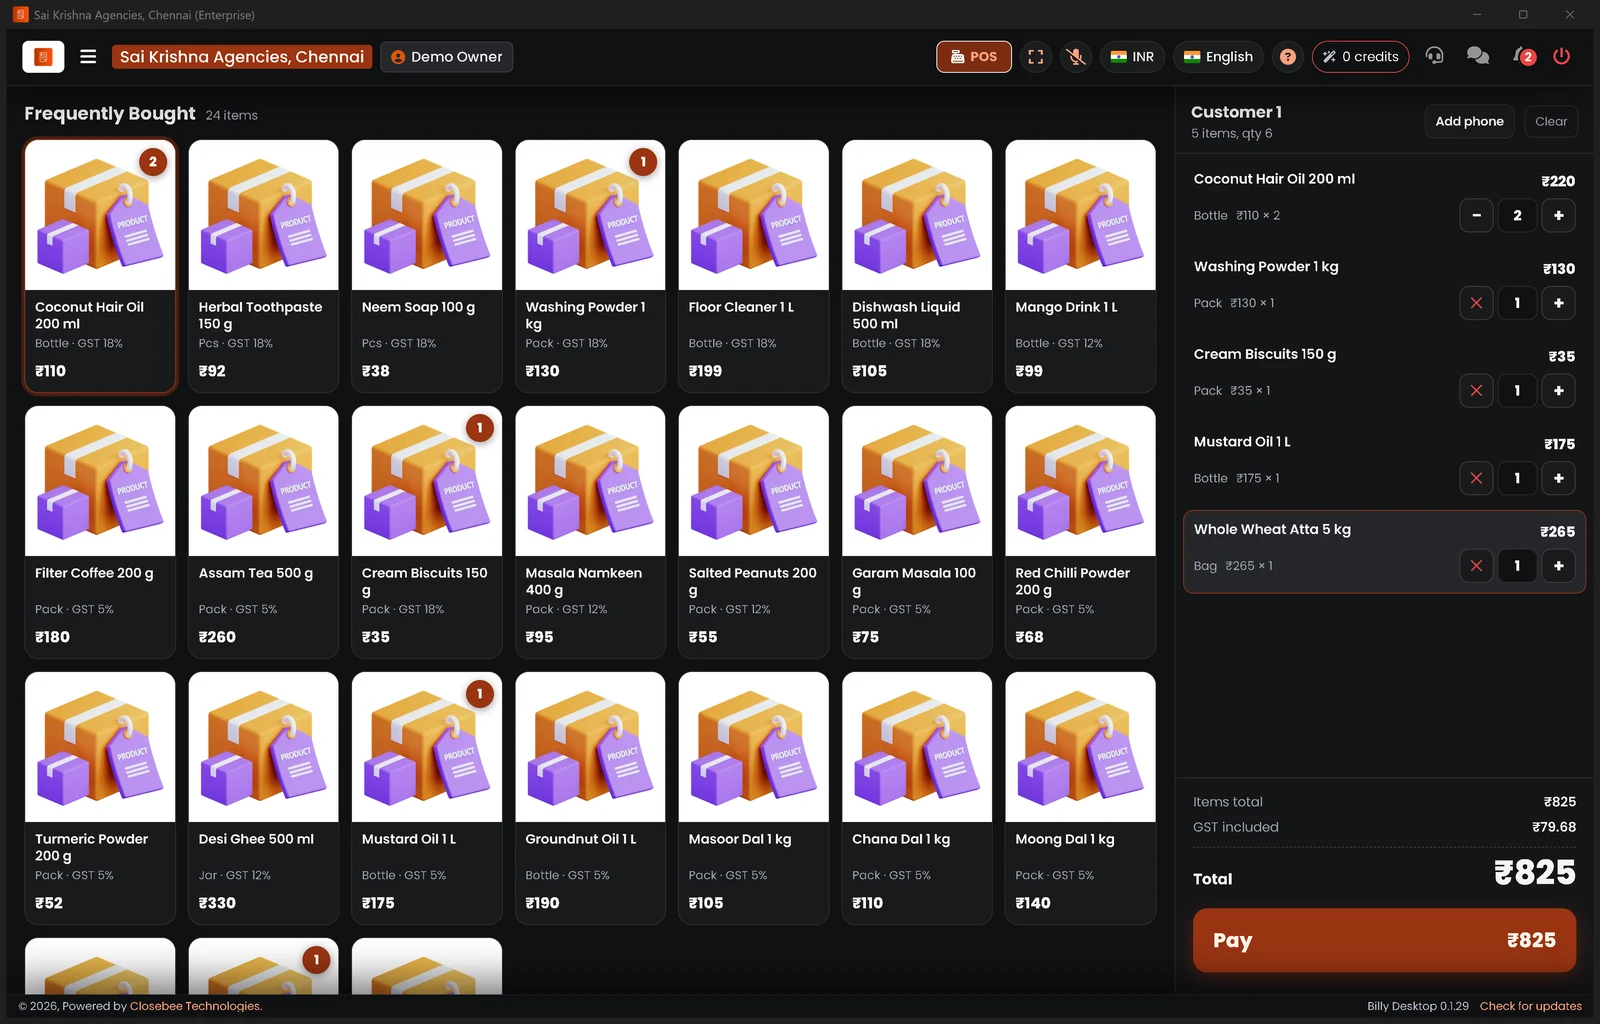
4Add items
Tap a tile, or move with the keys and press Space. Use + and - to change quantity, or the red cross to remove a line. Press Pay or F9 when done.
-
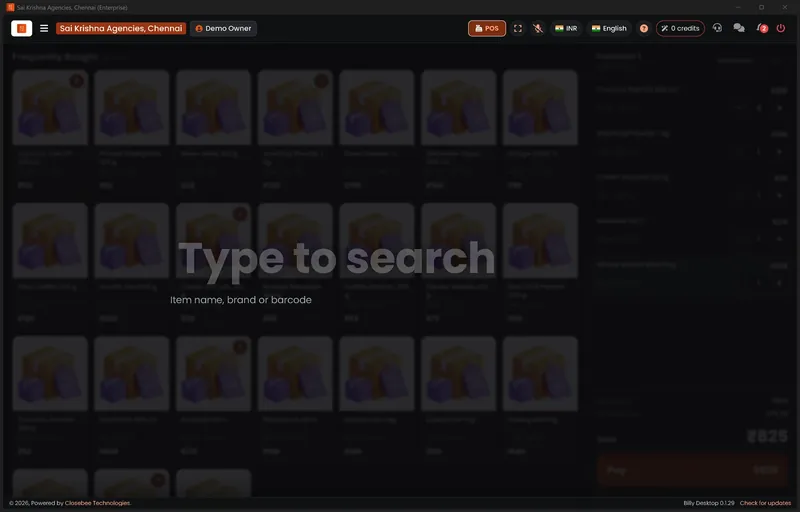
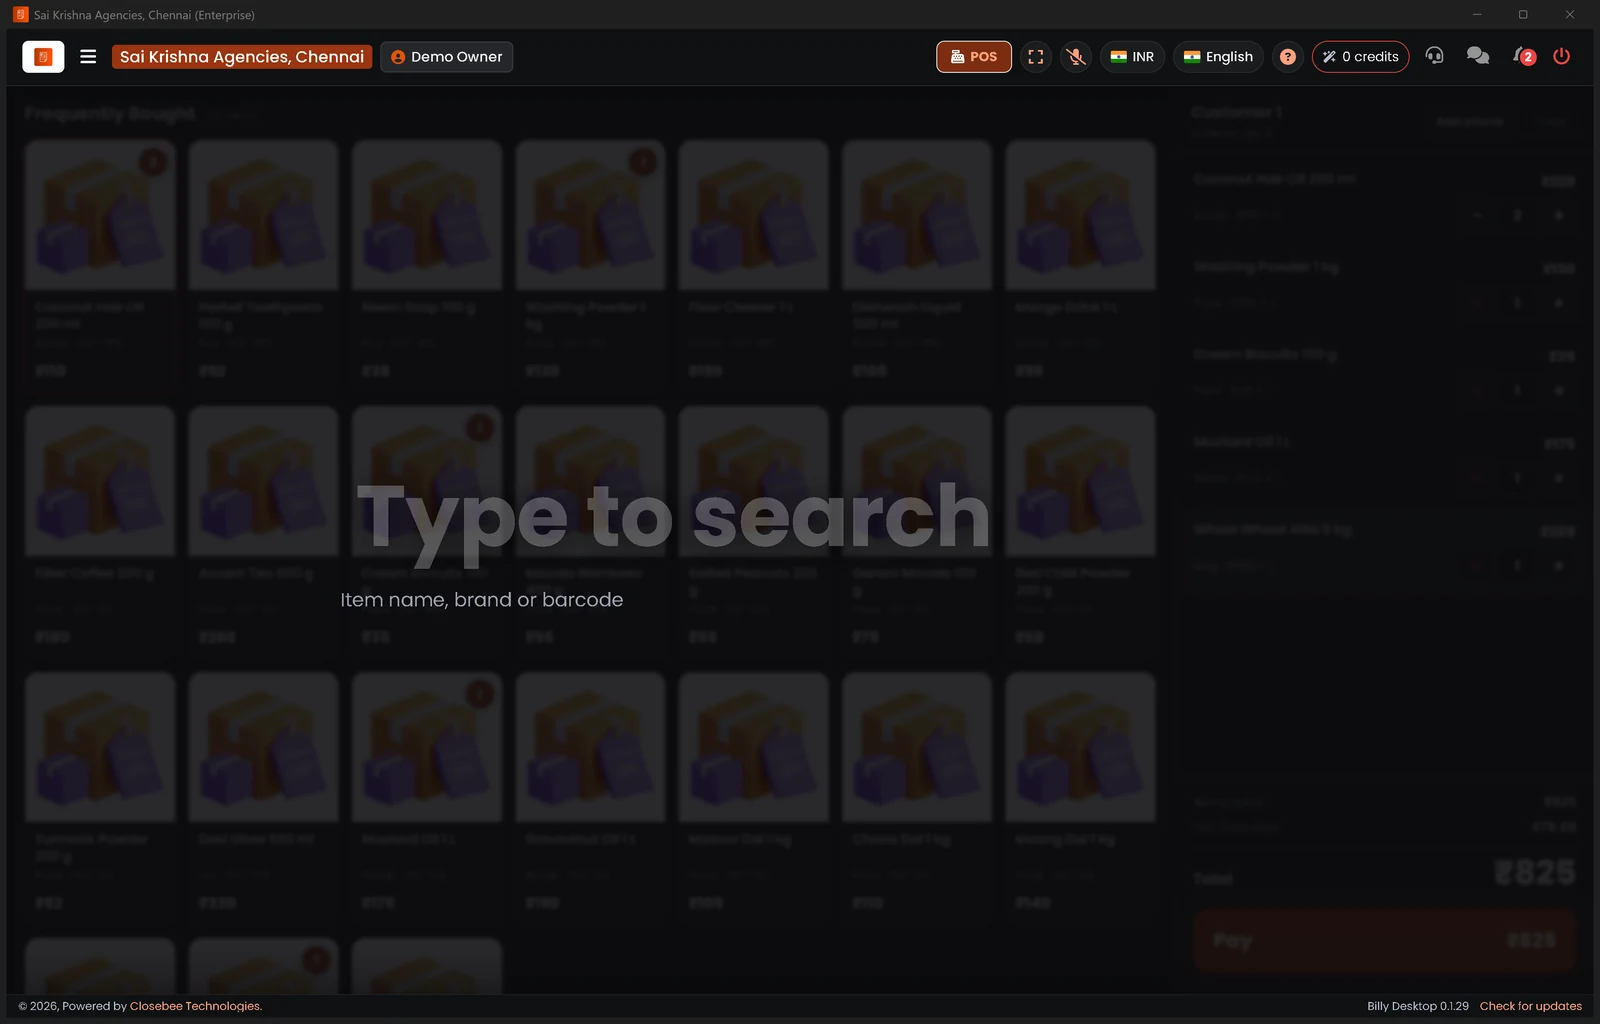
5Search or scan
Press F2, press Shift twice, or just start typing to search. Type a name or brand, or scan a barcode. Esc closes the search.
-
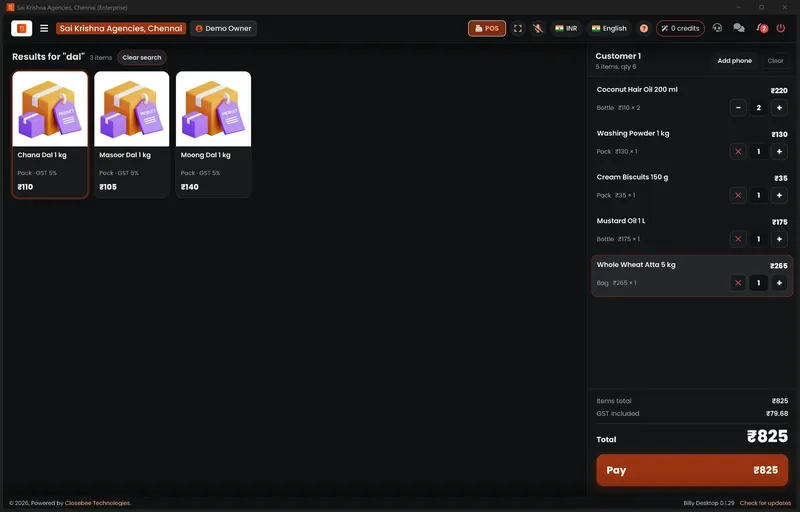
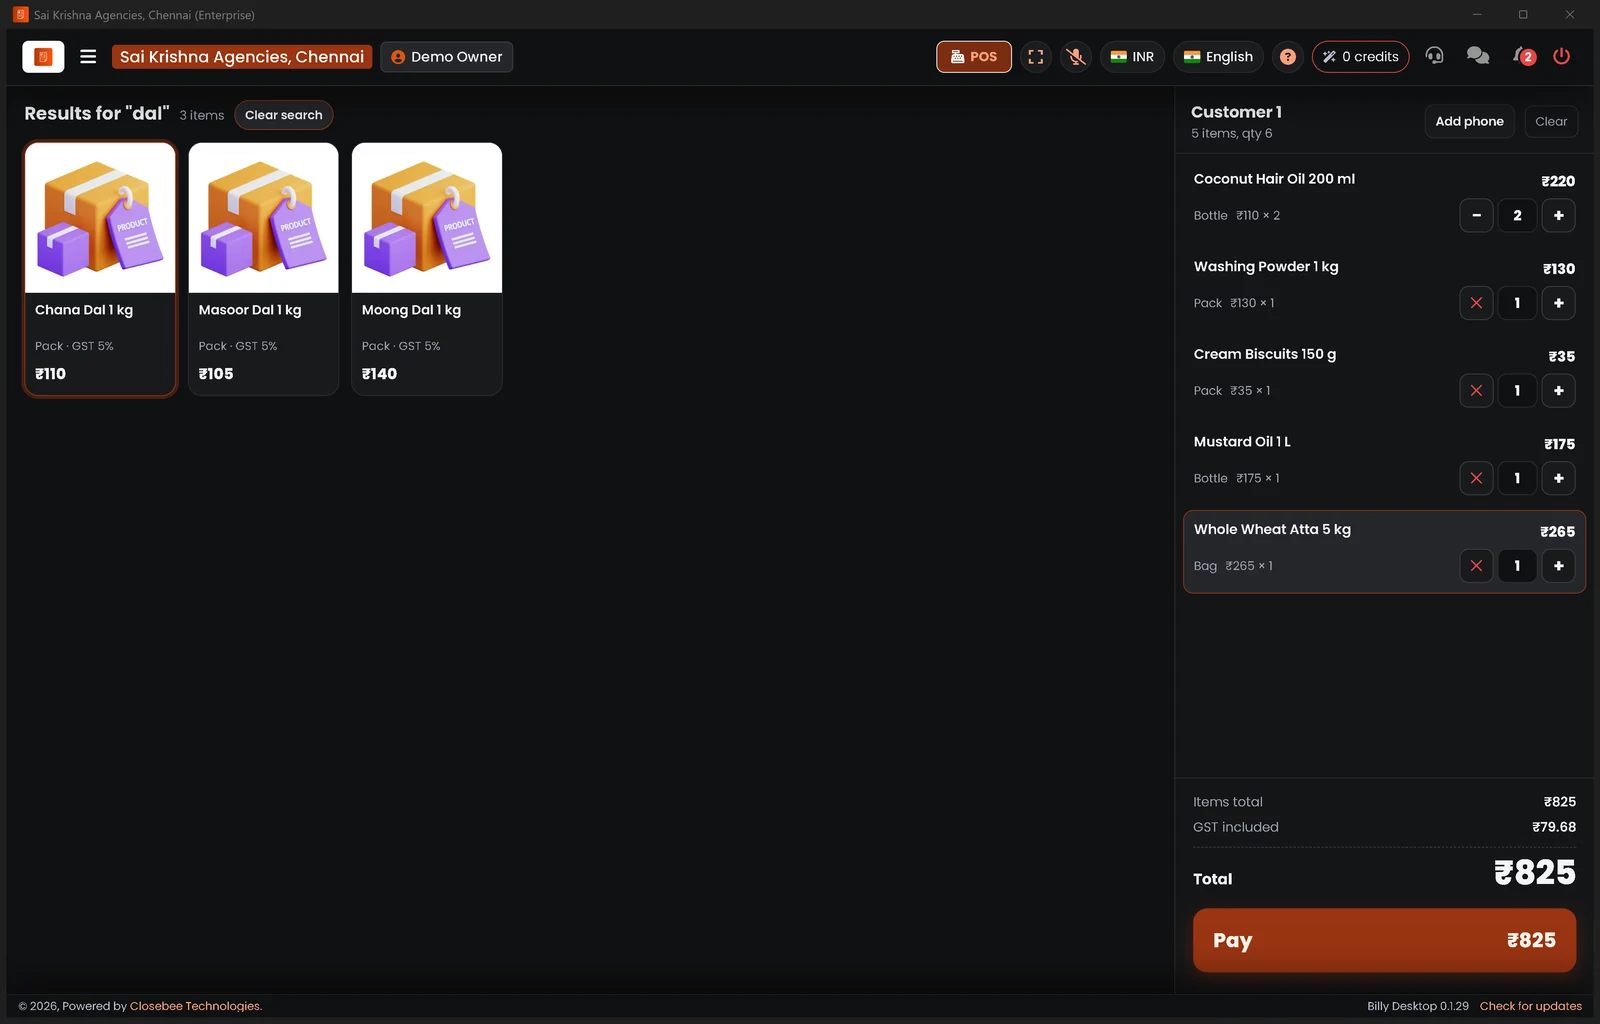
6Pick a match
Only matching items stay on screen. Press Enter or tap a tile to add it. Clear search, or Esc twice, brings back all items.
-
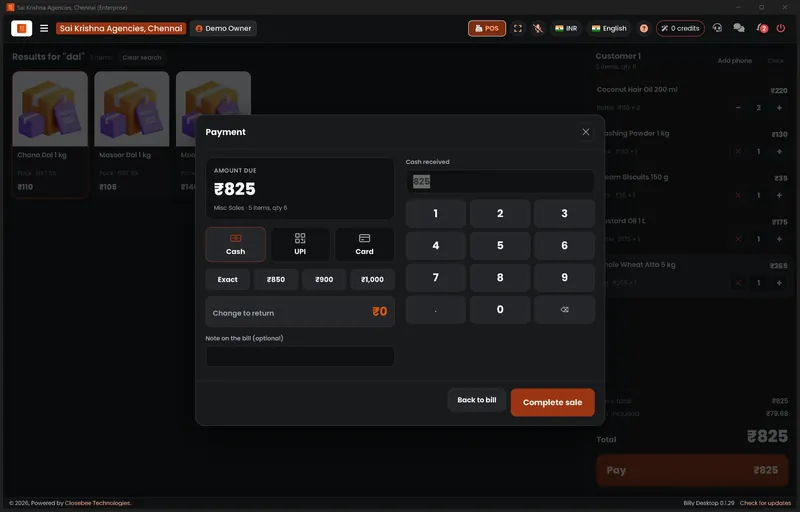
7Take payment
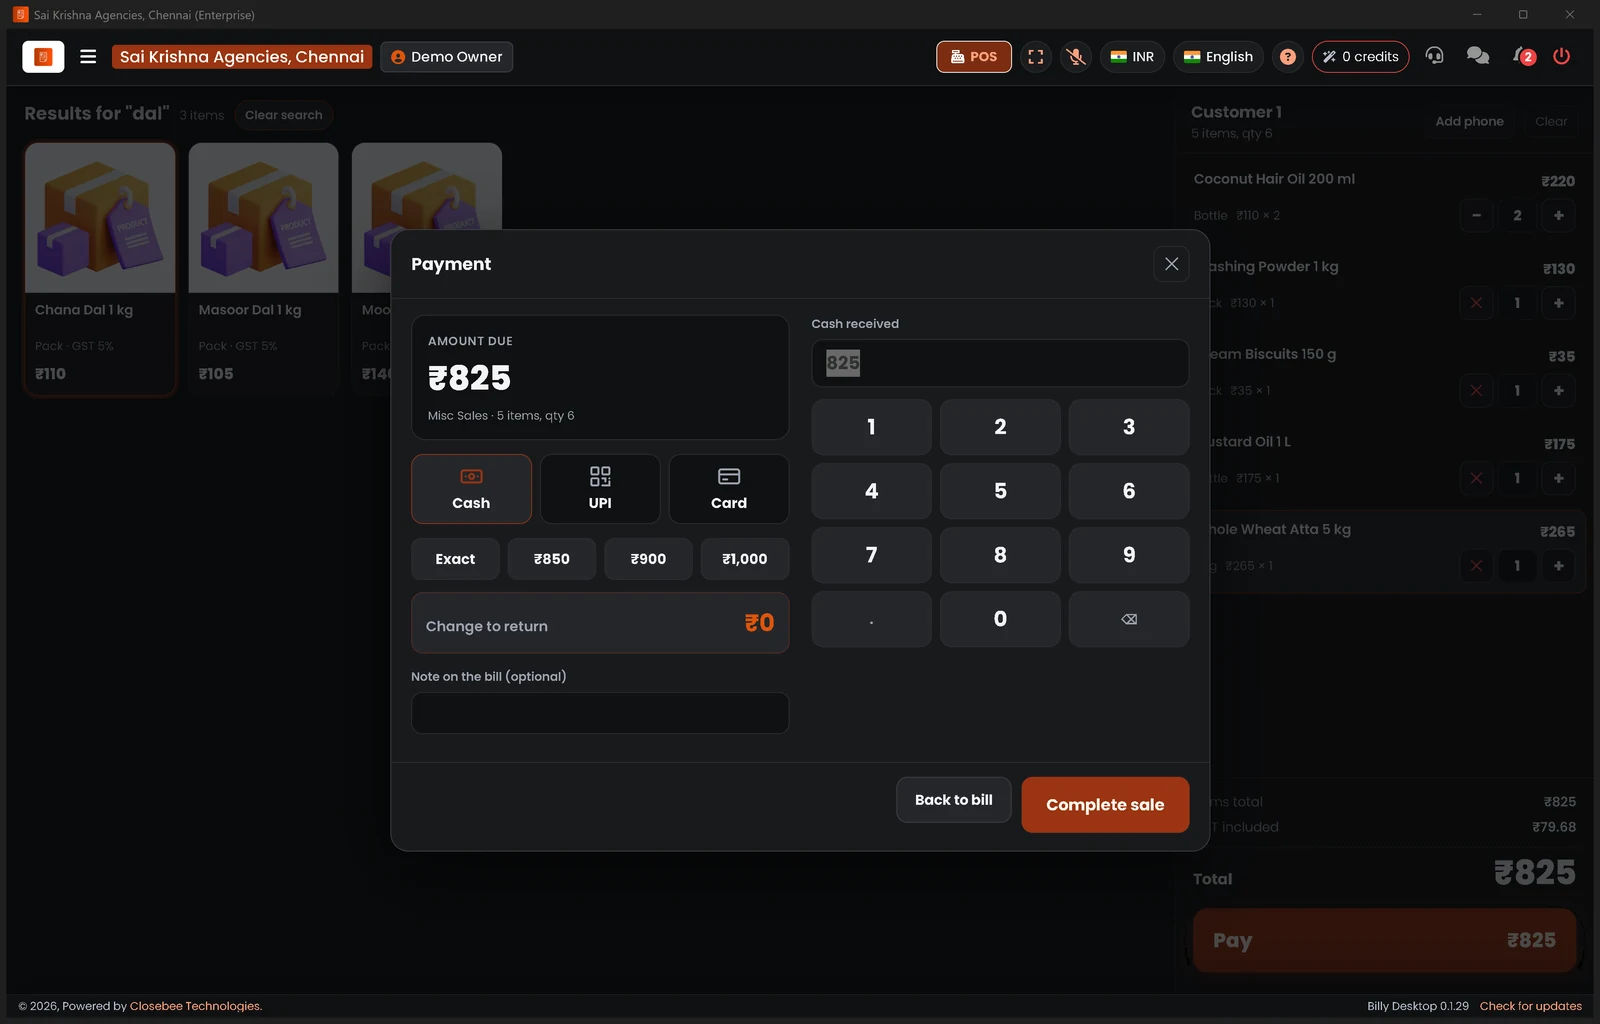
Press Pay or F9, choose Cash, UPI or Card, and enter or tap the amount received. Billy shows the change. Press Complete sale (Enter), or Back to bill.
-
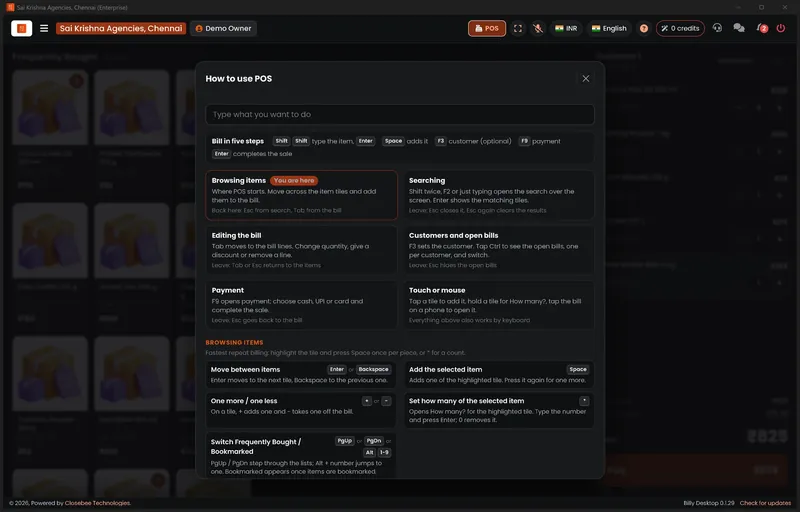
8Keyboard shortcuts
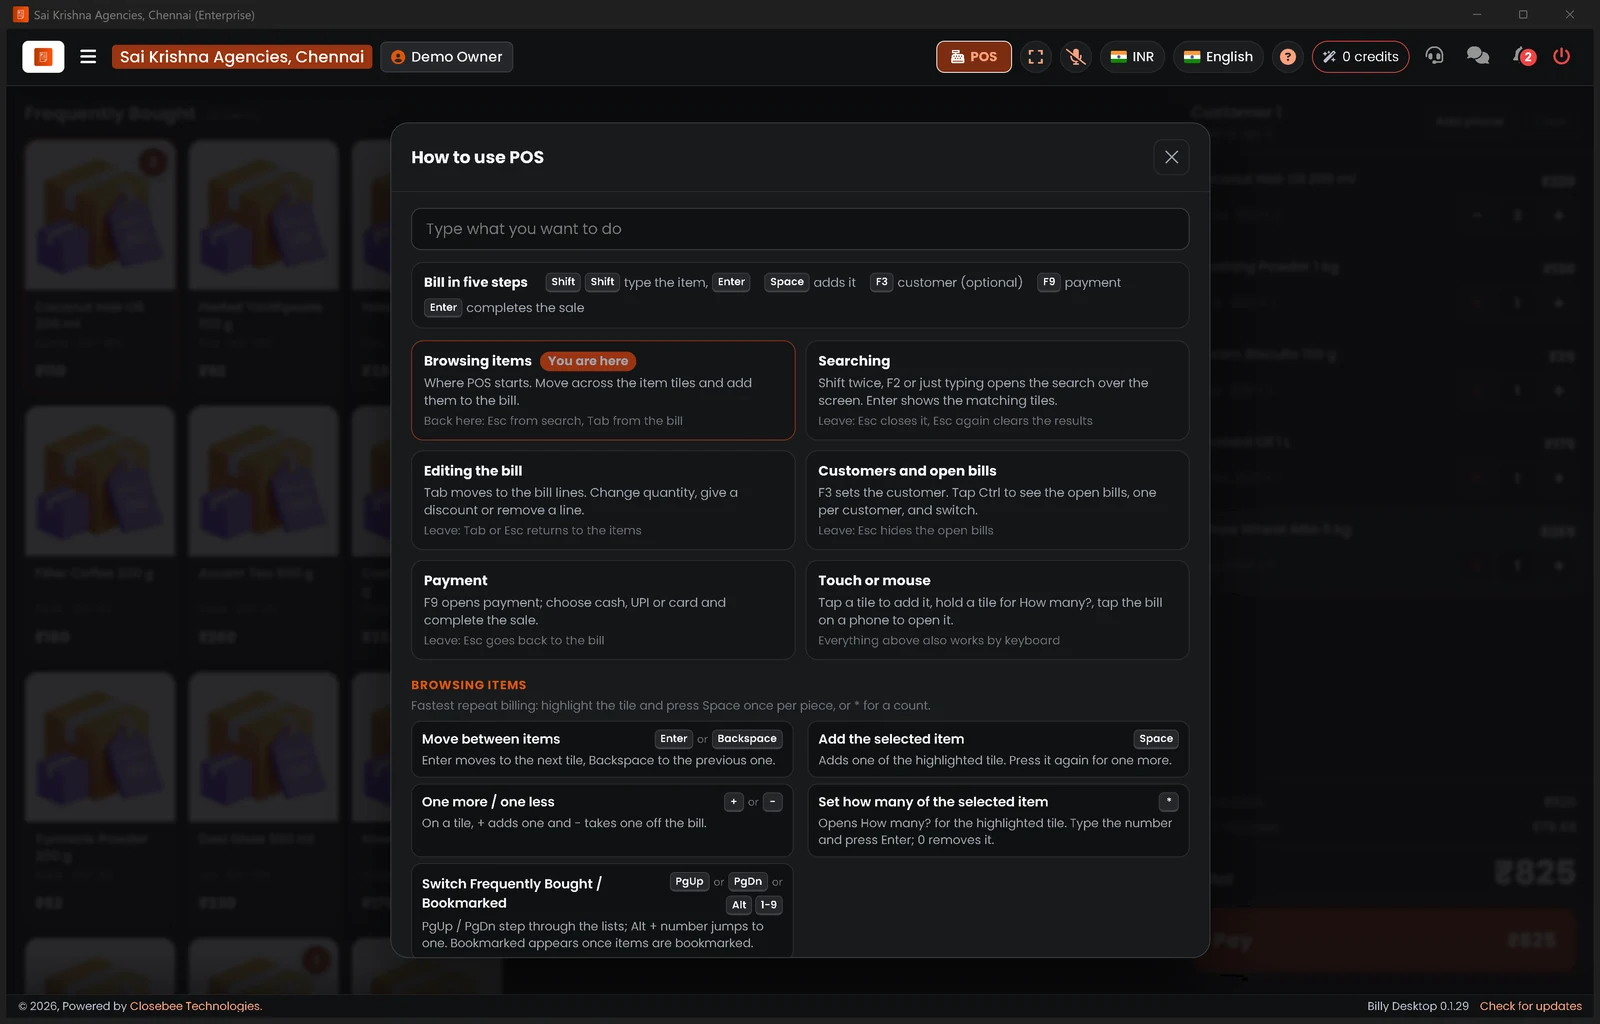
Press ? at the top of the POS to see every shortcut: F2 or Shift twice to search, Space to add, F3 for the customer, F9 to pay, Enter to finish. Type in the box to find one.

D4Voice billing
In Billy Desktop Full.
-
1Turn on voice
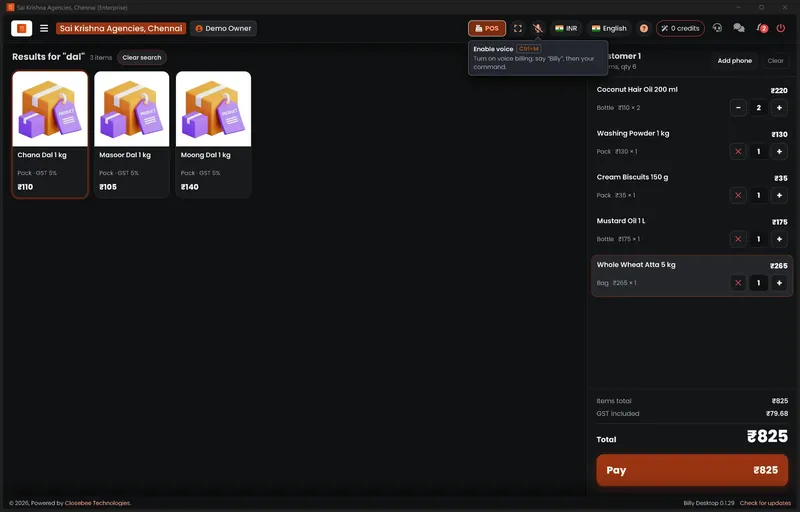
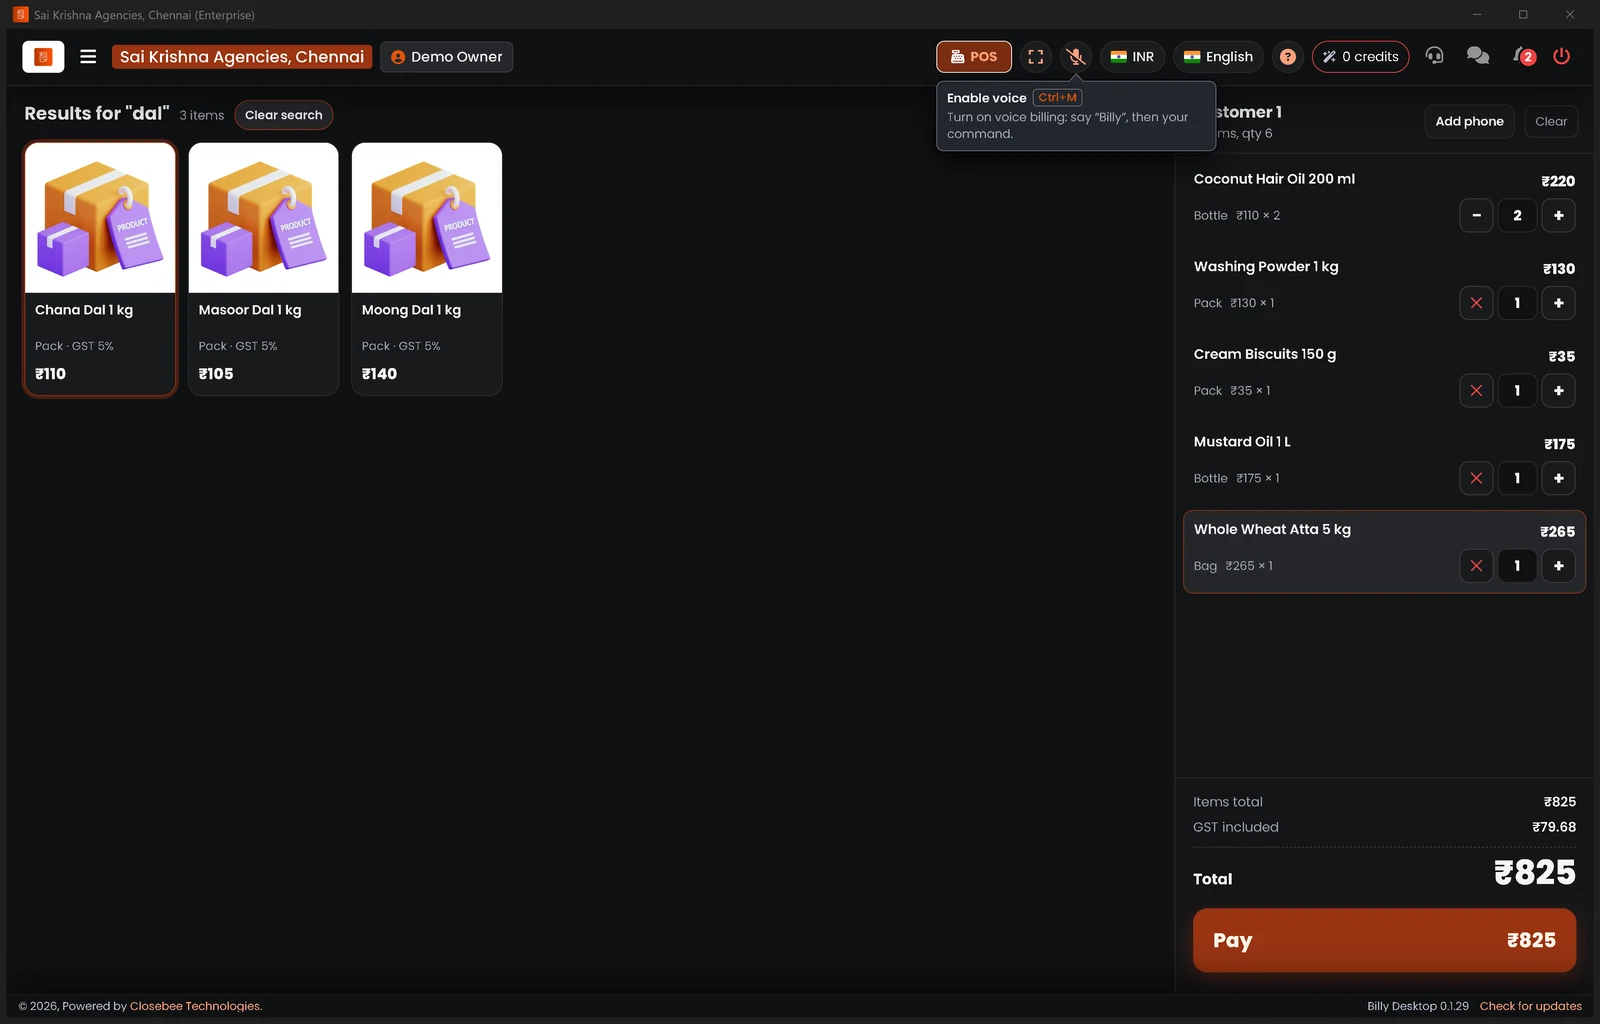
Press the microphone button at the top, or Ctrl+M. Then say "Billy" and your command, for example "Billy, two Parle G". Press the button again to turn voice off.
D5Printer and scanner
Set up once in Settings.
-
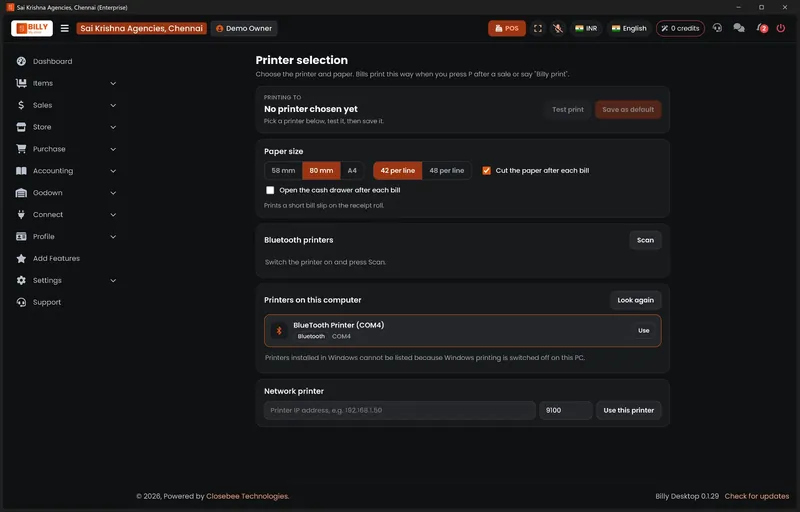
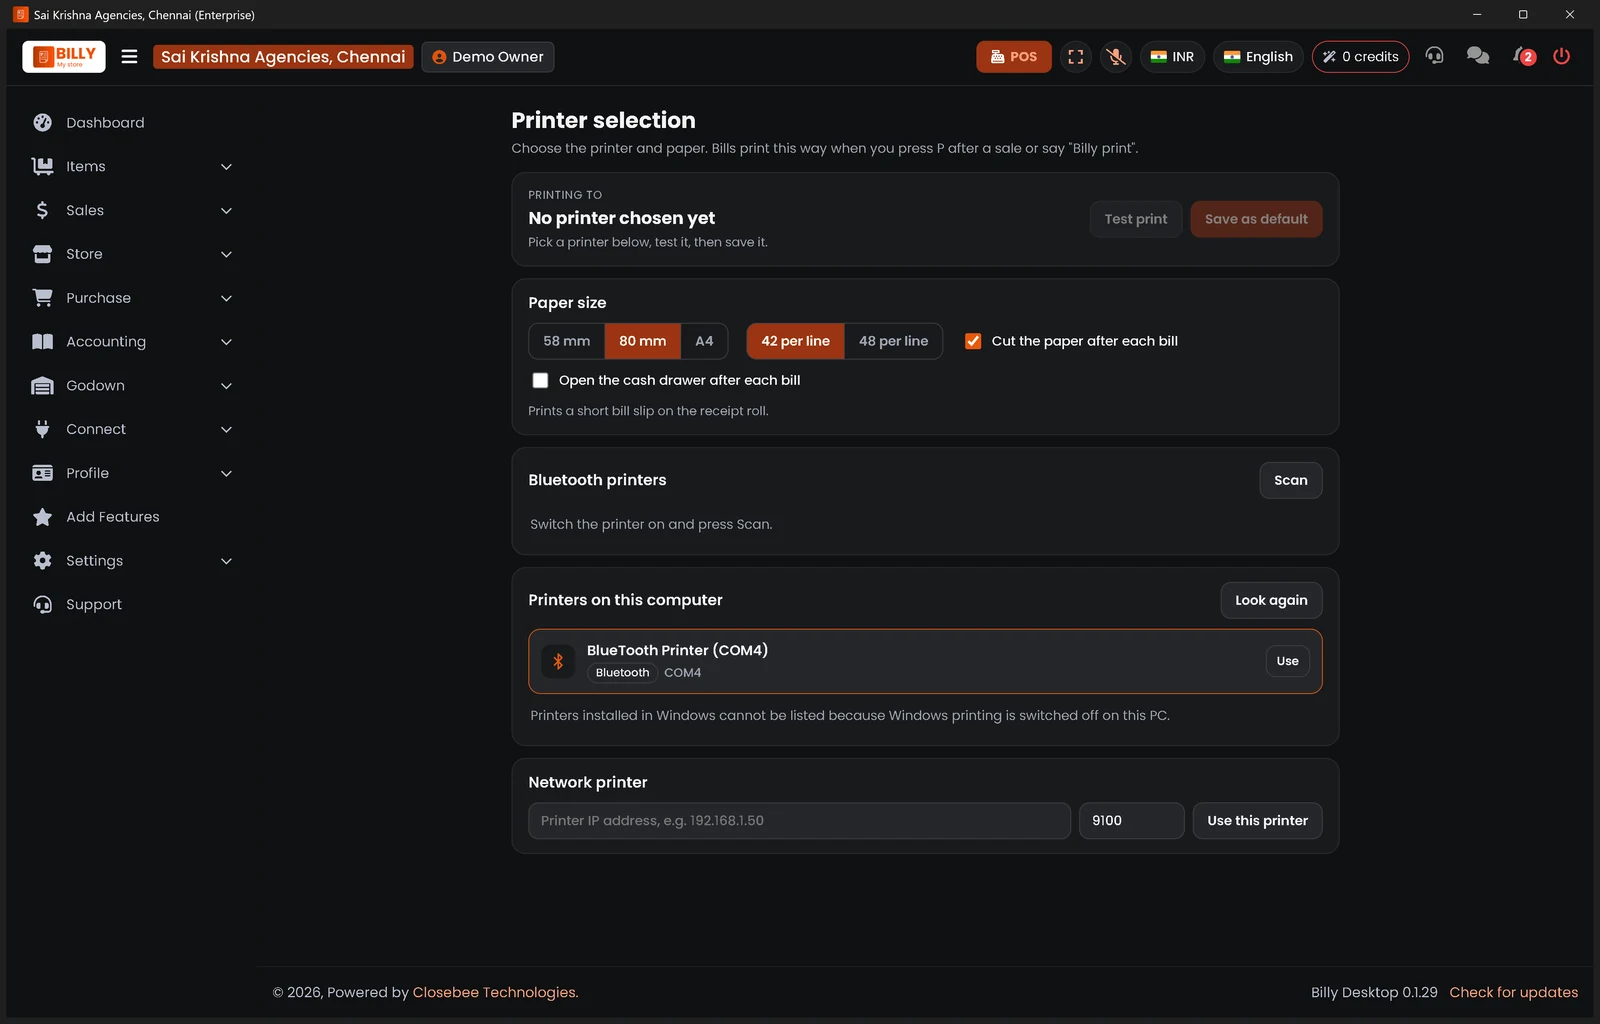
1Receipt printer
Open Settings › Printer. Pick the paper size and whether to cut the paper or open the cash drawer. Press Use next to your printer, or Scan for a Bluetooth one, then Test print and Save as default.
-
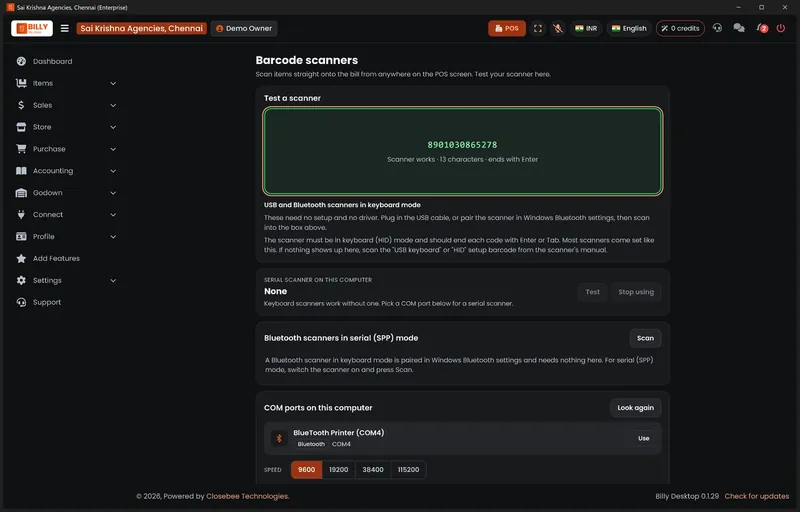
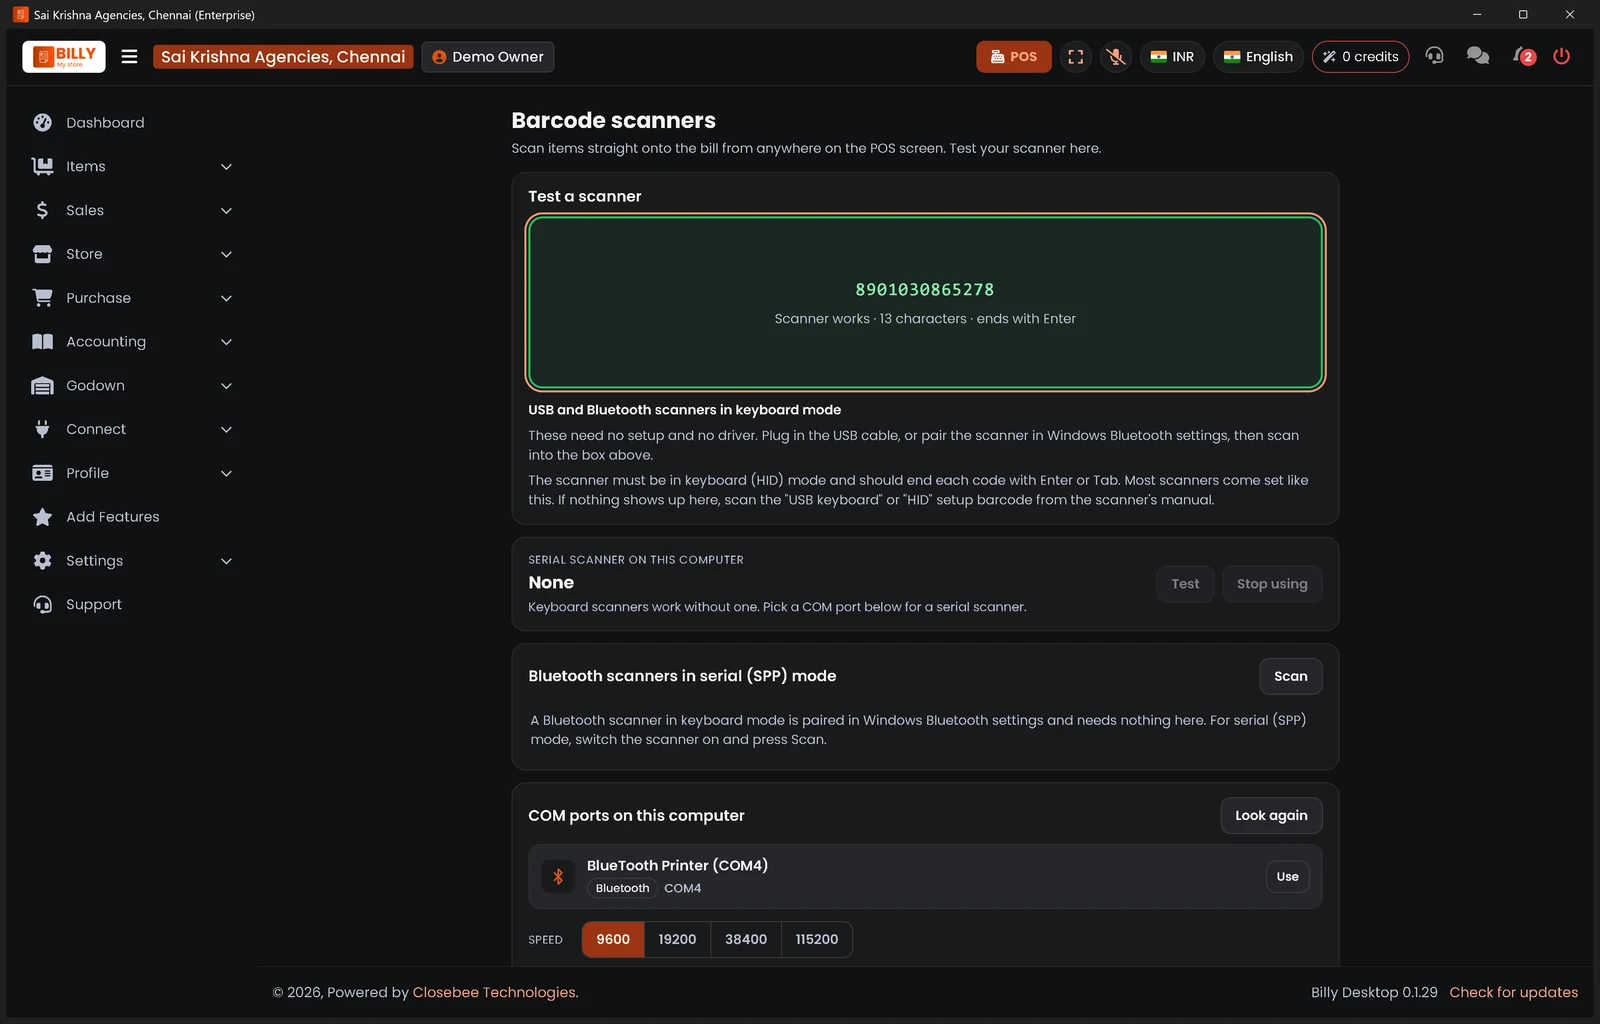
2Barcode scanner
Open Settings › Scanner and scan any barcode. A green box saying the scanner works means the POS will take scans. For a serial or Bluetooth SPP scanner, pick its COM port and press Test.
D6Updates
Billy Desktop keeps itself up to date.
-
1Your version
The bottom right of every screen shows your Billy Desktop version. Press Check for updates to look now.

-
2Checking
The link changes to Checking… while Billy looks. You can keep billing.

-
3Update ready
Update ready means the new version has downloaded. Press Update now when the counter is free. The version shown is an example.

-
4Update when it suits you
The chip waits in the footer while you work. Press Update now between customers.
-
5The update prompt
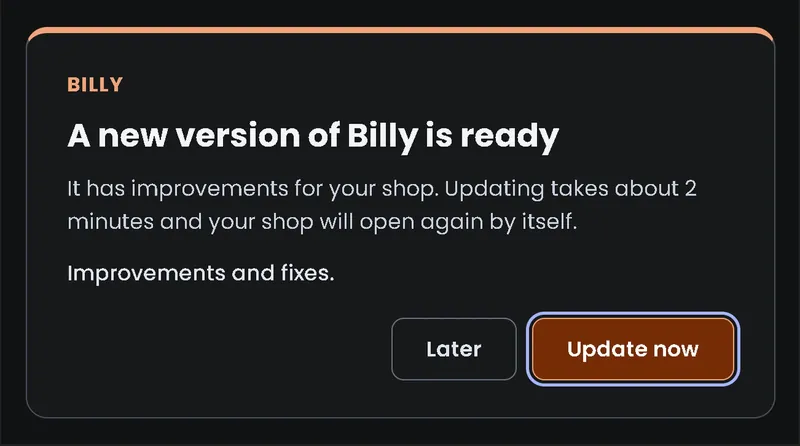
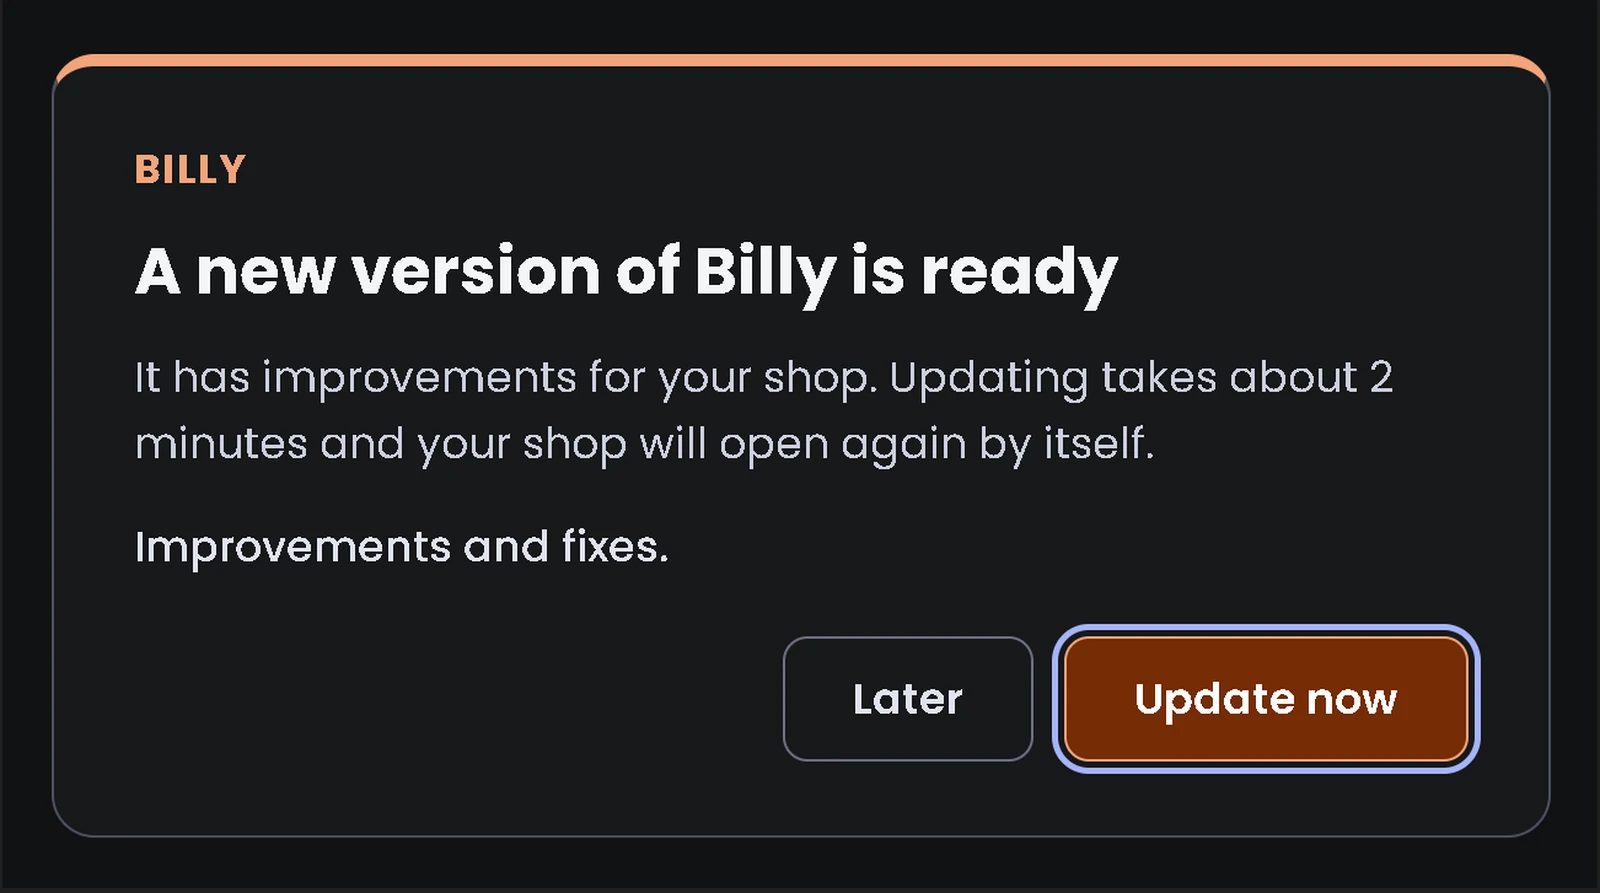
Billy may also ask: press Update now (about 2 minutes, then your shop opens again by itself) or Later to update from the footer chip.



D7Sign out
Leave this PC.
-
1Log out
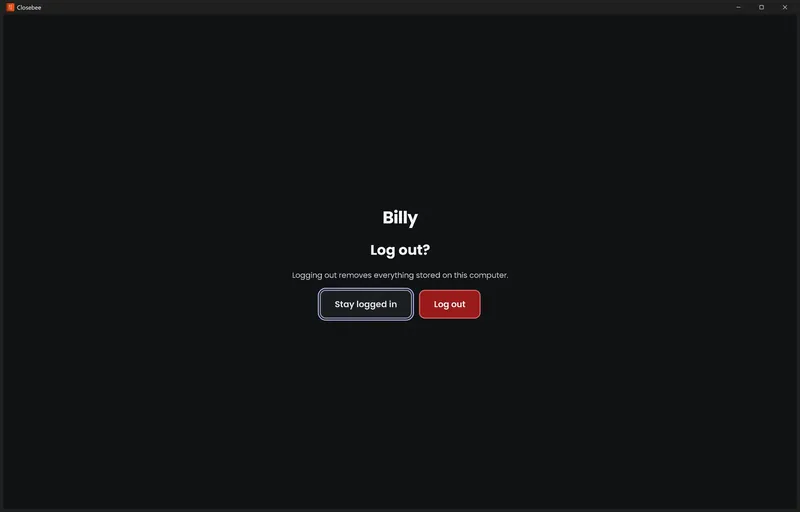
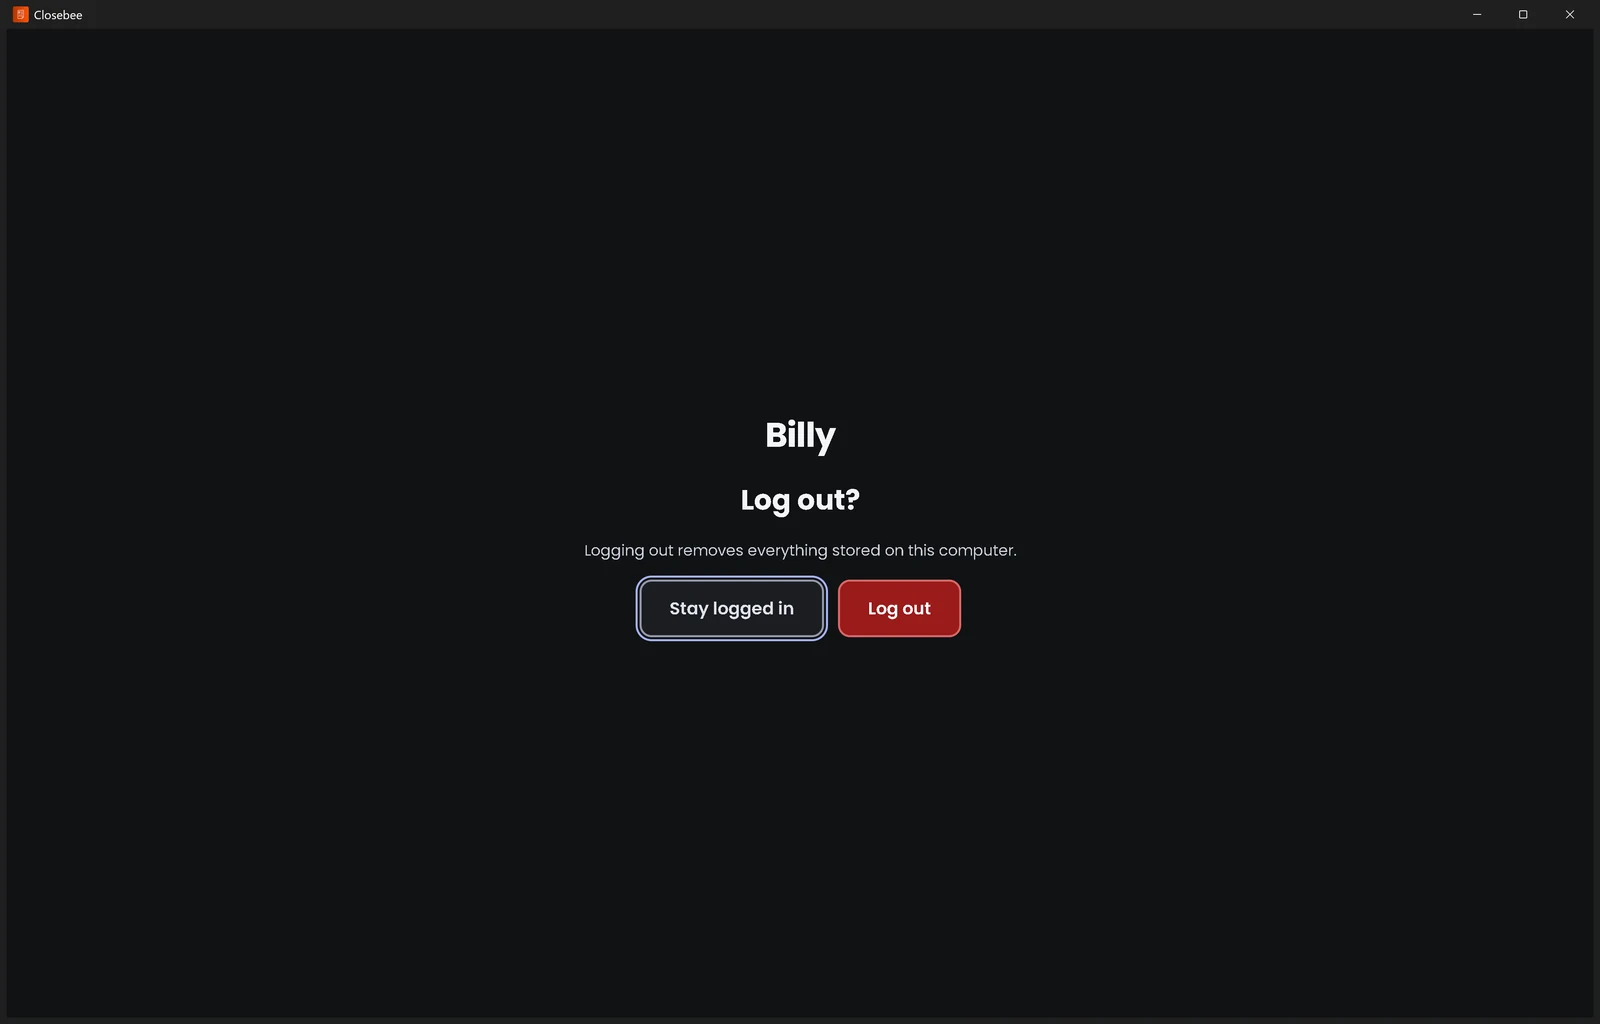
Press the red power button at the top right. Billy asks first, because logging out removes everything stored on this computer. Press Stay logged in to cancel.